Ever since our first Battenburg piece , we’ve fallen in love with this new lace technique. The cotton thread allows more interesting freestanding details and even a softer feel. Perfect, we thought, for a new choker design as part of our Halloween in July celebrations. Everyone loves a little gothic glam now and then.
Supplies
So, if you want to dress up your new Battenburg choker a little more than it already is, you’ll need:
- Your already stitched Battenburg lace choker design
- Chains (mine come with a clasp closure, if yours doesn’t you’ll need one of those)
- Jump rings
- Needle nose pliers and cutter
- Charm or cameo
- Dangling charm - optional
- Hot glue
Designs Used
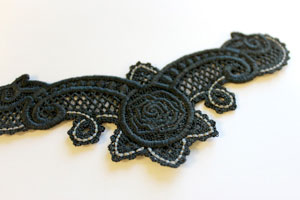
To stitch out this piece, just follow our standard Battenburg lace tutorial, and you should end up with a pretty choker piece that looks just like this! Now we can learn how to make it even more stunning, and spook it up a little for a gothic night on the town.
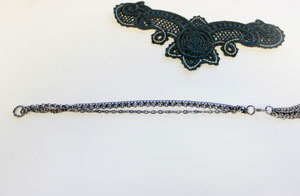
The chain I bought was two chain sections that were connected with a clasp. Each chain section had three chains on it. If you can find chain packages like these, they can save you a lot of time putting all the chains together yourself. All we need to do is modify it a bit to suit our choker.
If you can’t find a chain bundle like this, no worries. You can make it all using jump rings and lengths of regular chain.
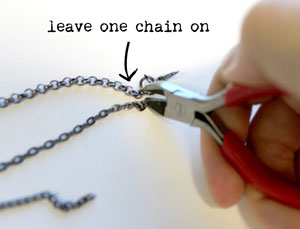
Let’s start with these chain bundles. We’ll want one chain to use as our necklace clasp in the back, the other two we’ll use as decoration for the front.
Cut two of the chains free from the clasp end, leaving one on to fasten your necklace later. Do this with both bundles of chain.
If you’re making your own bundle, attach three chains to a ring, and add a clasp to one of them. Leave the other two as they are.
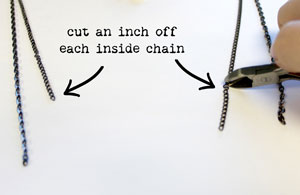
Now, my chain bundles are all the same length. I like a little bit of variation so we have some different dangling length, so I cut an inch of each inside chain so they would hang a bit shorter.
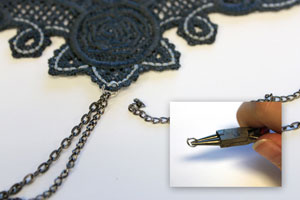
When you have both sides cut to your liking, open up a jump ring with your needle nose pliers and punch it through the bottom of your lace choker.
String on both sides of your chain bundle, so that they all meet on one ring in the middle.
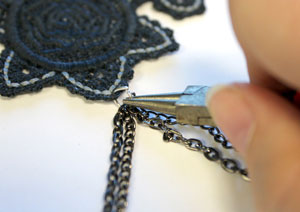
Once all your chain pieces are on the jump ring, close it up again.

Next you’ll want to attach the other ends of each chain to the side of the choker. Remember, on this side, you should have two chains leading down to the center, and on chain off by itself as a necklace clasp.
Attach these pieces on both sides of your choker.
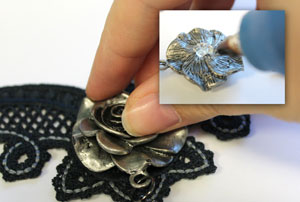
Finally for some finishing touches, you can add some extra dimension to your choker by gluing in a new cameo or charm in the center. Just dab some hot glue on the back of your charm, and hold it in place for a few seconds.
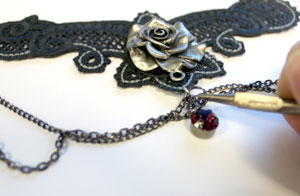
I also added a small dangling charm to top it all off, attached to the same ring as the rest of the chains. Once you close that back up, your necklace is done!
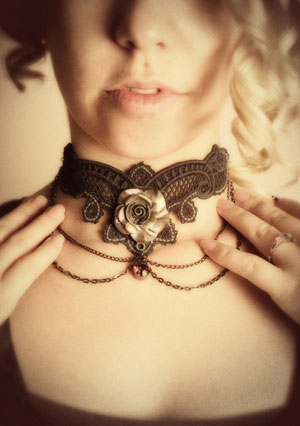
Gothic and glamorous, this is jewelry you make with your machine! Our new Battenburg style and cotton thread make this piece much softer than traditional machine embroidered freestanding lace, perfect for an elegant and wearable piece of embroidery.
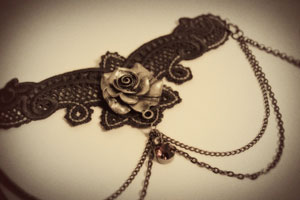
You can choose to just wear the lace piece on its own, or dress it up with chains and charms for something extra stunning.

Pair it with other lace pieces (like this Day of the Dead mask) for a complete lace look that’s dark and elegant enough to take beyond the spooky season. Any night is a good night to celebrate in lace!


