


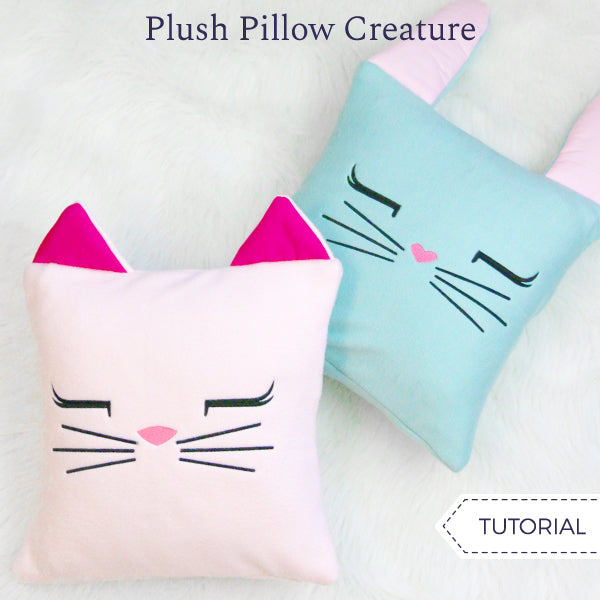
Pillows are great, and who doesn't love soft plush animals? Here is how to make a highly snugglable animal pillow sham for kids of all ages. It's cute and simple to do, and in a couple of easy steps, you can make your own!
Supplies & Materials:
Supplies
To get started, gather these supplies:
- Sweet Kitty Face (shown here) or Sweet Bunny Face embroidery design
- 1 square foot of pink quilters cotton
- 1 square foot of quilt batting
- Scissors
- Medium weight cutaway stabilizer
- Water-soluble stabilizer for topping, such as Sulky Solvy, if using a plush fabric
- Temporary spray adhesive
- Pins
- Ruler
- Needle and thread
- Tailors chalk (may leave a waxy film that will wash out)
Gather Materials:
First cut a piece of fleece fabric large enough to hoop (mine is 20" x 20"). Using your ruler and tailors chalk, find the center of each edge, and mark vertical and horizontal lines to find the center of the fabric.

Cut a piece of medium weight cutaway stabilizer a bit larger than your hoop. Spray the stabilizer with temporary spray adhesive. Smooth the stabilizer evenly over the back of the fleece fabric.

Start Embroidering:
If you're using a plush fabric, lay a sheet of water-soluble stabilizer (we're using Sulky Solvy) over the top.
Align the hoop with the alignment marks on the fabric, and hoop the stabilizer, fabric, and topping tightly together.

Load the embroidery design into your machine, and move the hoop so the needle is over the center point marked on your fabric. Embroider the design.

While the design is sewing out, start creating a pair of ears for your snuggly friend.
Spray a piece of batting with temporary spray adhesive, and smooth it onto the back of the pink quilters cotton. Lightly spray the backs of all the ear pattern pieces.

Cut out the paper pattern pieces from the PDF for the kitty or bunny. Place pieces A and B on the front of the quilters cotton. Place C and D on the fleece. Cut out all four ear pieces.

Remove the pattern pieces then match the fronts of A and D together and pin. Now do the same with B and C.

Cut one piece of the fleece fabric to a 9" x 15" and a second piece to 12" x 15" (these will be the back of your pillow). Using our ruler, chalk two lines 1/2" and 1" in along one 15" side of each piece for the hem. Fold and iron along the lines to hide the raw edge of the fabric. Secure the folded hem with a straight stitch.

Once the design has sewn, remove the hoop from the machine and remove the fabric from the hoop. Trim the excess stabilizer off, leaving at least 1/2" around the design.

Tear away the water-soluble stabilizer from the design. Carefully cut out a 15" x 15" square with the design centered in the middle.

Sew together the ears that you cut and pinned along the curved edge, leaving a 1/2 inch seam allowance.
After both ears are sewn together, turn them right side out and place them on the embroidered front piece with the pink quilters cotton side touching the embroidery design side. Make sure the point seams down toward the face and the straight edge lines up with the cut edge of the top piece.

Lay down the embroidered fabric with the embroidery face up. Lay the ears along the top edge about 3/4" from the corners, pointing toward the center, and with the quilters cotton facing the embroidered fabric.
Place the back pieces on top, overlapping the finished edges. Pin along the outside edges.

Sew all the way around the outside edge, leaving a 1/2" seam allowance.

Turn the pillow sham right side out, and lightly press both sides, using a pressing cloth between the iron and the fabric.

Stuff the pillow form inside the sham.
Your snuggly pillow is complete! Your choice of colors and fabrics will make each creature unique.
