


Supplies & Materials:
Project Materials or Supplies:
Note: The links below are affiliate links. We may earn a commission if you make a purchase using these links.
- Small pieces of quilter's cotton, twill, or linen
- Embroidery thread
- Water-soluble stabilizer
Gather Materials:
Freestanding fabric and embroidery designs have been specially digitized for use with water-soluble stabilizer. After the stabilizer is removed, beautiful fabric and embroidery remains.

When you download the in-the-hoop coaster design, you will find multiple files. Some are the embroidery files, while others are dieline files marked with the letters "DL." Dielines are used to cut the fabric to the correct shape and size for your project.
Open and print each dieline file using embroidery software.

First, take a piece of cutaway stabilizer and spray one side with temporary adhesive. Smooth the stabilizer onto the wrong side of your chosen fabric piece.

Next, spray the backside of the printed, front piece dieline with temporary spray adhesive, and smooth it onto the right side of the fabric. As both the front and back pieces will need to have cut away stabilizer on them, also spray and place the back dieline piece.

After cutting out the front and back piece, remove the paper dielines. Remember both the front and the back fabric pieces need to have cutaway stabilizer on the back for stability. Do not remove the cutaway stabilizer.

Now that your fabric has been prepared, you will need to prepare your water-soluble stabilizer. There are different kinds of water-soluble stabilizer. Some are clear and plastic, like Sulky Ultra Solvy. Others are soft and fibrous like Vilene. Both types work well, but Vilene is used in this demonstration.

Start Embroidering:
Hoop your water-soluble stabilizer firmly. Make sure it is tight with no wrinkles.

As all lace embroidery will be seen from both sides, wind a bobbin to match the lace thread colors, and thread the machine.

Attach the hoop onto your machine and load the embroidery file (not the dieline files). Embroider the design. The first thing to embroider will be the lace edge of the design.
For best results, use a size 11 or 75/11 sharp sewing needle. A sharp sewing needle has a smaller, finer point than an embroidery needle, and makes smaller perforations in the stabilizer, which helps to prevent shifting.

After the lace edge has sewn the next to sew out will be the dieline (or outline stitch). This marks the area on the stabilizer where the front fabric piece will be placed.

After the dieline has sewn, remove the hoop from the machine but do not unhoop the stabilizer. Spray the wrong side of the front fabric piece (the side covered with cutaway stabilizer) with temporary adhesive. Smooth the fabric piece onto the stabilizer inside of the sewn dieline.

Next, place the hoop back onto your machine and embroider the tackdown for the front fabric piece. The tackdown will hold the fabric piece in place for the remainder of the design.

Once the front fabric piece is stitched in place, embroider all the inner details. Make sure to stop your machine before sewing the "back piece tackdown" step.

Remove the hoop from the machine and turn it over so the back side of the embroidery is facing up. Then, spray the wrong side of the back fabric piece with temporary adhesive. Smooth it into place on the back side of the hooped embroidery.

Return the hoop to the machine and follow the color change sheet to embroider the "back piece tackdown."

Then, be sure the matching bobbin is threaded and embroider the "finishing border" step.

After embroidering, trim away the excess stabilizer, being careful not to cut the stitched embroidery.

Your stabilizer's packaging should give instructions for removing the excess. For Vilene, soak the embroidered fabric for 2-4 hours.

Allow your coaster to air dry and then iron it with a pressing cloth over the design for protection.

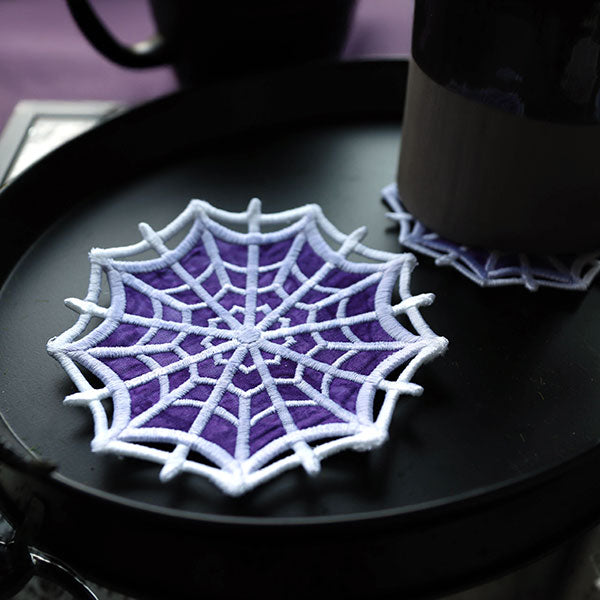
You're ready to add a touch of class and fun to your home decor, or gifts for friends and family with this lace edge coaster.
