


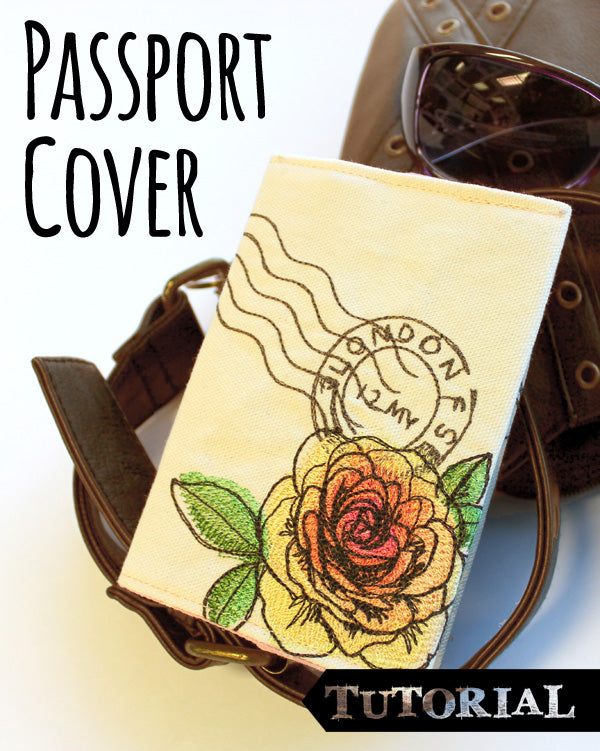
Got that seasonal wanderlust? Ready to break in that new passport? Worried about losing said passport to wear and tear? Or maybe you just want to make a statement and glam up that plain looking little book. Learn to make this simple passport cover and enter a new country in style!
Supplies & Materials:
- Passport embroidery designs . We used the English ones for this passport cover, though new contries will continue to be added!
- A passport
- 2 letter-size sheets of paper taped together, ruler, and pencil
- Two types of fabric -- one for the outside -of the cover, and one for the inside
- Medium weight stabilizer
- Scissors, pins, and tape
- Disappearing fabric marker
- Printed templates of your embroidery designs, for placement (Ideal for layering designs! Here’s how to print templates. )
- Iron
The designs used in this tutorial include:
- Passport to England - Big Ben
- Passport to England - London Bridge Stamp
- Passport to England - England Script
- Passport to England - Postmark
- Passport to England - English Rose
Now there’s a fun flexibility to these passport embroidery designs .. In addition to the one large “collage” piece, each element of the design is also available individually, for you to layer how you like. This is especially useful for little projects like this one, so you can fill the space in your own unique style.
The passport designs are also nicely suited for this project as they are small enough to fit on the small book and look great layered on top of one another so you can get a good number of designs in. You can put whatever and however many designs you want on your cover. I used all 5 separations from the English passport design .

First we have to make a template for that passport!
Take your passport and place it open on your piece of paper. Trace your passport with a pencil, marking where it folds in half.

Using the ruler, measure out an additional .25”-.375” to the top and bottom and 2” to each side. This will allow for flaps to tuck your passport in place. Cut out the template. (You can reuse this template multiple times if you are making more than one!)

Take your template, place on top of your exterior fabric, and pin down. Be sure you place your template in a position that will allow for enough fabric for hooping! Trace lightly with your fabric marker. Also transfer over the marks where the passport will be placed and folded..

Remove your template and place your designs! Don’t be afraid to let designs overlap one another. A passport is pretty small, but don’t forget there’s a back cover and those two-inch flaps you can utilize.
Make a sketch or take a picture before you start stitching your designs. You’ll need to take away those templates while you stitch out all your designs, so it’s best to have a reference to remember what goes where.

Start with the designs you want on the bottom layer first. Tape your first design in place. Hoop your fabric with medium weight cutaway stabilizer and use the design template hairlines to perfectly place your design.

Stitch, stitch, stitch away!

Once you have all your designs stitched out, lay the fabric out and mark the outline of the drawn template with pins.

Take your interior fabric and place the two together, right sides facing each other.

Use the pins in the exterior fabric as guides to place the template you drew earlier. Then remove those pins and pin together the pieces of fabric and template. Cut around the template, leaving about .25” extra for seam allowance.

Remove the paper template and sew all around the rectangle, leaving a 2”-3” opening. We will use this opening to turn the cover right side out when we’re ready.

Cut off the corners of your cover before turning it out. Be careful to not cut too close and break the stitching. This will make your corners sharper and flatter.

Through the opening you left, you can now turn your cover right side out, pushing the corners all the way out.

Flatten and press with an iron. Press the seams of the opening as well, folding them inside the cover. These will be sewn in place eventually.

Iron your cover in half and place your passport inside. Fold the edges over, tucking each end over the front and back cover. Pin down both ends. I’d recommend closing and opening your passport with the cover on a few times here to make sure there’s enough room for the passport to close all the way.
Take your passport out and press both ends with an iron, and then sew the flaps down. I sewed all along the top and bottom of the cover. This will also sew the seam shut from the turning.

Press the whole thing flat one more time and tuck your passport back inside.

You’re done! Now you’ve turned your previously boring-looking passport into a totally unique statement. This little thing is much easier to find in your bag and protects your key to the globe from the weathers of the world!
