


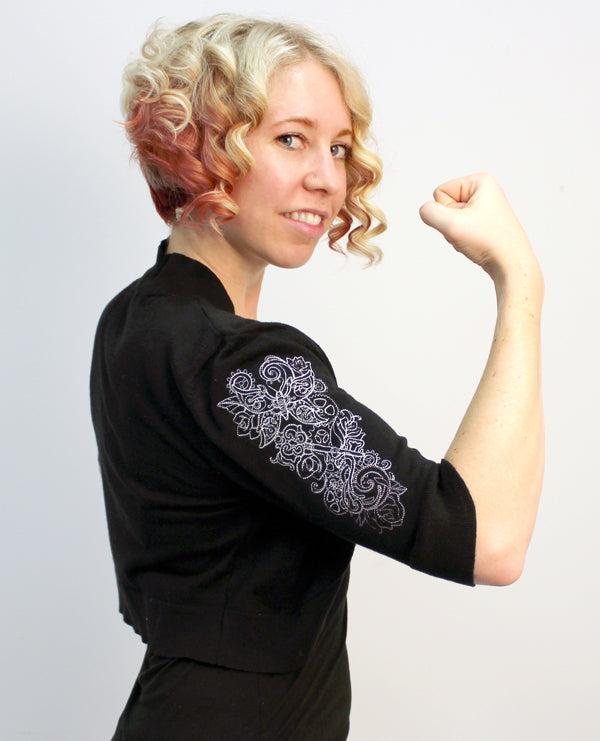
Discover fresh ways to use your favorite embroidery designs! The Design Muse tutorial series highlights simple techniques and tricks you can apply to all kinds of projects. Let these ideas inspire your own unique creations!
Embroidery designs can have a great impact anywhere you use them, but sometimes, it’s the more unusual places that really make a garment. Designs on sleeves are an unexpected and chic addition to shirts and sweaters, and just because they look impossible to hoop doesn’t mean they are! All you need is a seam ripper and a little patience, and you can give yourself a thread tattoo down any sleeve ... and check out the accompanying Embroidering on Sleeves video to see how it's done!
Supplies & Materials:
Supplies:
So, in order to try it out, you’ll need:
- A light-stitching embroidery design. The Steampunk Sleeve design shown in this tutorial was made just for this purpose! There are three versions available: the large version stitches as one piece about 9.4" long; the smaller two are split into multiple pieces suitable for 5"x7" and 4"x4" hoops that combine to make a bigger sleeve design.
- An article of clothing with sleeves at least 3/4 length
- No-show mesh cutaway stabilizer, such as Floriani No Show Mesh or Sulky Soft 'n' Sheer. (This is a great match for lighter deisgns. If your design is on the heavier side, consider a medium weight cutaway instead.)
- Seam ripper
- Scissors and pins
- Temporary spray adhesive
- Printed template(s) of your design, for placement (here's how to print templates)
Design Used In Tutorial:
I should note that we are going to be ripping open and then closing up the side seams on this garment, so you will lose a little bit of your seam. Don’t grab anything that’s already too snug!
Gather Materials:
Your real secret weapon here is your seam ripper. When you’re done, people will go ... how did you get it on your sleeve? Well, this little baby is how.
We’ll need to open up the side seam all the way up to the sleeve edge. Trust me, it’s much easier to put all back together when you open it all up first, and much easier to embroider on.

Once you’ve carefully torn away those stitches with your seam ripper, you should be able to open your sleeve up nice and flat! Don’t worry if your edges look rough and raw, it will all get stitched up nice and pretty when we’re done.

Start Embroidering:
Use your printed templates to figure out exactly where on the fabric you want your embroidery to go. Once you've got a plan: stick your no-show mesh cutaway stabilizer to the back of your sleeve fabric with temporary spray adhesive, then hoop both layers tightly together and embroider.
Here we're using the smallest version of the steampunk sleeve design, which stitches in three parts. Here's how to stitch split designs.

Ta da! Your beautiful sleeve embroidery is all done!
Now we just need to close it all up again, and leave people wondering how on earth we did it in the first place.

Turn your item inside out and pin the raw edges together.
Your secret weapon on this step is pins. Lots and lots of pins! Especially with light, stretchy or knit garments, pins will help keep all those edges lined up they way they should be.
Take extra care that you line up the two pieces at the sleeve end, under arm, and bottom of the garment. These are the places you will most notice a misalignment.

Sew a nice wide seam to make sure you catch both sides of your shirt, and backstitch at the beginning and end for extra strength. Before you call it done, check the edges of the seam to make sure there are no gaps where the seam didn’t get closed up.

That’s it! It may look tricky from the outside, but opening up and stitching on sleeves is really quite easy, and produces truly chic and professional results.
Plus, that elegant, long design is perfect for any sleeve you can stitch on, and easy to assemble no matter what your hoop size.

Repeat the process on the other side for a tattoo sleeve shirt that is certainly much much more painless than its skin-inked counterpart.
Opening sleeves opens up a whole world of more unique placement options for designs. Forget just putting designs in the expected places. Go wild and see just how easy it can be!
