Certain embroidery designs call for a personal touch. Maybe you want to add a message to a quilt label, or accent a monogram with a decorative border, or just add your own in-joke caption to an existing design? Here's how to make it happen.
This tutorial covers a few different ways of adding your own text to designs: using an embroidery alphabet (which is a collection of embroidery designs, one for each letter), using the fonts built into your embroidery machine/software, hand-writing, and hand-stitching. Each has its own strengths. Pick your perfect method, and enjoy!
Designs Used
Using Alphabets
Embroidery alphabets are great. In embroidery terms, an alphabet is a collection of embroidery designs, one for each letter. When they're digitized well, they're the best quality text stitching you're going to find.
However, it's not a font, which means you can't just type out your word and be done with it -- you're going to have to arrange the letters by hand. This takes a bit of time, but once you get the process down it's super simple and pretty quick to do (plus, if you're a design nut, you can fiddle with the spacing to your heart's content -- yay!).

For this tutorial, I'm using the program Embird (psst ... it has a free 30 day trial!). If you're using different software, that's just dandy -- as long as your program has the ability to combine and arrange designs, you should be set. And this tutorial will still show you what, in general, you need to do, though the details of how to do it may be different.
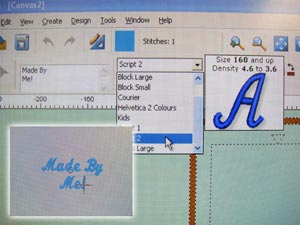
So. Adding text to a label. First things first, sizes. We don't recommend resizing the designs, so choose 'em carefully so they'll get along well with each other. Here, I'm using the 3.86" x 2.05" size of the Stitched with Love From design, and the 0.94" x 0.98" size of the Handwriting Alphabet.
Open up your label design in Embird. If needed, rotate the design so that your text will go across it horizontally.
Time to add letters to your label!
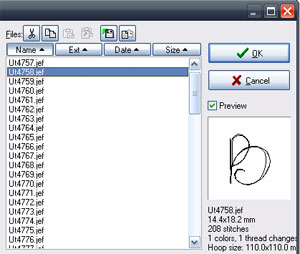
In Embird, click the File menu at the top of the screen, then Merge. Select the letter you want to insert. Click OK to open the letter design.
Once you've opened the letter design, drag it to approximately wher eyou want it to be. Don't get fussy about the placement -- that comes later.
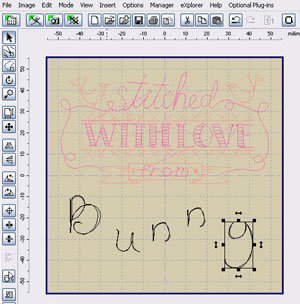
Repeat until you've got all the letters you want hanging out on your screen. You should have something that looks more or less like this.
Except it probably won't say Bunny. You get the idea.

Drag the letters around until you're happy with their arrangement. Make sure to center it in the hoop. If needed, rotate the whole thing back the way it was when you first opened it.
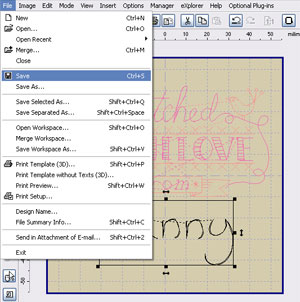
When you're satisfied, click File --> Save As, and save your newly created label with a filename that you'll recognize.
Click "Manager" at the top to go into Manager mode, then click "Editor" to go back into Editor mode. You're not looking at your quilt label as one combined design. One more thing to do...

OK! To make this thing a bit more user-friendly, since this particular alphabet stitches in just one color, we're going to merge all the letters into the same color stop so that you won't have to keep re-starting your machine when stitching it out.
In Embird, at the upper right corner of the screen, you should see something that looks more or less like this. Each square represents one color stop. Here, the first two pink squares are the label design, and all the black ones are the letters.
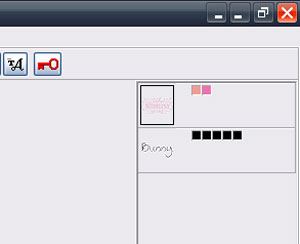
Figure out which square represents the first letter. Right-click on that square, then click "Split Before Color" on the menu that pops up. You should now see something like this.

Right-click on the tiny image of the lettering layer (the image! not the color squares!), and choose "Reduce Colors." In the menu that appears, set it to reduce colors to 1, and click OK.
Save your design. You're done!

Take your design to your embroidery machine and stitch it to your heart's content.

Using Fonts
It's also possible to add text to a design using the built-in fonts on your embroidery machine or software. Consult your manual or dealer for specifics on how to use these features.
Here's how we did it on our Futura...
First, load up your design (shown is the Antique Frame), and center it in your hoop. Next, find the text tool. Mine was in the upper right, marked by a big “T”. Click this button to add text to the design file.
Most software works a lot like using a Word doc. Mine had a small area for typing my chosen text (there at the left) as well as a few font choices and sizes. You can also find alignment buttons to center your words if you so choose. Type away whatever you wish to put in your label ... your name, who made your craft, the date ... whatever!
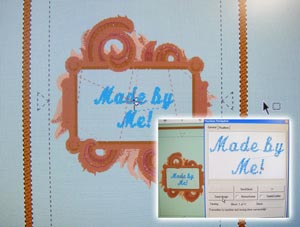
Center your text inside your design. If you used your in-software fonts, your text will probably all be part of the same color and stop, so you can just send your design off to be stitched…
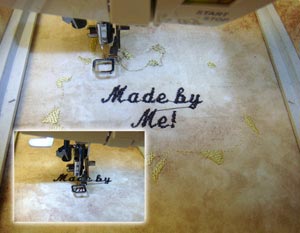
Send the whole thing to your machine, and stitch away!

Hand-Writing Text
This one's pretty simple. Stitch out your label design (shown:Handmade By). Then use a permanent fabric marker to add your own message. What this method lacks in stitches, it makes up for in flexibility. Write teeny-tiny text or grand, flowery script -- whatever you like!

Hand-Stitching Text
Stitch out your label design. Then grab a hand-stitching needle and embroidery floss, write our your lettering with an air-erase pen if you feel so inclined, and go to town. Takes a bit longer, but oh so charming.

Where can you use your newly personalized frames and labels?
Make a quilt, then stitch a label on the back to sign your work. The maker's name and the date completed are traditional to include; you might also mention the place where it was made, the name of the recipient, the title of the quilt (if your quilts are into having titles), the occasion or story behind it, a heartfelt message, or on the practical end, contact information or care instructions. Whatever suits your needs, go ahead and stitch it!
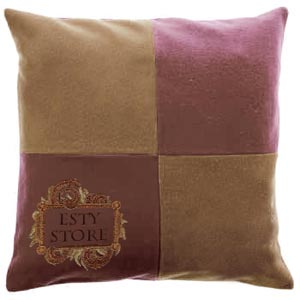
Stitch a label on products you make with your store name and contact info...
...on crafts that just need some fun text with a fun frame...

...even on a bear!
I'm totally kidding. Bears would be impossible to hoop.
Paying attention now? Good. Now go embroider labels on whatever your heart desires! And if your heart does desire to embroider on dangerous animals, do send us a photo...


