Welcome, crafters, to a special edition of our weekly projects!
This week instead of showing you what fancy goodies you can apply your sweet stitches to, I’m going to show you how to make your sweet stitchings even more stylin’! This week’s project is Design Hacks, simple ways you can change, edit, modify and otherwise swank-ify your normal embroidery designs for some fab results. These tips and tricks are not just our brainchild – many of our examples come from Urban Threadsters from all over! So follow along and get some fun ideas on how to “hack” your own designs. After all, the whole point of Urban Threads is designs that show your own style... why not do what you want with ‘em?
Designs Used
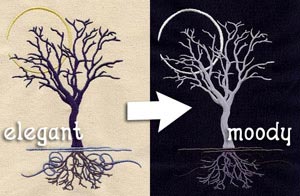
Our first hack is the easiest: Change the color scheme! This one is sometimes so simple we don’t even think to do it. Not that the colors we pick aren’t fabulous, of course, but there are so many possibilities to changing up the colors. Take a fun, elegant design like this Tree of Tranquility, and make it dark and moody with just a few color shifts, and stitching it on a different color fabric.
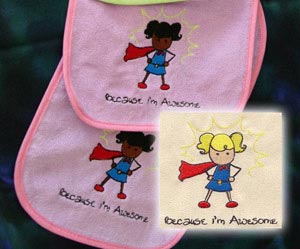
Changing the colors can also be for the simple reason of customizing it to a person, like this wonderful example from stitcher Elfie Elfie using Because I'm Awesome. Change skin tones, or use someone’s favorite colors to make a personal statement with the design. Take a design and stitch it on a pillow to perfectly match the decor and colors of a room. Change the colors of a design to make it masculine, or extra girly. You have to pick the colors for the design anyway, so it’s a step you can easily customize. Try it out!

The second hack is almost as simple: Use specialty threads. There are all sorts of cool threads you can use to jazz up your designs. One of my favorites is variegated thread, thread that transitions in color. There are different kinds of variegated thread, some that changes color faster than others. I stitched out our little Lonely Robot design in two different types. The little blue robot was stitched out in thread that changed color slowly, so he has more of a gradient effect. The other little robot, on the right, was stitched with thread with faster color transitions, so he looks a bit more “stripey.” Scribbles are especially fun to try out variegated thread on. Give it a shot!
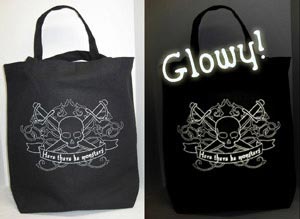
Another fun option for thread choice is glow-in-the-dark thread. Kim C StL stitched up this awesome piratey tote with Here There Be Monsters in glow-in-the-dark threads, perfect for Halloween festivities! Glow-in-the-dark thread can be used as fun accents to pieces, and kids love having some part of their designs stand out at night. There are all kinds of fun threads out there… sparkly threads, metallic threads, thicker threads... try them all! You might get some surprising results!
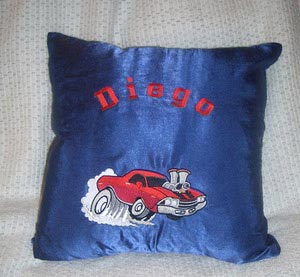
Our third design hack is text. Again, that sounds pretty simple, but sometimes being able to add or remove text can make or break a design. The first thing you should know about all our designs with text is that as long as the text is separate from the design (above or below it, but not part of it), it’s always on the last stop, and there for all you need to do to skip it is not stitch the last step! That makes it very easy to either modify it to have no text, or add your own. Many embroidery machines and embroidery software programs come with some free simple fonts. Adding names or your own fun phrases is an excellent way of adding some personalization to a design... take this spiffy El Camino Loco pillow that mad-squirrel stitched up for Diego!
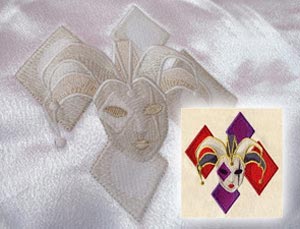
Another fun idea is changing a design to tone-on-tone, like we did with this Jester in one of our recent editions of Design Threads.Tone-on-tone, or monochromatic color choices, is a fun and sophisticated way of changing up a design, taking our “color choice” hack one step further. It can be great for adding subtle accents, or dialing down the pop of a design and dialing up the elegance. You can try stitching out a design all in one color, or you can choose a bunch of threads that are all very close in color, lending to subtle shading effects. Stitch it on a like-colored fabric, and you’ve got a sassy, classy version of your once loud design.
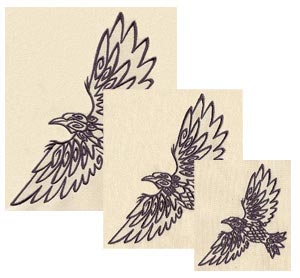
What about sizing? Very simple in concept, but not so much in execution. Sizes are something we all struggle with sometimes, especially when your favorite design is just that little bit too big for your hoop. You can just shrink it, right?
Well, hold your horses there, partner. When it comes to re-sizing the designs yourself, all we can advise is that you proceed at your own risk. As a very basic rule, you can usually size a design up or down by about 10-15%, but depending on what you use to resize it, it can sometimes distort the stitches. There are some programs out there that can help you resize stuff, like the free Wilcom TrueSizer, or Embird (there's a free trial available). We always try and make designs as small as possible for little hoops, but trust us when we say, if we haven’t offered it in a 4 by 4 size, that’s probably because it won’t stitch out very well in one.
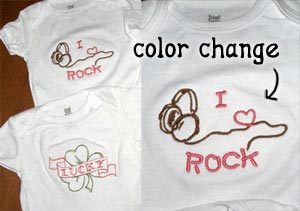
Want to up the hacking skill? How about changing colors in the middle of a design? This hack takes a little bit more attention on your part, because you have to carefully watch your machine while it’s stitching out, but Shannon over on Craftstylish did an awesome “hack” to our Love my Music design, by both adding her own text, and then doing a super swank color change up while the machine was sewing. She stopped the machine at the heart, changed it to pink, and then changed it back once the heart section had stitched. You can add all sorts of color accents this way... just make absolutely sure your machine has stopped stitching!
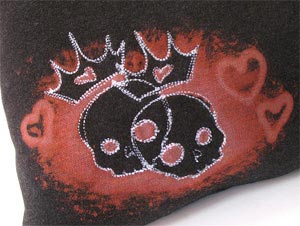
Another very simple way of changing up a design is just to mirror it. All embroidery software has the ability to do this (trust me, if the Futura can do it, anything can). Sometimes you need to select the design and mirror it yourself, or sometimes your machine will have settings you can adjust to rotate or mirror the design built in to the software. This hack is especially fun when you use a mirrored design overlaid on top of an un-mirrored one, creating a fun pattern. You could almost believe these skulls are simple a design in itself, but they were simply achieved by mirroring and overlapping one design on top of the other.
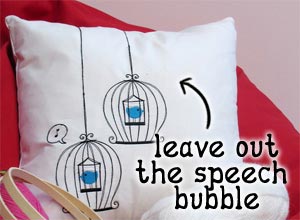
Finally, we’ve talked a lot about adding or changing things... but what about leaving things out?Sometimes leaving elements out of a design can help you create the illusion of a new one. Take the Caged Birds on this pillow, for example. When I mirrored the second design, I decided to eliminate the speak bubble part so it wouldn’t be an exact copy of the other design. This helps cut down on excessive repetition when you stitch it more than once. This works best on parts of the design that are separate “trims” (like the speech bubble) that aren’t connected to the main part of the design. Try it in combination with mirroring and you can create your very own version that looks like a whole new design!
There you have it! All sorts of ways of changing up your embroidery designs to suit your every whim, and do your bidding. Combine these tips and tricks to come up with totally new designs that leave people wondering how on earth you did that. Of course, all these tricks can be done with hand embroidery too – it’s just a good deal easier. Have fun taking and making these designs you own when you stitch them out.


