Patchwork quilts can be an amazing way to display machine embroidery. You can get expressive with shapes, colors, and textures, making a unique work of art that you or your favorite people will treasure for years to come. And let's face it, everyone could use a cozy personalized blanket or a gorgeous wall display.
You might find a quilt pattern that you want to use as a starting point (our Nature's Curiosities pattern was created with embroidery in mind) -- but to bring your vision to life, you might find yourself wanting to create your own from scratch. Designing your own quilt pattern might seem like a daunting task, but it's actually pretty simple -- just take it one step at time, and you can sew something really amazing.
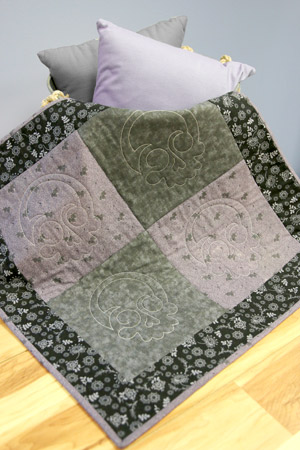
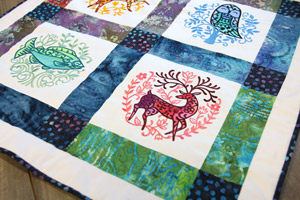
Never made a quilt before? No problem! We're firm believers that anyone can quilt -- total beginners and hardcore hobbyists alike. We'll walk you through planning, constructing, and finishing your very own one-of-a-kind patchwork masterpiece, using the quilt shown here as an example. Read through this whole tutorial before you get started, and get ready to stitch the most amazing quilt you've ever seen!
Designs Used
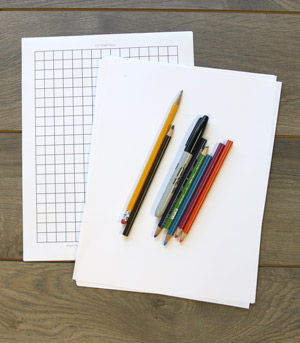
What you'll need for planning:
- Your imagination and creativity!
- Pencil and paper for sketching (you might also like to have some graph paper handy -- search for "free graph paper" and you can find all the printable graph paper options your heart desires)
- Colored pencils or markers
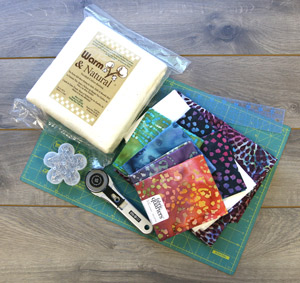
And to make your quilt:
- Rotary cutter, cutting mat, clear ruler to use as a straight edge
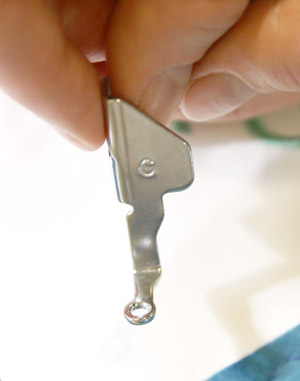
- Curved quilting safety pins
- Enough fabric and batting to make your quilt. We'll figure out the amount as we're planning.
- Some awesome embroidery designs
- Cutaway stabilizer
- Temporary spray adhesive
- Embroidery thread
- Thread for sewing and quilting -- you'll use lots!
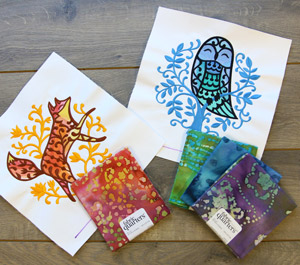
First things first: start dreaming! Pick out some embroidery designs you'd like to showcase on your quilt, and start thinking about the fabrics you might want to use. While you won't know your exact yardage requirements until you figure out your pattern, there are a couple of things to keep in mind at this point:
Lighter, more open designs such as running stitch or applique will get along great with quilters cotton (and you might also be able to get away with a sheer mesh cutaway stabilizer). For designs that have more stitch-filled areas, you'll want to use a medium weight cutaway stabilizer, possibly paired with a slightly more substantial fabric for the embroidered parts (such as flannel or twill).
It's a good idea to test your combination of designs, fabric, and stabilizer before you commit to your whole project, so you can make sure you're getting nice results.
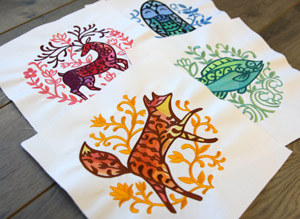
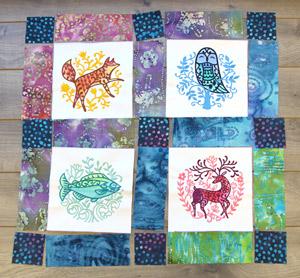
In my example quilt, I'm going to use four designs from the Bohemian Woods collection.
Once you've selected your designs, get your general color scheme or mood in mind, as well as a size -- are you making a bed quilt, a throw, a wall hanging?
Then start sketching possible layouts and ideas for your quilt. Experiment with a few; you never know what will catch your imagination!
Below are a few basic directions you might consider. They're just a start -- feel free to mix and match, or create something entirely new. Many of these examples were made by an Urban Threadster just like you!
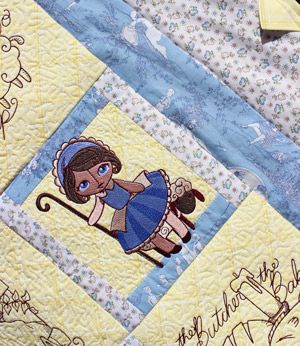
This kind of quilt is a classic with embroiderers, and for good reason -- it lets your embroidery designs take center stage, as Drapes of Wrath demonstrates with this cute Misfit Nursery Rhymes quilt. A solid color fabric makes a more subdued background, but subtle patterned fabrics for your embroidered blocks can add some nice texture too.
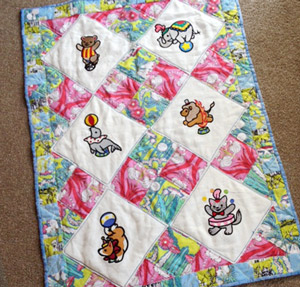
Another popular type of quilt alternates embroidered blocks with blocks that aren't embroidered, as in Jacqueline's charming Too Cute Circus quilt. This is a great way to have the best of all possible worlds -- nifty patchwork blocks or bold patterned fabrics, plus embroidery!
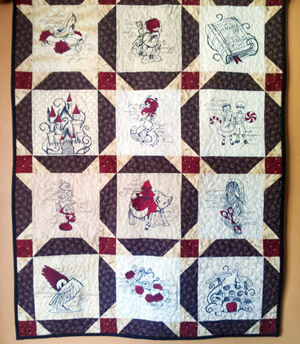
You can keep your blocks sleek and simple -- or dress them up with patchwork, as in Ragannfan1's amazing Dark Fairytales quilt. If you're a beginner, right angles are your friend. Look around at other quilts for inspiration!
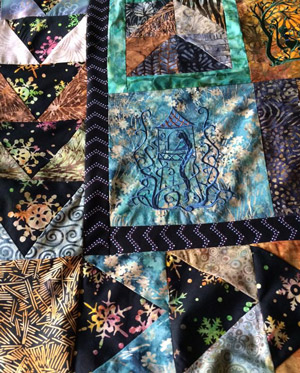
Crazy quilts, a Victorian trend that's still popular today, feature scraps of fabric stitched haphazardly together -- often in rich colors and decadent materials like silk and velvet. They lend themselves perfectly to embellishment -- in addition to embroidery, try adding ribbons, buttons, and other fanciness!
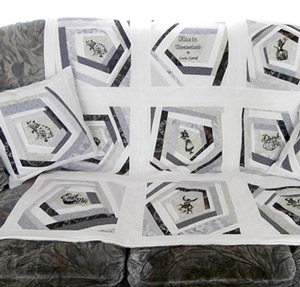
You don't really need as much of a pattern for these -- just start with your embroidered fabric, keep adding more pieces at irregular angles until you've filled a square, repeat, then stitch all your squares together, as Tracy did in this Wonderland quilt. Each square is unique -- that's part of the charm!
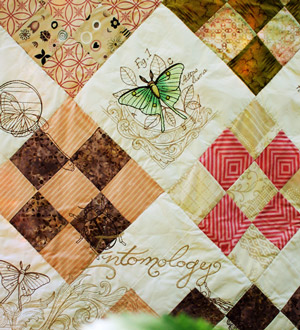
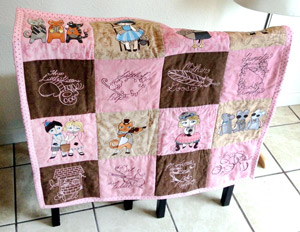
Even if you're using a more "traditional" quilt design, you can stitch outside the box! That's what we did with this Nature's Curiosities quilt -- patched together part of the quilt top, then hooped it up with stabilizer and embroidered.
The more patchwork you do before you hoop and embroider your quilt top, the more you're risking if something goes awry -- so it's a good idea to do this before the whole quilt top is assembled, if you can.
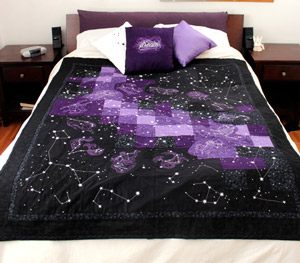
Some awesome quilts dispense with blocks altogether, turning the whole quilt into one big canvas!
In this celestial quilt, a curve of purple squares creates a galactic backdrop to a circle of constellations. The backdrop is all made up of squares, but it's so much more than the sum of its parts.
Try a meadow and sky with woodland creatures, or an underwater seascape full of embroidered fish ... anything you like!
Don't forget about your border! You can use a simple strip of fabric, dress it up with patchwork or other embellishments, as Karen did in this brilliant Fairytale Shadows quilt. You might even add some embroidery here, too.
Also, remember that the edge of your border will need a binding -- that tiny strip of fabric that wraps around the very edge of your quilt sandwich, hiding the raw edges of your quilt top, batting, and backing.
Another thing you'll want to think about while designing: after you've assembled your quilt top and layered it with batting and backing, how will you quilt through your layers? There are several options here.
You can stick the quilt under your sewing machine, and let your stitching wander in random freemotion swirls, as Maddy did in this adorable Misfit Nursery Rhymes quilt...
...or "stitch in the ditch" along the seams between your patchwork pieces...
any combination of the above!
You also can use single run quilting embroidery designs to quilt through all the layers of your quilt. Check out this tutorial to learn more about using this unique kind of embroidery design.
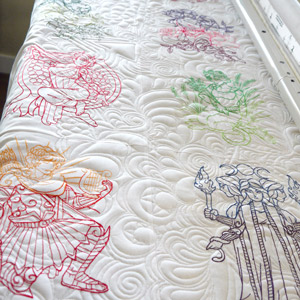
Alternatively, you can hire someone with a longarm quilting machine to quilt your quilt, as Kathleen did with these heavenly Greek Gods. Longarm quilting machines are a bit like embroidery machines, but they're the size of a room and repeat a design over and over, rather than working within a hoop. This could be harder to combine with more filled embroidery designs, but with these running stitch designs it looks amazing!
Again, how you quilt through your layers is all up to you ... but it's a good idea to give some thought to this in the design process.
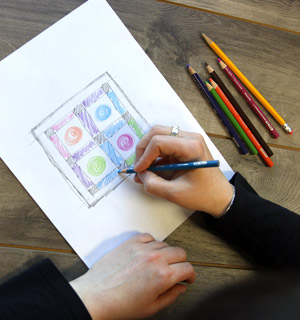
Once you've got your quilt plan all sketched out, grab some colored pencils and color it in. So much of your quilt's finished look depends on the specific fabrics you're using, but this can help you get a clearer idea of where you're headed. Keep this handy -- you'll want to refer to it as you're working.
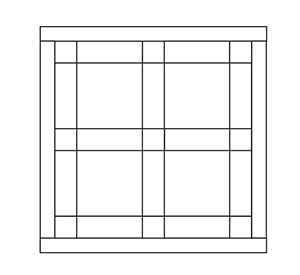
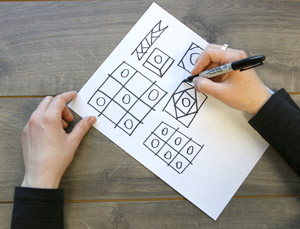
Now that you have a vision, it's time to get down to details and plan your pattern! Here's mine, as an example. I sketched these on graph paper, but had them re-drawn on the computer so you can see them more clearly.
Exactly how you write your pattern will depend on what kind of quilt you're making. If you're taking a more freeform approach (like with a crazy quilt), you can make up more of as you go along. If your quilt will be more structured, you'll want to plan your pattern more precisely.
Start by grabbing a piece of paper and drawing a nice clean diagram of the pieces of your quilt top, approximately to scale. The idea here is to get a visual representation of the shapes in your quilt. Make it big enough that you can mark it up with measurements later.
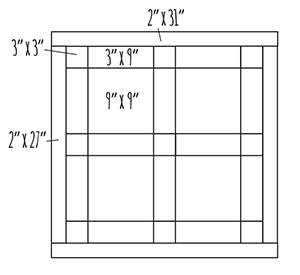
OK! Now it's time to figure out the size and shape of the pieces. On your to-scale diagram, mark the size of each type of piece, as it will show on your finished quilt. (There are a lot of identically sized pieces here; I've marked each only once. You get the idea.)
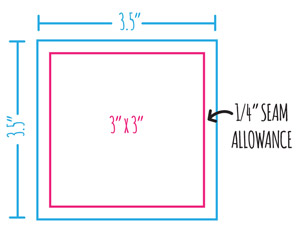
The next step is to figure out the size of the fabric you'll actually need to cut. You'll want to add 1/4" to each side for seam allowance, to figure out the size of the fabric pieces you should cut. So for example, if your quilt top contains a 3"x3" square, you'll want to cut a piece of fabric that's 3 1/2" x 3 1/2".
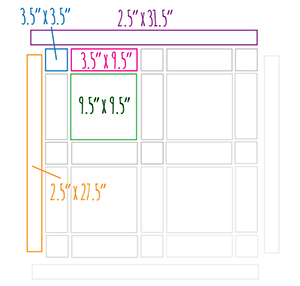
Here's my diagram marked up with cutting sizes.
The one thing we haven't talked about yet is binding. You're going to need a long strip of fabric for this. To figure out the length, measure the perimeter of your quilt, then add at least a foot extra to accommodate corners and seams. The width depends on your preference. If you want about 1/4" of binding to show around the edge of your quilt, strips of about 2 1/4" should work out nicely. If you want it to be wider, add width accordingly.
You won't be able to cut all this in one long strip, so you'll want to enough shorter strips that you can piece them together to create the length you need. Throw in a little extra length to account for all those seams.
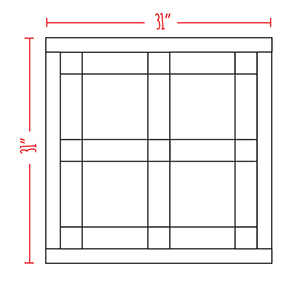
My quilt is 31" square, so it has a perimeter of 124". I'll bump that up to 140" of binding.
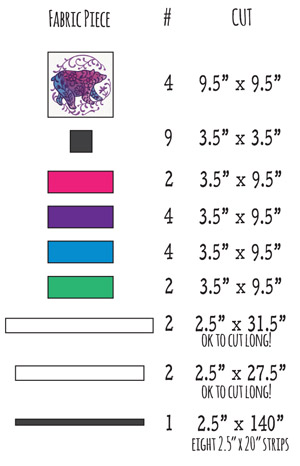
Once all that's done, make yourself a list of pieces you'll need to cut, with specific dimensions for each. Here's my list.
If you're doing the math, you'll notice that 7 strips (cut from a fat quarter) would have taken care of my 140" of binding. But I cut an extra to allow for all those seams needed to patch them together. Better too much binding than too little.
If you have strips framing the edges of your quilt, it's not a bad idea to cut those a bit longer than their "official" length too. The finished measurement of your quilt can have a way of turning out a little differently than you expect. It's cool.
Still with me? Great! Now it's time to start actually making this thing.
Unless you're going to be embroidering over multiple patchwork pieces at the same time, you'll want to embroider your fabric BEFORE you cut your pieces. This will help you get the best-looking embroidery results.
Spray a piece of cutaway stabilizer with temporary spray adhesive, smooth it on the back of your fabric, hoop it up, and embroider. Repeat as needed.
Often it can look best to leave the stabilizer on the back of the whole piece of fabric, rather than cutting it close to the design. Keep this in mind as you're stitching out designs, to make sure you'll have enough fabric and stabilizer around the edges.
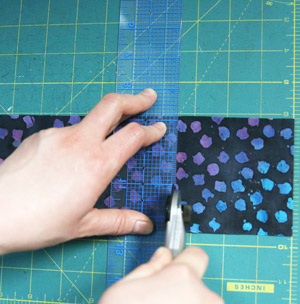
Once your designs are stitched, it's time to start cutting!
Grab your cutting mat and rotary cutter, and start cutting fabric shapes according to the list you made earlier. Keep the measurements precise!
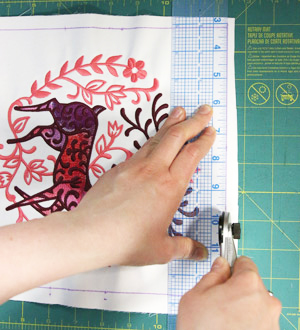
When you're cutting your embroidered fabric, you'll want to make sure the design is located where you want it. Marking out your piece with fabric markers can help in this case. Again, it can look nicest to leave the stabilizer on the back of the whole piece.
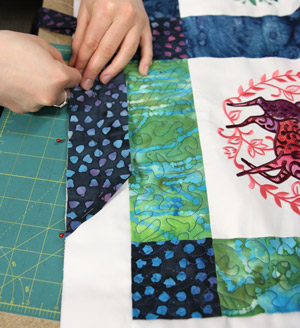
In an undisturbed space, lay out all your pieces to make sure you like how it's all coming together. If you want to rearrange or swap in different fabrics, go right ahead!
Here's my quilt at this point. It's missing the white strips that frame the whole thing, because there weren't really any color variations to consider with those.
Finally, it's time to start stitching!
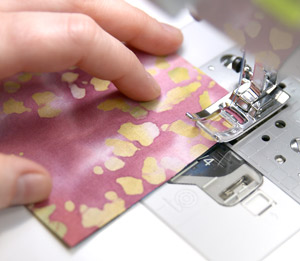
Flip two neighboring pieces right-sides-together, then stitch them together using a scant 1/4" seam allowance. Try not to vary from this if you can help it, since tiny changes in the patchwork seam allowance can add up to big changes in a whole quilt.
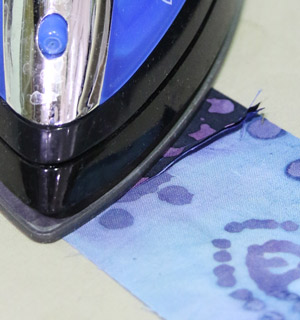
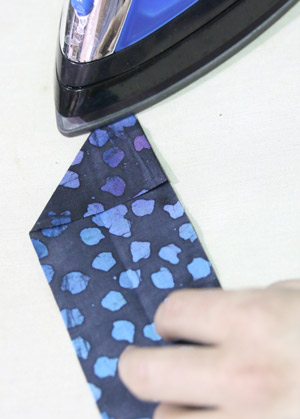
After you've stitched a seam, you'll want to press it nice and flat. To keep from building up too much bulk as seams intersect, it can be a good idea to open up the seam allowance and press one side each way. If one of your fabrics is very light-colored and the other is dark, you might press everything toward the darker fabric so that it won't be visible from the front.
Keep on assembling, one seam at a time. If your quilt has any sort of blocks going on, you'll probably want to do one block at a time, then assemble those blocks into rows, and so on.
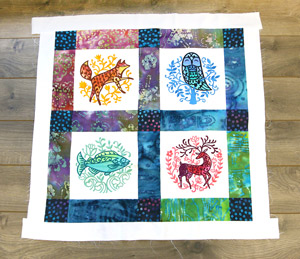
Eventually you'll have a completed quilt top. Congratulations!
Now let's finish this thing up...
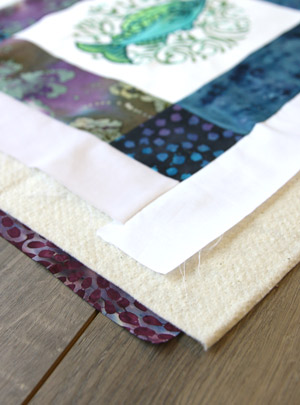
Your quilt will be a sandwich: your quilt top in the top, batting in the middle, and a solid piece of fabric on the back. Before you assemble that tasty sandwich, there are a couple of things you might want to do...
Cut a piece of fabric for the back of your quilt. It's a good idea to do this after you've finished your quilt top, to make sure the sizes match up. Leave your batting and backing a bit bigger than your quilt top -- any excess will get trimmed off later.
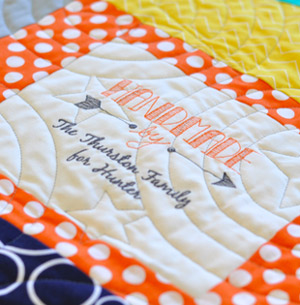
If you like, you can add a quilt label to the back of your quilt, with your name, the date, a message to the recipient, or anything else you want (like this label on the back of a quilt by Quilted Thimble Cottage). You can use embroidery, a fabric marker, or anything else you like!
If you're adding this before you quilt through your layers, you'll want to think about how your label will interact with your quilting. You could also hand-stitch it on afterward, if you prefer. Both options can look great!
Also, if you're planning to hang your quilt on the wall, you'll want to build in some way to do that. There are a variety of possibilities, so we'd recommend doing some googling to see what you prefer for your project.
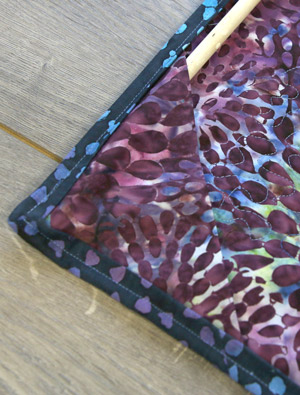
Here's one nifty approach that works great for smaller quilts -- just add a pocket to the corners, and pop in a dowel. To hang larger quilts, you'll probably want to add a channel across the entire top of the quilt instead.
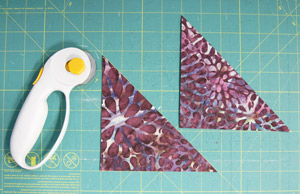
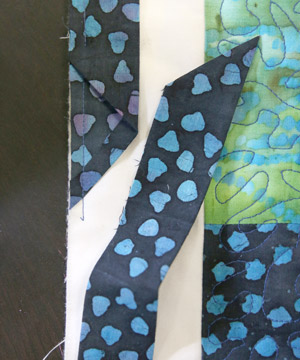
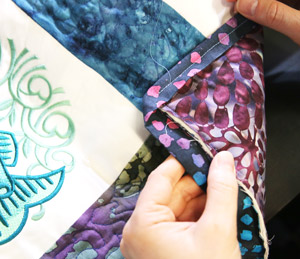
If you're adding corner pockets, fold some fabric in half, cut two triangles as shown (the fold is the diagonal edge), and set them aside for now. They'll be added later. But it's important that we know where we're headed.
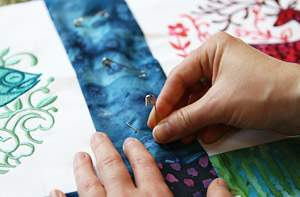
OK! Once the back is prepared, it's sandwich makin' time. Find a nice flat surface and smooth out your backing, right side down. Smooth your batting on top of that, followed by your quilt top. Make sure everything is lined up just the way you want it.
Then, use curved safety pins throughout to pin all three layers together. The curve allows your quilt to lay flat, and the pins will keep the layers from shifting around as you move on to the next step...
At long last, we get to the quilting of the quilt! That's what gives your creation its puffy magic.
The thing to watch out for here is keeping your layers from shifting around as you're stitching. Those nifty curved safety pins will help, but it's also important to use a presser foot that won't push things out of alignment.
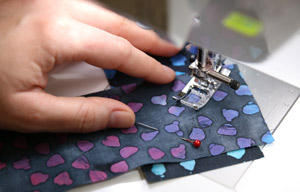
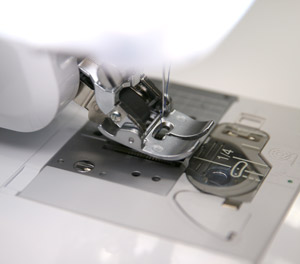
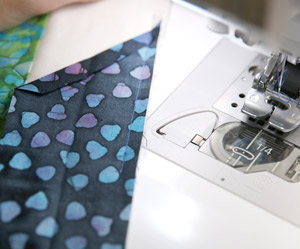
I'm going to be meandering across the quilt with random squiggly stitches, so I'm using this freemotion foot and dropping the feed dogs so I can move the quilt any which way I want.
If you're going to be quilting in straight lines instead, a "walking foot" can make things way easier by feeding all your layers through the machine at the same rate. You'll see our version of this later in the tutorial, when we do the binding.
If you're new to using these feet, it's a good idea to consult your machine's manual to make sure you understand how to use this foot for quilting -- and do a practice run a scrap "sandwich" of fabric with batting in the middle, to make sure everything is running smoothly before you stitch the real thing.

As we discussed in the planning phrase, there are a variety of ways you can quilt your quilt. Stitch along the seams between patchwork pieces, and/or just let your stitching wander and curve.
If possible, try starting from the center of your quilt and working outward. This also helps to prevent shifting and bunching.
This may take awhile. Throw on a movie or a podcast, and have fun!
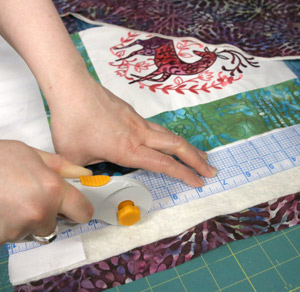
Once you're all done quilting, it's time to finish up the edges!
Trim any excess batting and backing, so that it's aligned with the edges of your quilt top. It's best to do this after you're finished quilting through the layers, so that you'll have a nice, neat edge and corners, even if the fabric has stretched a bit during the quilting process. Your rotary cutter and mat can help get this nice and straight.
The last step is to add a binding around the edge of your quilt. In this case, we'll be adding corner pockets for hanging as well.
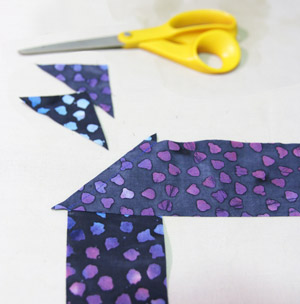
Grab those binding strips you cut earlier. Place two of them at a 90 degree angle, right sides together, as shown. Pin them in place, and stitch them together from corner to corner.
Repeat until all your seams are sewn end-to-end.
Now head to your ironing board. Trim about 1/4" away from each seam...
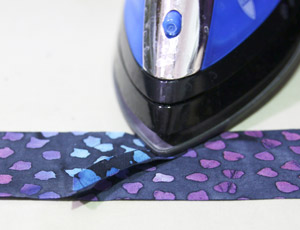
...and press the seam open. You'll get the smoothest binding if you press half each way, as shown.
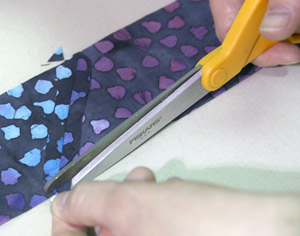
Then trim off the excess sticky-outy bits.
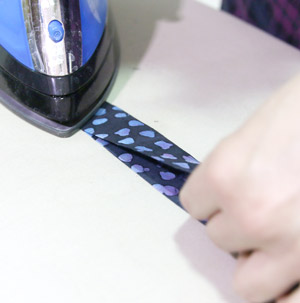
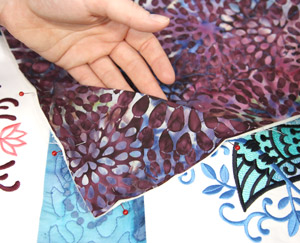
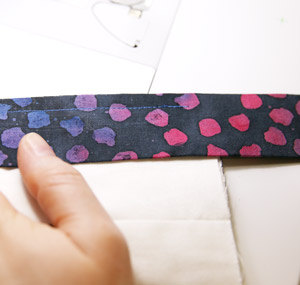
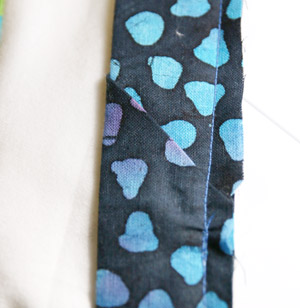
Almost done! Fold your binding exactly in half lengthwise, wrong sides together, and press.
You'll also want to press the end diagonally, as shown. You only need to do this to one end. Trim about 1/4" from the angled fold.
Now it's time to bind the edges of your quilt!
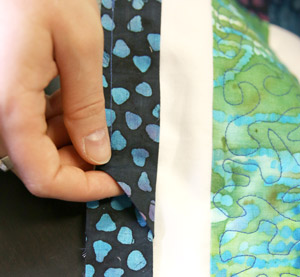
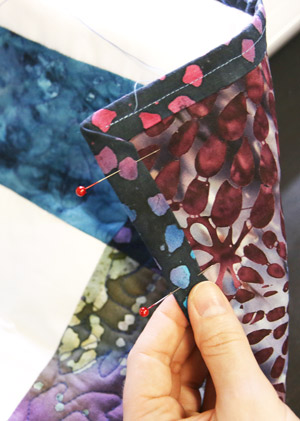
If you're adding corner pockets for hanging, grab the fabric you cut earlier, and pin it in place.
OK! Time to start stitching the binding onto the quilt.
For this step, I'm using a dual feed foot, which is basically a fancy version of a walking foot. The idea here is that the presser foot and feed dogs will BOTH push the fabric through equally from the top and the bottom, so that the layers will stay nicely aligned.
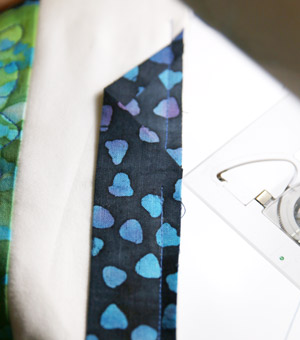
Grab the angled end of your binding and open it up. Pin the first few inches of the binding onto the edge of the quilt, as shown. You may find that you don't need a lot of pins for the binding in general, but a few here can help get everything started nicely.
You'll want to start your binding the middle of one of the sides, far away from the corners. There'll be plenty of other exciting stuff happening in the corners.
Before you start sewing, remember what seam allowance you chose to use for your binding -- 1/4" is common and appropriate if you cut your strips about 2" to 2 1/4". If you cut them bigger, you might want to increase your seam allowance a bit here, so that they'll wrap around the edge evenly. Bigger strips can also make it easier to finish your binding using your sewing machine (we'll talk about that more later).
Stitch the first little bit, so that the seam goes an inch or two past where the top folded edge would meet it. Then take your quilt off the machine. It should look like this.
Now fold your binding back together and resume your seam, about a half inch from the angled edge, as shown.
Keep on stitching until you get close to the corner -- 1/4" away, or whatever your seam allowance is. Backstitch and take it off your machine.
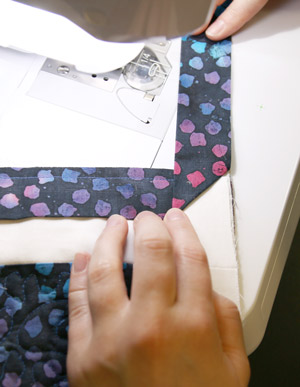
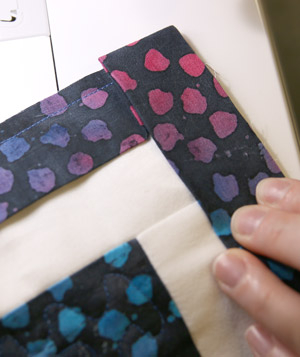
OK, here's how you make that corner nice and neat. Fold your binding up in the opposite direction of your quilt, as shown, so that the fold creates a 45 degree angle with the edges of the quilt.
Then fold it back down as shown, aligning this fold with the edge of your quilt.
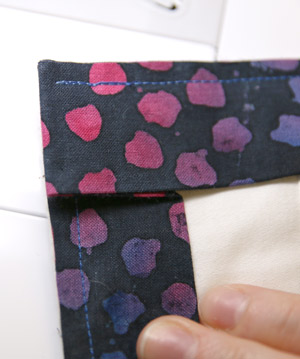
Now stick it back under your machine, and stick in your needle as close to where you left off as possible -- which should be right on that 45 degree fold line. Start stitching down the next side of the quilt.
Ta da ... a mitered corner!
Keep on going like this, mitering your corners as you get to them.
When you get back around to where your binding starts, cut off the end at an angle, so that it will fit nicely into that little overlappy area we left...
...tuck it into the beginning of the binding...
...and keep stitching to finish the thing off.
Now all that's left is to stitch your binding to the back of your quilt. Again, you have options here: you can do this by hand or by machine.
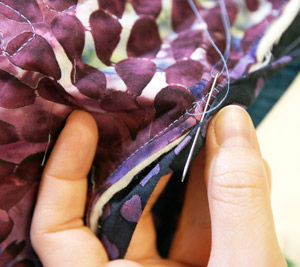
Here's how I would finish the binding by hand. Fold the binding around to the back, then slipstitch it in place, catching a tiny bit of fabric alternately from each side. This is the neatest way to finish your binding, but it takes longer. Another great time for a movie.

However, I'm actually going to finish my binding by machine. Fold your binding around to the back, and pin it in place, starting in the middle of one of the sides (again, the corners will get special treatment, which we'll talk about later). It should look like this from the back...
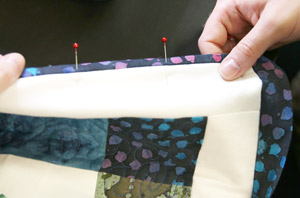
---and this from the front. The back should have a wider margin of fabric than the front, so that your machine will catch the binding in its seam
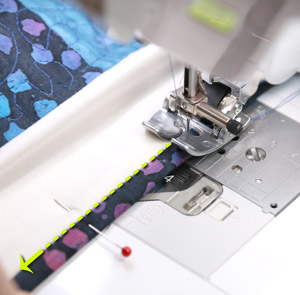
Pop that edge under your machine and start stitching! You can "stitch in the ditch" here, or do what I did and sew just a bit to the binding side of the existing seam.
When you get to a corner, backstitch and tie off your seam neatly. You should have something that looks like this.
Fold over the next edge to make a nice neat corner. You'll probably want to use a couple pins to keep everything in place. Then resume stitching from that corner, on the front side.
Keep on going until your binding is finished!
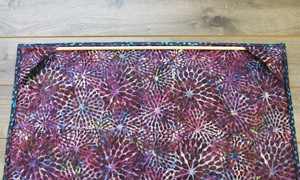
If you added pockets for hanging a smaller quilt, cut a dowel to size and slide it in.
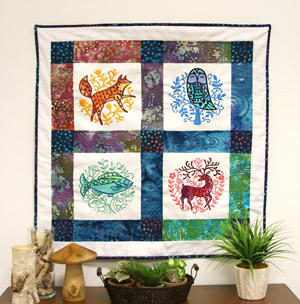
Congratulations -- you've just finished a quilt of your very own design! Display it, give it, or snuggle it with pride.
Your quilt is an awesome expression of your unique style and vision -- and it's infused with love and care in every stitch. And now that you've learned so much in the process, you'll be full of ideas for your next amazing quilty creations!


