Applique is a wonderful thing. It’s fast, simple, and completely versatile. What you might not know is how versatile it can be...
There are many different styles of applique. Here at Urban Threads, we tend to favor the “rough edge” applique look, meaning the fabric is left with a nice raw edge around the design instead of having a finishing satin stitch. We also have some satin stitch, or typical applique, that we’ve used as a patch. Well there’s another way to use your applique, with any of the rough edge designs you like. It’s called reverse applique, and it’s a simple, crafty way to try a new style.
Designs Used
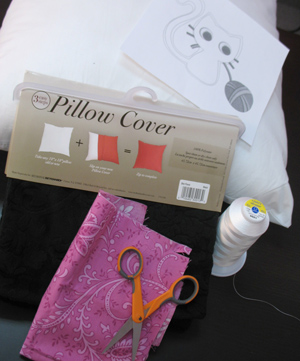
As part of our Design Threads series on the blog, we’re highlighting new trends in fashion and design and showing you how to do them yourself, and reverse applique is fast becoming a hot trend.
Reverse applique is where the applique fabric is underneath your design, instead of stitched on top of it. It’s a simple switch to make, as long as you know what parts to change from regular applique, but has a unique crafty look. It’s especially easy with our rough edge applique, because there’s no finishing border to worry about. I’ll show you how to do it...
First, you’ll need something to put your applique on. This can be anything from shirts and hoodies to purses and bags. If you can cut through it easily, you can add reverse applique. I chose a pillow sham, because it’s fast and cheap and is always in need of some good embroidery. You’ll also need the fabric you’ll want to use for your applique, and some very sharp scissors. A printout of your design is also helpful if you have placement issues like I sometimes do.
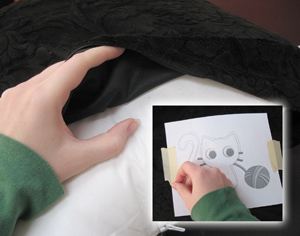
To start, you might want to get some help with the placement of your design, depending on what you’re putting it on. Pillows covers have a strange habit of getting plumper when you stuff pillows in them, and that can sometimes mean your design doesn’t end up where you expect.
I covered my pillow with its cover and then placed my little knittin' kitten where I wanted him, and taped him in place. Having this taped printout can also help when we need to place the applique fabric on the back.
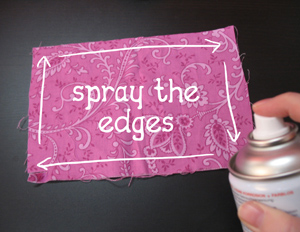
Before we hoop the kitty, you have to get your applique fabric ready. Cut a piece of fabric that’s at least as large as your kitty. To make sure it’s nice and taut, I’d make it large enough to hoop with the rest of your fabric. With your fabric right side up, take your spray adhesive, and spray just around the edges of the fabric, leaving the middle, where the kitty will be, free of sticky gunk.
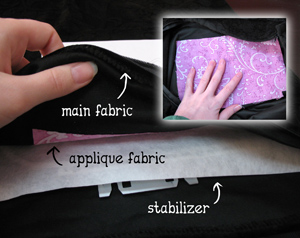
Place your applique fabric carefully on the inside of your fabric, right side down, so it’s directly behind where your design is going to be. It helps to use the paper template to make sure you know that there’s fabric behind everything it needs to be.
Be sure to get your fabric in the proper order. On top is your fabric, (pillowcase, tee, whatever), underneath that is your applique fabric, and behind that is your stabilizer. You don’t want to hoop it in the wrong order or you’ll be snipping through stabilizer too.
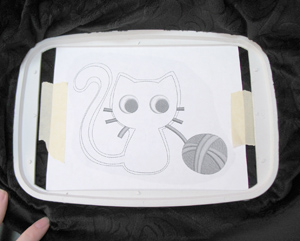
Hoop all your layers together so it’s ready to sew. Now... before we sew, we’re going to need to do a bit of fiddling with our design file.
These applique designs always have a dieline that stitches first so you know where to place your cutout bit of fabric. Since our fabric is underneath the design, we don’t need that dieline to stitch. I’ll show you a few ways of getting rid of it.
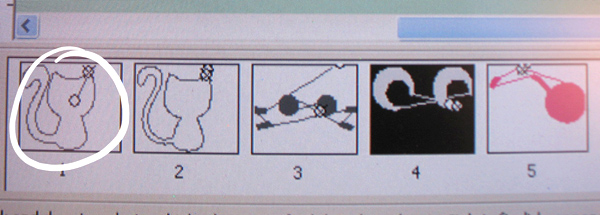
My cheap little Futura runs through a desktop computer, so I have to set my files up on the computer, instead of in the machine, like many fancier models do. In most instances, you should be able to see or find all the “stops” or steps your machine is going to take to stitch out the design. You can see here with the kitty that the first thing that stitches is a dieline, followed by a tackdown, and then all the rest of the elements. It’s that first step we want to eliminate.
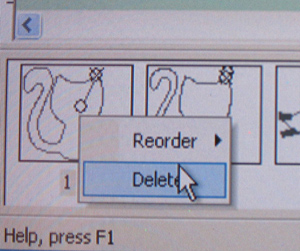
The simplest way is to simple delete that step, if your machine or software allows you to... Simply click or select the first step and hit delete.
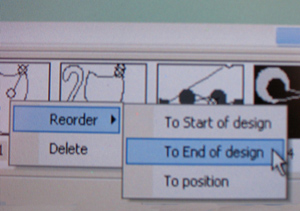
If you can’t delete it, the next option is to reorder the steps, moving the first step to the very end, and simply stop sewing before that step stitches out.
If you can’t find a way to get either of those to work, you can always run the first step without any thread, so it doesn’t actually stitch a dieline. It may leave little undesirable holes around your design, but depending on what you’re stitching it on it may not be noticeable. Take a gander at your instruction manual and play around with your software a bit. Usually, if my Futura is capable of it, most things can do it.
It should be mentioned that you can choose to stitch the first dieline and skip the second one instead. Using the first dieline will give you more room to snip out your shape because it’s a bit larger, but it’s a much less defined shape, so your kitty may not be as perfectly proportioned. It depends on how much space you feel you need in order to be able to cut out your design. With very small applique designs, you may choose to keep the first, larger dieline rather than the second.
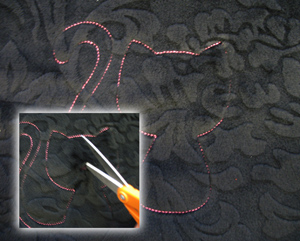
Stitch out the new first step of your kitty, the outline. This outline should have sewn your cover or fabric to the applique fabric beneath, and now all you need to do is reveal it! Grab your sharp pair of scissors...
Without un-hooping anything, verrry carefully lift up a bit of your fabric and poke a hole through just the top later. This will be your starting point to cut out the kitty shape. Be very careful not to cut through both layers of fabric!
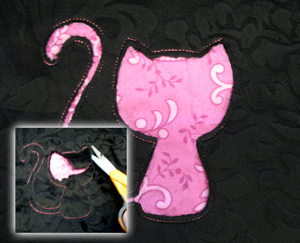
Cutting as close as possible to the dieline, snip away the top fabric to reveal your applique fabric underneath. A dull scissors is not going to make a very pretty kitty. You need a small pair of scissors with a decently sharp tip in order to get to all the fiddly bits, like the corners of the ears or the tail.
Carefully cut it away one bit at a time, cleaning up the edges as you go. My fabric was fuzzy, so I was all covered in black fuzz by the time I got my kitty tidied up. When you’re done trimming, you might want to go over your fabric with a lint roller to pick up any bits left behind. We don’t want them to get sewn into it in the next step....
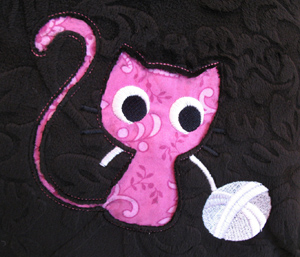
Once you’ve cut out your shape, stick it back under your machine and let the rest of your kitty details stitch out.
Ta da! Instant reverse applique! It’s a super cute peek-a-boo effect that you can get with any applique design, and it’s a fast new way to freshen up the applique designs you already have!
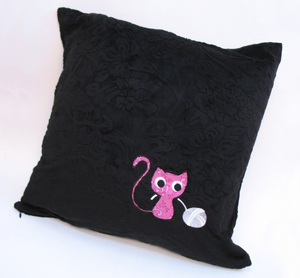
I’m now the proud owner of a new pretty kitty pillow cover, complete with hip new applique design. It’s a fast and simple and just different enough to grab some attention.
You can use different kinds of fabric to get all different kinds of results. Use fuzzy fabric to give your kitty a soft edge, or use vinyl cutouts to really make your design pop! It looks super cute on hoodies and bags, and extra crafty.
Have fun reinventing your applique designs!


