Add a three-dimensional look to your projects with embossed machine embroidery. These designs tamp down the fabric nap, and the negative space allows the design element to stand out for an eye-catching and textural look. These project instructions will show you how to tackle your own embossed machine embroidery project step by step.
The designs used in this tutorial include:
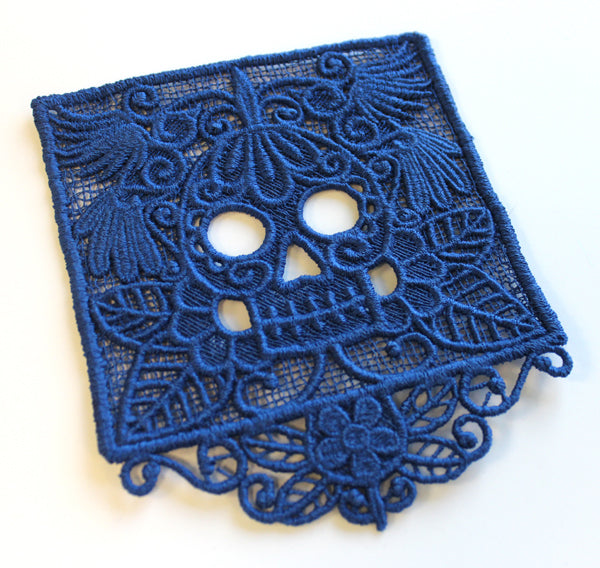
Freestanding lace can be one of the most dazzling things about machine embroidery. Stitch out a specially digitized lace design onto water-soluble stabilizer, then rinse the stabilizer away, leaving only the stitches in a beautiful, airy pattern. Lace designs can be pretty, they can be spooky, and they can be made into things -- ornaments, accessories, what-have-you. Urban Threads has lots of freestanding lace embroidery designs , and more are being added all the time.
Using the right materials and techniques can make a big difference in the quality of your finished lace. Read on to discover how to stitch freestanding lace designs, avoid common problems, and make your lacy designs look their best!

When you're stitching regular embroidery designs onto fabric, proper stabilizer, fabric, and hooping can all help prevent shifting and gapping . Freestanding lace is similar. If you've stitched a lace design, perhaps it's happened to you: a gap appears between the inner "netting" of the design and the satin stitch border, making the lace piece not so freestanding after all. The more stitches a lace design has, the more susceptible it is to this kind of separation.

First things first: thread. Look at the thread list for the design you're stitching to see if it calls for any particular kind of thread. Some of the freestanding lace designs on Urban Threads call for 30 to 50 weight cotton in order to stitch out properly; others call for the usual 40 weight rayon (but should also do fine in 30 to 50 weight cotton if you like). If it calls for cotton, though, do use cotton, in order to make sure the lace will hold together properly.
Wind a bobbin (or a couple, if you're gonna need 'em) in the same thread you're going to to use for your lace.

Some designs, like this Captured Star design , require a mixture of cotton thread with metallic threads. If you are stiching a lace design with two different types or colors of thread, each color or thread type needs its own matching bobbin. Make sure to follow the thread list for the design, noting the recommended thread type.
Thread lists can be found on each product's page, or in your order history, next to each design.

Next up, stabilizer. You'll get the best results if you use a heavy duty water-soluble stabilizer. Two of our favorites are Vilene, which is is white and fibrous, and Sulky Ultra Solvy, which feels like a thick sheet plastic.

Time for hooping. Grab your machine's embroidery hoop -- the smallest that will work with the design you want to stitch.
Only stitch one lace piece per hooping. We know, that stabilizer's not cheap. But a piece of water-soluble stabilizer that's already had one design stitched in it is not going to support the next one as well as it otherwise would. It's science.

While we're at it, needles: We recommend a 75/11 sharp sewing needle for freestanding lace. The sharp tip and relatively narrow shaft will help minimize perforations in the stabilizer.

Got all your supplies? Great. On to one of the most important parts: hooping the stabilzer.
Cut a piece of water-solube stabilizer and hoop it tightly so it's taut like a drum, but not stretched or distorted. If it makes a little thuddy drum noise when you (gently!) tap on it, that's great. This is really important, so take the time to get it right.
Once you've got a nice quality heavy-duty water-soluble stabilizer, hooping firmly is probably the most important factor in making sure your lace stitches out well. The more tension you can get here (without way stretching the stabilizer, which would damage it, of course), the sturdier a foundation it will be.

Showtime! Thread your machine (don't forget the matching bobbin thread), load up the embroidery design file, attach the hoop, and start it a-stitchin'.
Change colors (top and bottom) if the design calls for it.

Once the design is done stitching, unhoop the stabilizer.
Cut or gently tear away the excess water-soluble stabilizer around the edges of the design, and soak/rinse away the stabilizer according to the package directions. Allow the lace to dry.

Optional: Depending on the design/project you're working with, you might want the lace to be a bit sturdier. If so, you can spray it with heavy starch, mold it into the shape you want, and allow it to dry.

Your lace is done! Depending on your design/project, you might now want to stick on crystals, feathers, or other embellishments. Or not. It's up to you.
Loving lace? Check out all the freestanding lace embroidery designs available on Urban Threads, and see some of the amazing things you can make out of 'em in these tutorials . Enjoy!


