We get it, we really do. The thing about stabilizing your embroidery is that you tend to end up with stabilizer on the back of your embroidery. Sometimes it's no big deal, but sometimes, like when it's on a garment, it can be kind of annoying.
The temptation can be to understabilize, using a tearaway or even water-soluble stabilizer on a project that would be better suited to a cutaway. But wait! There are so! Many! Options! Read on to discover lots of nifty tricks to minimize and disguise the stabilizer on the back of your embroidery.
Get close to the action -- check out the How to Hide Stabilizer video to see how it's done!
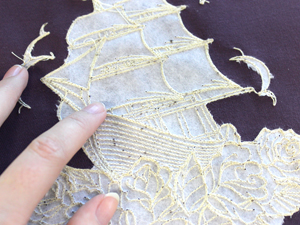
Time for Tearaway?
Tearaway stabilizer's appeal is in the clean finish it can leave on the back of your embroidery. But because it's meant to tear easily, it breaks down a bit during stitching -- that's why we generally recommend cutaway for best support.
When can you get away with tearaway? It's best for stitching light, open designs (think redwork) on fabrics that are sturdy enough to support them without a whole lot of help. Read more about choosing the best stabilizer for your project.
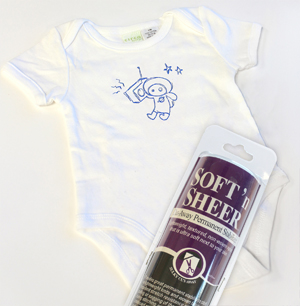
Sheer Magic
Ruled out tearaway? OK, you're using a cutaway stabilizer. There's still lots we can do to make this a smooth experience!
If your main concern is scratchiness (such as with a T-shirt), and your design's on the lighter side, consider a sheer mesh cutaway stabilizer such as Sulky Soft 'n' Sheer or Floriani No Show Mesh. This stuff is awesome -- it provides good stability for something so light, and it's nice and soft to the touch.
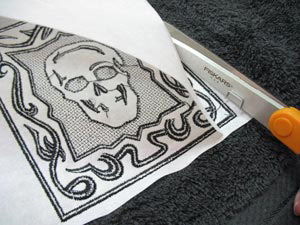
Snip It Good
For some projects, you may be able to just trim away the excess cutaway stabilizer very neatly and close to the embroidery, and call it good. Snip carefully to avoid cutting either your fabric or your embroidery.
Still bothered by that pesky exposed stabilizer? Lots more solutions ahead...
Under Cover
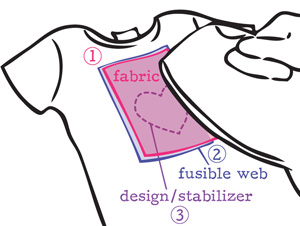
Hoop up your fabric with cutaway stabilizer, embroider the design, and cut away the excess stabilizer. Then cut a piece of soft fabric (flannel or scrap T-shirt knit works well) and a piece of fusible web, a bit bigger than the are you just embroidered. Following the package instructions, use an iron to adhere the fabric over the back of the embroidery like so:
- Backing fabric on top
- Fusible web in the middle
- Back of embroidered item on bottom
Patch It Up
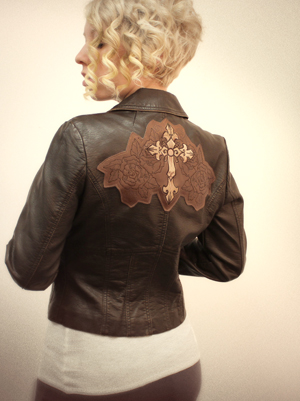
Embroider your design onto a piece of fabric with appropriate stabilizer, cut out around the design, and sew the whole business onto the item you actually want the design on.
If you choose a non-fraying fabric (as we did with the embroidered faux leather stitched onto this jacket) then you won't have to worry about the edges unraveling. If fraying is a concern with the fabric you're using, stick the patch onto the item with fusible web, then zigzag around the very edge to keep it in place.
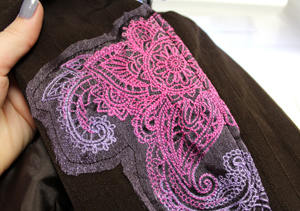
Ghost Patch
This one's basically the same as the above, but sneakier! Stitch your design on organza hooped with heavy duty water-soluble stabilizer. Rinse away the stabilizer, let it dry, and cut out the shape with about 1/4" of organza around the edges of the design. Pin the embroidered organza onto your item (or use a bit of temporary spray adhesive to stick it in place) and machine-sew around the edges. This'll certainly suit some projects better than others, but it can bring a pretty ethereal look to your designs.
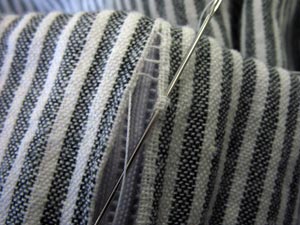
Cross the Lining
Embroidering a jacket, skirt, tote, etc. that has a lining? Perfect! Just use a seamripper to carefully open up a seam where the embroidery will go, then embroider only the outer layer, with some nice sturdy stabilizer. When you're all done, slipstitch the lining closed again. Good as new!
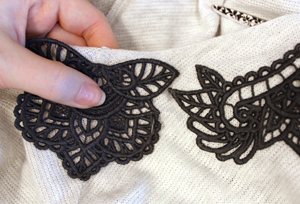
Space for Lace
And finally ... this one technically doesn't count as hiding the stabilizer, because there isn't any. But! Stitch a freestanding lace design onto heavy water-soluble stabilizer, and rinse to leave only the lace. Then hand- or machine-sew the lace piece onto clothing, purses, decor, what-have-you. This lacy neckline accent is designed to work like this, but really you can do it with any freestanding lace design. So pretty!
And there you have it! Plenty of ways to stabilize properly and still have a nice smooth finish on the back of your embroidery. Now you've got no excuses -- go forth and stitch!


