The thing about machine embroidery is that it looks all automatic. Just push the button and away it goes. Piece of cake, right? HA. There's technique, skill, proper materials, and a fair amount of voodoo involved.
Kidding about the voodoo. Kind of.
Point being, if you want your embroidery to look awesome, you gotta get the foundations right. There are lots of different decisions you can make depending on what fabric and design you're using, but in general, here's how we recommend that you stitch:
Designs Used
Firstly, you'll need a thing to embroider on. What kind of things? Towels, garments, plain ol' fabric that you will later sew into something fancy ... there are tons of possibilities.
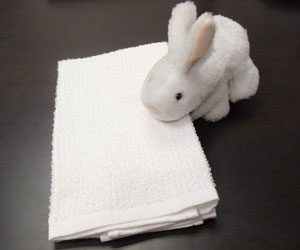
Bunny wants to embroider a nifty new towel for the kitchen, so that's what we're gonna do.
Make sure whatever you want to embroider has enough flat surface area that it can be hooped. More on hooping later.

One thing to keep in mind is how sturdy the fabric is. Lightweight fabrics, like T-shirts and tea towels, might be better suited to light, open designs than heavy, dense embroidery.
Texture matters too -- if you stitch a light, sketchy running stitch design onto a luxurious bath towel, the stitches are likely to just sink into the loopy terrycloth and pretty much disappear.
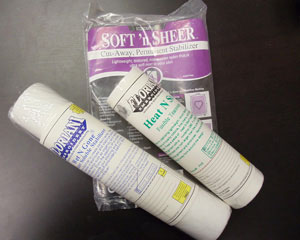
Now, I'm sure your embroiderable thing is really nifty, but it's going to need some help to make the design you're about to stick on it look truly awesome. That's where stabilizer comes in.
There are lots of kinds of stabilizer on the market -- cutaway, tearaway, water-soluble, heat-away, and so on, in weights from breezy to super-duper-extra sturdy.
Which kind of stabilizer should you use? Probably cutaway. Your designs will line up better, your fabric will pucker less, and your embroidery will look better through inevitable wash and wear -- it's a fact of physics.
There are situations when tearaway stabilizer is a must -- super-thin floursack towels, for example, where you can see the cutaway through the fabric. But then you'd darn well better be using a very light design.

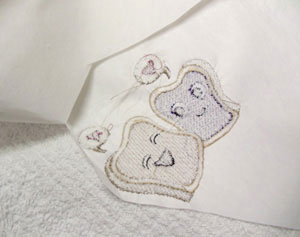
Speaking of which, pick out a design that makes you happy, suits your fabric, and fits within your machine's embroidery area. This peanut butter and jelly design will do nicely.
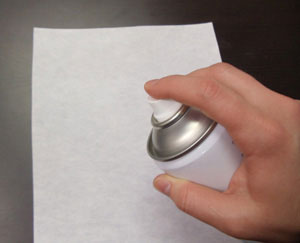
One more thing: get yourself some temporary spray adhesive. Sticking your stabilizer to the back of your fabric will give the whole thing even more stability. We're all about that here.
Cut a piece of stabilizer (cutaway cutaway cutaway!) that's a bit bigger than whichever one of your machine's hoops works with your design, and spray it generously with temporary spray adhesive.
Our fave temporary spray adhesive is Gunold KK100, which can be hard to find in stores, so we order it online.
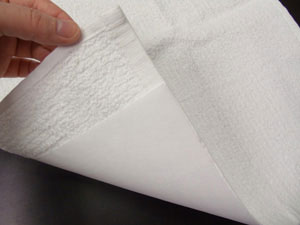
Now quick, before the adhesive dries, smooth the fabric/item you're about to embroider on top of the sticky stabilizer.
I'm also using a piece of water-soluble stabilizer as a topping (which you can vaguely see in the photo below). This holds down the fuzzies on the terrycloth so that they won't poke up through the stitching. That wouldn't be pretty. You don't need a topping with fabrics that have a flat surface.
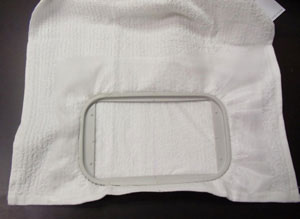
Now it's time to hoop your fabric and stabilizer. You'll want to do this very firmly -- taut like a drum, but not stretched -- and tighten the hoop up nice and snug so that fabric isn't going anywhere. Fabric that's hooped too loosely is a common cause of funky-looking finished embroidery, so take the time to get this right.

Load your design into your embroidery machine. How you do this will depend on the make and model of your machine -- consult your machine's manual or your embroidery machine dealer if you need help figuring it out.
Also, print out the design's thread list -- there's one for every machine embroidery design on the site. (To find it, click on the "thread list" link right below the picture on the page for that design, or after you've bought it, click on its little image in your order history.) If you're like bunny, you will proceed to completely ignore it and use whatever colors you like. But it's handy to have around for reference.
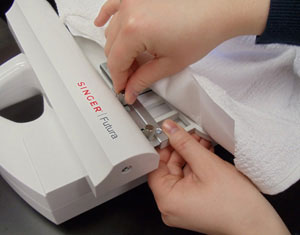
Pop in a bobbin of thread, and thread your machine with the first thread color of the design (either what the thread list says, or anything else you want). Attach the hoop to the embroidery machine. Again, consult your manual/dealer if you need help figuring out how to do any of this.
Once everything is in place, set your machine a-stitchin'!

Your machine will tell you when it's time to thread in the next color. Do what your robot overlords tell you to do.
Repeat until the design is done. Hooray! Take the hoop off the machine and un-hoop the fabric.
There's still the matter of the stabilizer. If you're using cutaway, because cutaway is awesome, then take out a pair of scissors and cut away the excess. You can do this pretty close -- just make sure not to cut the fabric or the stitching.
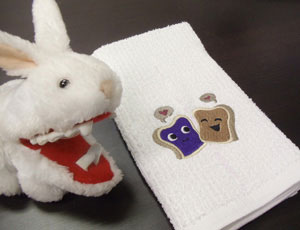
Ta daaaa! You're done! Your splendid new creation is ready to go out into the world.


