Freestanding machine embroidered lace by itself is a pretty cool concept. The 3D quality of the lace allows you to make all kinds of things, from jewelry to ornaments, but did you know it can get even cooler? Elevate your regular lace to a shining sculptural accent with a metallic dip of paint. Once it's dry the lace turns into a more solid, shining version of its former glory, perfect for upgrading your lace accents to a new level of chic.
Designs Used
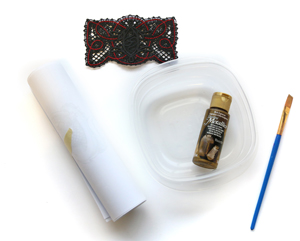
So how do you make metallic lace? It's easier than you think! Pretty much any lace can be transformed, but here we'll show you how to turn a large lace border into a metallic lace cuff. All you need is:
- A freestanding lace stitched piece. For tips on stitching lace, click here.
- Acrylic metallic paint
- Tupperware or other receptacle to hold the paint
- Paintbrush
- Rolled paper to help shape your lace as it dries. (For making cuffs and other rounded lace)
It's key here to use something like acrylic paint, instead of spray paint, as spray paint will just absorb into the cotton thread and not give you that dipped effect.
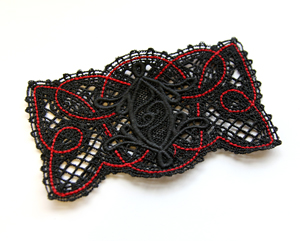
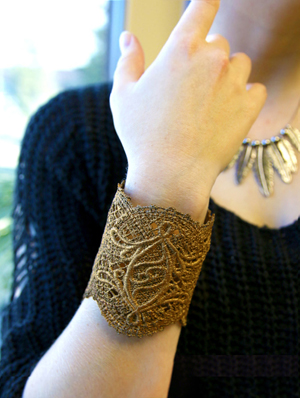
So we're starting here with a big piece of cotton lace. You can also use regular rayon stitched lace. This 5"x7" size is perfect for making a wrist cuff, but you can also dip lace to create necklaces, earrings, and anything you want to have that more dipped metal effect.
Remember though, the point of the dipped metallic lace is to make it look more like metal, so the lace will become much stiffer when this technique is finished. This is ideal for cuffs and earrings but may not work well for softer items like chokers.
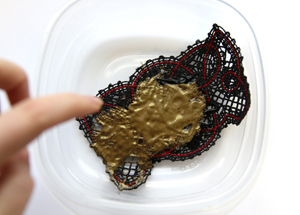
Start by putting your lace piece in your paint receptacle. In this case, I used a piece of Tupperware. Pour a generous amount of paint directly onto your lace.
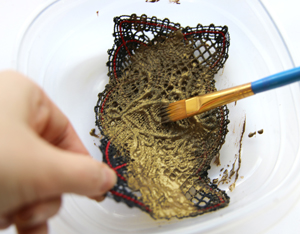
Now using your brush, push the paint around so it evenly covers all of your lace. Make sure it doesn't gunk up the open areas too much, so keep moving paint around to keep those areas open. You want a thick layer, not a goopy layer.
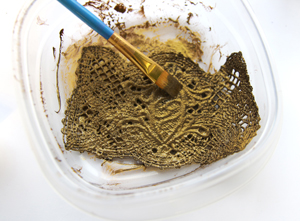
As you move your paint around, flip your lace over and get both sides. Generously coat everything evenly.
Not only will getting both sides look better, it will also allow the lace to dry with a more even stiffness.
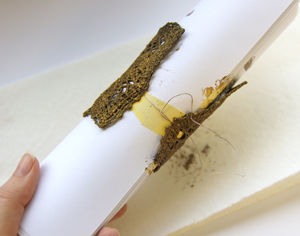
When you're ready to set your lace to dry, wrap up a few pieces of paper into a tube that's roughly the same thickness as your wrist.
This is of course if you're setting this to dry as a cuff. You don't have to do this, but remember the lace will dry in whatever shape you leave it in.
If you want your cuff to stay properly wrapped, I recommend also tying it with a small piece of string so it stays firm as it dries.
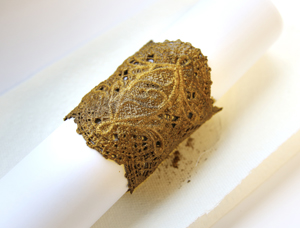
Once your lace is wrapped and tied, let it sit overnight to fully dry.
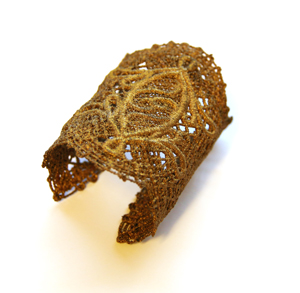
When your lace is fully dry, remove it from the paper and admire your new shining creation! The lace, now metallic and shimmering, has a more sculptural quality folded into an elegant cuff. If it seems a little light still, coat it again and repeat the process. Each time it will look more metal!
Wear it with pride, and let people try and guess that you actually made that glimmering creation, using only your embroidery machine and paint!


