Puff foam is a gorgeous way to add depth and texture to your embroidery. The raised area gives a three-dimensional look to the design. Follow along and we'll show you how to take your embroidery to the next level!
Supplies & Materials:
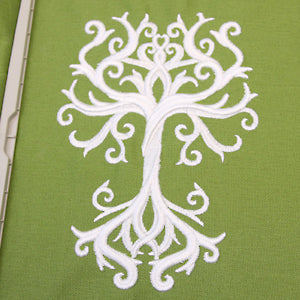
- Embroidery design specially created for use with puff foam - we're stitching the Enchanted Tree (Puff Foam) design
- Fabric to embroider
- Temporary spray adhesive
- 2-3 mm puff foam
- Embroidery thread
- Medium weight cutaway stabilizer
The designs used in this tutorial include:
.

Puff foam is sold specially for embroidery; craft foam will work as well. To minimize show-through, choose a sheet of foam that's close in color to your thread.

Spray a piece of medium weight cutaway stabilizer with temporary spray adhesive, then smooth the fabric on top. Hoop the fabric and stabilizer taut together

Begin stitching the design. First the background detail will sew -- stitch this as usual, without puff foam.

Before stitching the "puff detail" section, lay the puff foam in the hoop, over the design.

Continue embroidering the design. The needle will perforate the foam while stitching

After the foam section has finished stitching, remove the foam. In this example, the design is complete; there are no more sections to embroider.

Remove any remaining bits of foam with tweezers.

You can also hide the foam by pushing it into the satin stitch with the point of a small pair of scissors.

Your design embroidery is complete!
It's OK to wash you project as you would normally, but air dry. Avoid dry cleaning, as the chemicals can make the foam dissolve.
Puff foam is a beautiful way to add dimension and interest to your creations!
