Make your own 3D stuffies for Christmas ornaments, gift toppers, and more with specialized in-the-hoop designs and our helpful tutorial.
Designs Used
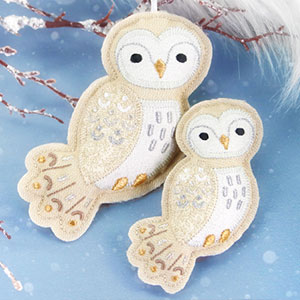
Enchanting embroidery designs come to life as sweet 3D stuffies! Stitch these specially created designs completely in-the-hoop, then stuff and hand-stitch closed. Create adorable little plush toys, add a loop to make a hanging ornament, fill with fragrant herbs to make a sachet ... the possibilities are endless. Follow along below to create your own!
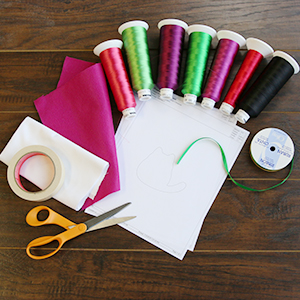
To create your raw edge stuffie, you'll need:
- Raw edge stuffie embroidery design
- Printed dieline
- 40 wt. rayon thread for embroidery
- Small pieces of felt for the front and back of the stuffie
- Small piece of cotton for applique pieces, if applicable
- Medium weight tear-away stabilizer
- Temporary spray adhesive (such as Gunold KK100)
- 1/4" to 3/4" ribbon for hanging (optional)
- Polyester fiber fill
- Masking tape
- Needle for hand sewing
- Scissors
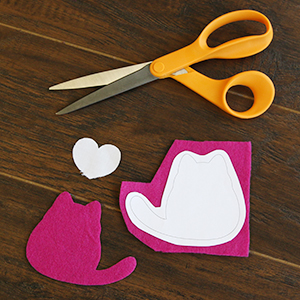
First, print the dieline files that comes with your design. This file will always have "DL" in the name. (Click here for instructions on how to print or stitch dieline templates.)
Spray the back side of the dieline templates with temporary spray adhesive, and smooth them onto the felt and fabric. Cut out the shapes and remove the paper.
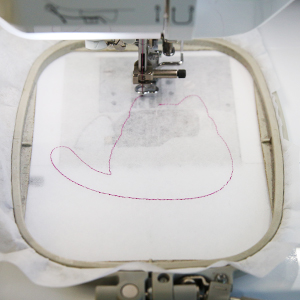
Once all of your pieces have been cut, hoop a piece of tearaway stabilizer taut. Use a size 11 or 75/11 sharp sewing needle rather than an embroidery needle (a sharp sewing needle has a smaller, finer point than an embroidery needle, so that it will make smaller perforations in the stabilizer).Attach the hoop to the embroidery machine, and load the full embroidery design file into the machine. The first thing to stitch is a dieline that shows were to place the front felt piece.
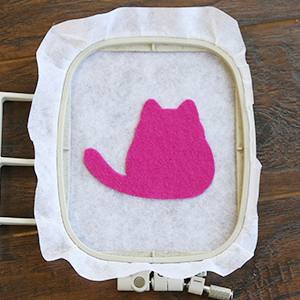
Remove the hoop from the machine, but do not unhoop the stabilizer. Spray the back side of the front fabric piece with temporary spray adhesive, and place the fabric right inside the dieline.
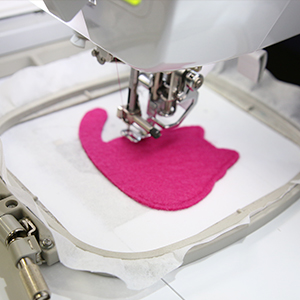
Attach the hoop back onto the machine and continue embroidering the design. The next step will tack down the fabric.

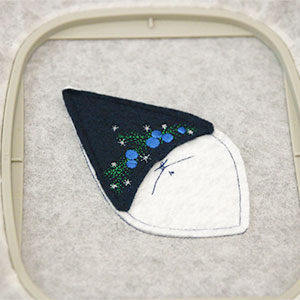
If your design has applique, the applique placement dieline will sew out next. If your design does not have applique, you may skip this step.
Once this has sewn, remove the hoop from the machine, but do not unhoop the stabilizer. Spray the backside of the applique piece with temporary spray adhesive, and place it right inside the dieline. Attach the hoop back onto the machine and continue stitching the design. The applique tackdown and details will be the next to sew out.
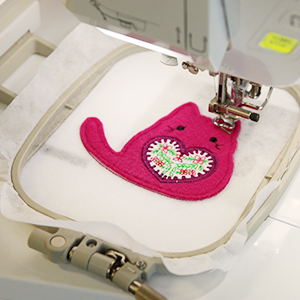
Some ornaments have multiple applique pieces. If your design does not, skip this step. If the design does have multiple applique pieces, follow your color sheet carefully.
Sew each placement dieline, and adhere each applique piece inside of the correct dieline shape using temporary adhesive. Then sew the tackdown, and repeat until all the applique pieces sewn down.
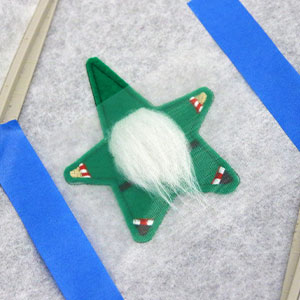
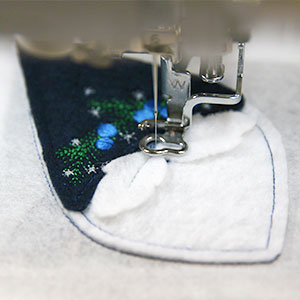
Some ornaments have an applique piece that is a heavily textured fabric such as faux fur or velvet. If your design does not use textured fabric, skip this step. If your design does use a textured fabric, sew the dieline, and place the fabric piece using temporary spray adhesive like you would a normal applique piece. To prevent the embroidery from gapping or getting lost in the texture of the fabric, lay a piece of light weight water-soluble stabilizer over the applique piece before sewing the tackdown, and tape the stabilizer down so it cannot get caught on the hoop. For best results, leave this stabilizer in place until all of the embroidery has completely finished. Then simply tear it off once the design is done sewing out.
Some Ornaments have 3D applique pieces which will have a "guideline" step instead of a "dieline". If your design does not, skip this step and the next step as well. If our design does have an applique piece, follow the color change sheet and embroider the guideline. The guideline will be a unique set of lines that indicate where the edges and center of the fabric piece should be placed.
Spray the wrong side of the fabric piece with temporary adhesive and place the fabric piece over the sewn guidelines. Then place the hoop back on the machine, and sew the tackdown for this piece.
Follow your color change sheet and continue to stitch the remaining details. Watch for the step that says "back piece tack down". When you reach this step, remove the hoop from the machine once again, but do not unhoop the stabilizer.
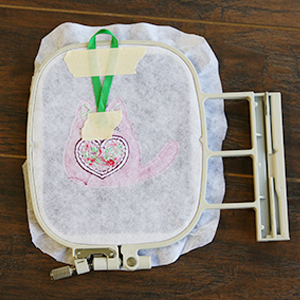
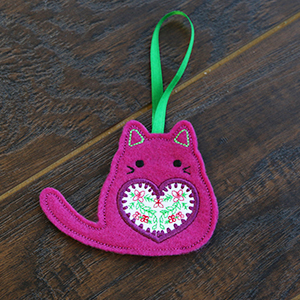
If you would like to make your stuffie into a hanging ornament, cut a 7-9" length of ribbon, and bring the ends of the ribbon together to form a loop.
Use a small piece of masking tape to secure the ends of the loop to the stabilizer, being careful to place it just below the front piece dieline so that it remains hidden when your project is complete. Place another piece of masking tape toward the edge of the hoop to keep the ribbon from shifting.
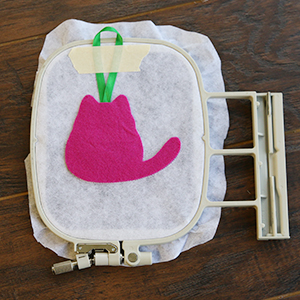
Next, spray the back felt piece with temporary spray adhesive, and place the felt right inside the dieline.
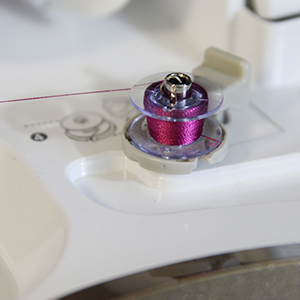
Since both sides of the stuffie will be visible when complete, wind a bobbin with the same color used in the needle.
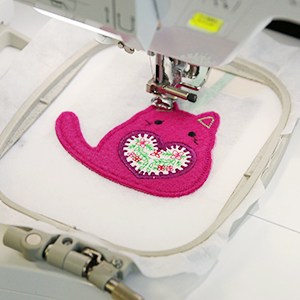
Attach the hoop to the machine and continue embroidering the design. A tackdown stitch will sew next, binding the layers together, but leaving a small opening at the bottom of the design for stuffing.
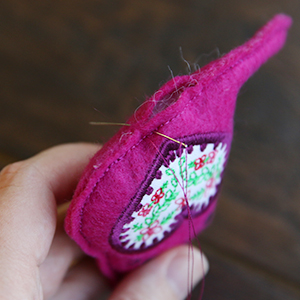
After the design is finished sewing, remove the hoop from the machine. Unhoop the stabilizer, remove the tape, and gently tear the stabilizer away from the design. The outline stitches will be removed with the stabilizer.
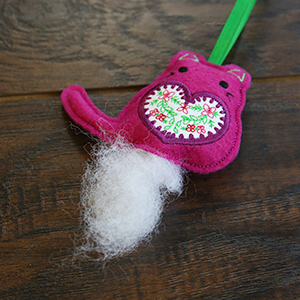
Using the 1" opening at the bottom of the design, stuff your stuffie with polyester fiber fill. If the design has smaller areas, a narrow tool may be useful for stuffing.
Finally, hand stitch the stuffie closed, using the same color thread as was used for the outline. Your in-the-hoop stuffie is now ready to brighten your decor!


