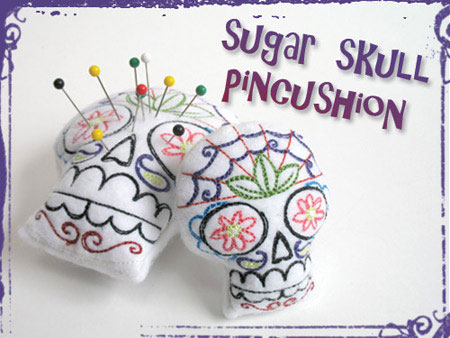
What's sweeter than a sugar skull? A sugar skull pincushion, of course!
Designs Used
To make your little skull pincushion (or other in-the-hoop stitch-and-turn stuffie), you're going to need some felt, tearaway stabilizer, temporary spray adhesive, stuffing, and a needle and thread. Got it? Follow along with me...
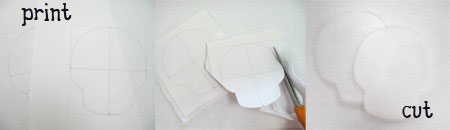
First we have to make the templates. If you have embroidery software like me, print out two copies of your skull dieline, back them with some felt, and cut them out. If you don't have software to print them out, load up the dieline file, and stitch it onto a piece of white felt, then cut the felt out along the stitching line.
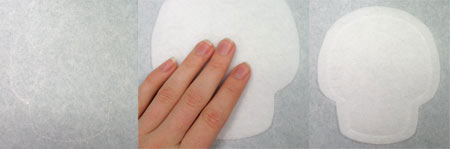
Next, hoop up some tearaway stabilizer, and load up your design. The first thing that stitches is your dieline. Spray some adhesive on the back of one felt skully, and place it carefully inside the line. Set your machine to stitching again, and it'll sew a tackdown stitch.
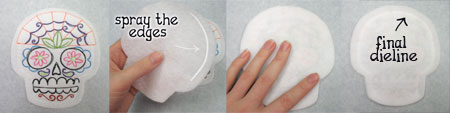
Next, all the fun colorful skully stuff stitches. After that's done, grab your last felt skully, and spray just around the edges, so it doesn't stick to itself when we need to turn it right side out. Place your skull on top of the embroidered one, and sew the last dieline. You'll notice the last dieline only stitches around the sides and top, leaving the bottom open so we can turn it right side out.
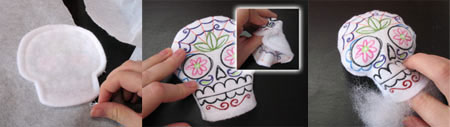
Once your skull is done stitching, tear it free of the stabilizer, and turn it right side out. Grab your stuffing and go to town!

Finally, take your needle and thread, and fold in the raw edge and sew it neatly shut. Grab your pins, and put your skully to use! Stitch the little one onto a wrist strap and make the spookiest portable pincushion ever! Or just use your skullies as fun Halloween-y decor.


