We may spend lots of effort trying to let the tension go from our minds and shoulders ... but in embroidery, a little tension is a good thing!
When thread tension is in balance (and designs are properly stabilized) embroidery can run smoothly, with beautiful results. When tension is off, you might see clumps of thread on the underside of the fabric, bobbin thread showing on the front of the design, looping threads, or thread breaks. Read on to discover how to keep your thread tension in perfect balance!
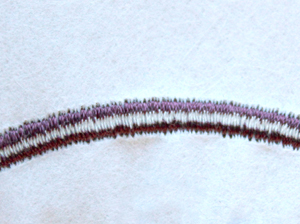
First off, what does proper tension look like?
A good way to check your tension is to stitch a design with satin stitch columns. Hoop up a piece of quilters cotton or similar fabric and medium weight cutaway stabilizer, adhered together with temporary spray adhesive, and stitch out the design.
Then take a look at the back of the embroidery. If tension is good, the bobbin thread should take up 1/3 to 1/2 of the back of a satin stitch column (on average -- it's normal for this to vary a bit within a design).
Thread tension isn't programmed into an embroidery design -- it's a result of how the machine physically handles the thread.
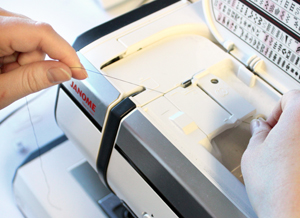
If you've got tension troubles, the first thing you'll want to do is re-thread everything. Take the top and bobbin thread all the way out of the machine, then thread each into the machine again. Keep the presser foot up as you do this, and pay attention to make sure the thread is sitting properly all the way along the thread path, caught between all tension discs. Give a tug on each thread -- you should feel a little bit of resistance, but the thread should move.
Related: when removing thread from the machine, always cut the thread and pull it forward through the thread path, not backwards.
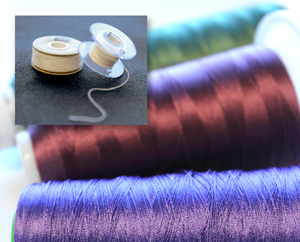
Check your thread! Thread type can make a difference in the stitched results. Polyester thread is stretchy, which can sometimes lead to looping. If you're seeing tension issues, try switching to rayon thread to see if that makes a difference.
Also, make sure the bobbin is wound evenly, with proper tension. A bobbin that's loosely wound can contribute to tension issues. If your machine calls for prewound bobbins, make sure you're using those.
You'll also want to make sure the thread path is clean. A vacuum cleaner can help remove dust and thread fuzz from the machine, especially the bobbin housing. Some people recommend threading the machine with unflavored dental floss and pulling it through to clean the thread path. If there's any adhesive buildup on the machine, you may want to remove it using rubbing alcohol, for the smoothest stitching.

For general good embroidery behavior, it's also important to make sure your design, fabric, and stabilizer are well suited to each other. If a design is improperly stabilized, it can make any tension issues in the stitchout that much worse -- in general, a medium weight cutaway stabilizer will provide better support than a tearaway. See this tutorial for a guide to matching designs, fabric, and stabilizer.
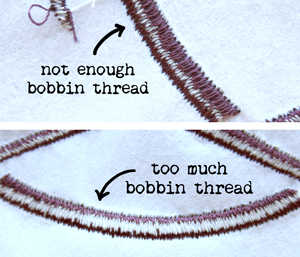
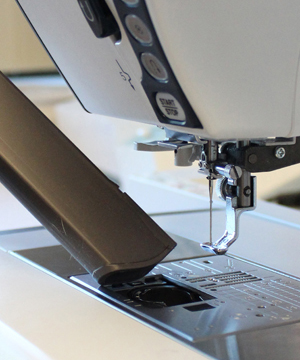
Thread running smoothly through the machine, design properly stabilized, and you're still seeing tension issues? It's time to adjust the machine's thread tension. Relax! You can do this. Remember the tension test above, where the bobbin thread should take up 1/3 to 1/2 of the back of a satin stitch column?
If you're not seeing enough bobbin thread, you'll want to increase the top tension and/or decrease the bobbin tension.
If you're seeing too much bobbin thread, you'll want to decrease the top tension and/or increase the bobbin tension.
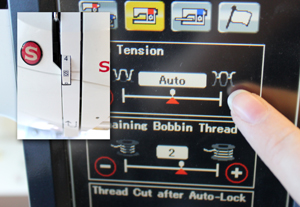
Adjusting the top thread tension is simple. On some machines this will be a dial; on fancier machines it may be a digital menu. Play with this setting and notice how it affects your stitched results.
In most cases, adjusting just the top thread tension should be enough to fix tension issues in the stitchout. If you're still not seeing the results you'd like, it may be time to...
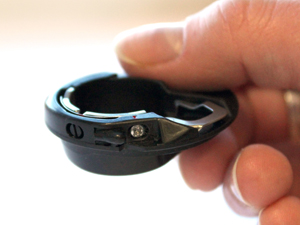
...adjust the bobbin tension! While this is less frequently adjusted than the top tension, it can help if adjusting the top tension alone hasn't fixed the issues. This is a really great time to pull out your embroidery machine's manual, or consult your embroidery machine dealer if you have questions.
In short, there should be a little screw on the bobbin casing that you can turn to adjust the tension -- righty tighty, lefty loosey. (Our machine actually came with two bobbin cases set at different tensions, one for regular sewing and one for embroidery!) If the above steps have failed to resolve the issue, you may want to experiment with this and test-stitch to see the effects.
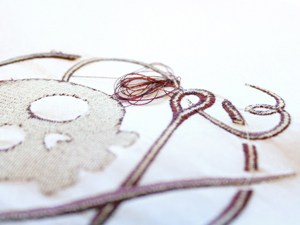
Back to thread nesting! Thread nests can be a tricky thing. In many cases, if you're seeing clumps of thread on the back of the embroidery, increasing the top tension slightly should help. If that doesn't work, try cleaning the thread path as described above to make sure the tension discs will hold the thread properly.
If you've gone through all these steps and you're still seeing thread nests, contact your friendly local sewing machine technician. If the machine isn't keeping the thread within the thread path during stitching, a professional can help sort out the issue.
In most cases, though, a small tension adjustment should solve the problem, and you'll be back to sewing stress-free in no time!


