Karline here. This week, we're making patches!
Among the many rewarding things to make with your embroidery machine, patches have to be right up there on the list. They’re quick and slick to stitch. Patches are great gifts for embroidery-machine-less friends. They let you put your favorite designs on un-hoopable things. And because they’re so portable and versatile, patches are a great way to earn an extra buck or two at craft fairs.
Designs Used
Supplies Needed:
- Embroidery design for your patch
- Patch outline design
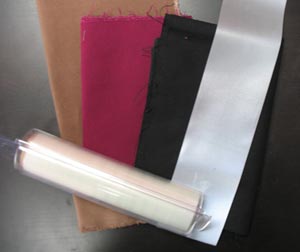
- Fabric for patch background
- Heavy water soluble stabilizer such as Sulky Ultra Solvy
- Cutaway stabilizer
- Embroidery software (optional)
- Patch glue, or needle and thread
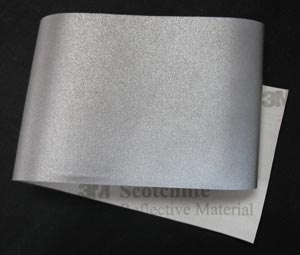
Every patch will have a piece of fabric as the base. For some of my patches, I’m using this neat-o reflective fabric (3M Scotchlite). The stuff is available in widths up to 6”. I ordered my 3" wide reflective fabric; you can also find it in widths up to 4” right and in widths up to 6". (Update: and up to 8".) In addition to looking flashy and cool, it’s great for keeping nighttime wanderers safe. Stick a reflective patch on your kid’s Halloween costume, on your favorite college student who walks everywhere, or on joggers.
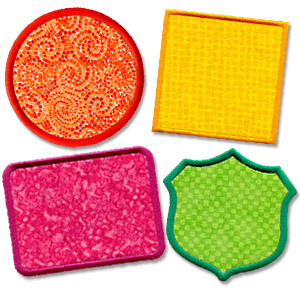
Pay close attention to the dimensions of the patch borders and the designs you want to use with them, to make sure they’ll play nice with each other.
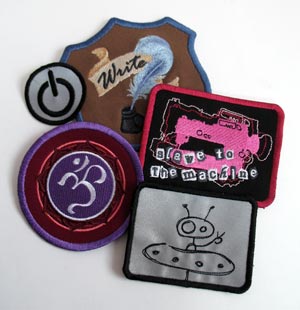
In general, you’ll want the dimensions of your border design to be at least ¾” to 1” bigger than the dimensions of the design you want to put on the patch. The shield will require more breathing room than the circle, square, and rectangle, because of its irregular shapes.
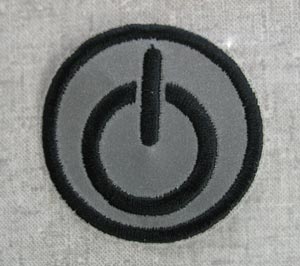
If you have a 4-inch hoop (which is actually more like 3.85”), many of the small designs on Urban Threads will fill out one or both of the maximum dimensions of your embroidery field – 3.85” x 3.85” and 3.85” x 2.75” are common design sizes. Which means there won’t be much room around the designs to add a patch border, unless you finesse things a little. While we officially recommend against resizing designs, stitchers often have success resizing them 5-10%. If your machine or software has this capability, you might give it a try and a test-sew with a UT design you already have, and see how you like the results. In many cases, though, this won’t be enough of a change to make it fit. If you have editing software, another option is to delete parts of the design to create a smaller one. Or, if you’re really unorthodox (and that’s why you’re here, right?), you might do like I did with the alien patch pictured above and run a light, scribbly design right off the edge. These patch borders will work well for this size range.
If you have a bigger hoop, this won’t be an issue, and you can use designs in the 3.85” x 3.85” and 3.85” x 2.75” range (and larger) on patches without resizing anything. These borders are likely to work well for you.
OK, here’s the choose-your-own-adventure part of the project. If you’re using embroidery software, keep reading for The High Tech Way. If you’re not, skip to The Low Tech Way below.
The High Tech Way
These instructions assume that you have a) embroidery software that can merge designs and rearrange the sewing sequence, and b) basic familiarity with how to use the software to do these things. I’ll be using Embird.
Open the patch border design you want to use, and go into Editor mode.
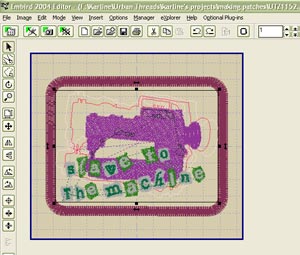
Merge the design you want to use on the patch with the border (In Embird, it’s File -> Merge).
If you need to resize the inner design at all, now’s the time to do it. Remember, we don’t officially recommend resizing designs, but stitchers often find they have success changing the size no more than 5-10%. More than that and things start to get funky.
Now we need to rearrange the sewing sequence so that the elements sew in the right order.
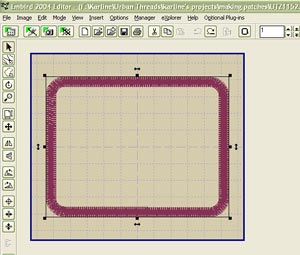
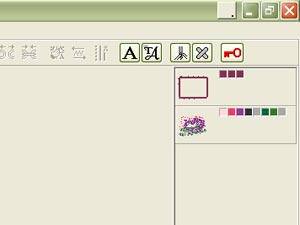
See these little icons for each design in the upper right hand corner of the screen? Right-click on the color boxes near the patch border design (not the icon for the design) and choose “Separate All Colors.”
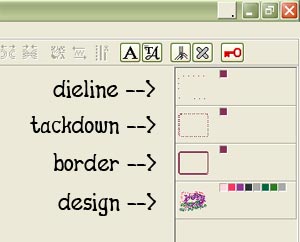
You should now be looking at this. The top rectangle is the dieline, the middle one is the tackdown, and the bottom one is the satin stitch border.
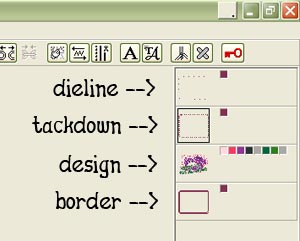
Drag and drop the elements so they’re in this order:
Dieline
Tackdown
Design on the patch
Satin stitch border
Click the menu option at the top to go into Manager mode. This will prompt you to save your patch as one combined file. That’s it – your patch design is all set to transfer to your machine!
Spray a piece of cutaway stabilizer with temporary spray adhesive, and smooth your patch fabric on top.
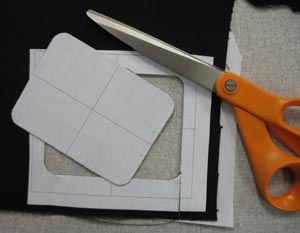
Cut out your patch background fabric. There are a couple of different ways to accomplish this: You can print the dieline from your embroidery software, use temporary spray adhesive to affix it to your fabric, and cut out along the line. Or you can hoop up the fabric, load the dieline file (the one whose filename ends with DL) into your machine, stitch it on the fabric, and then cut out right on the stitching line. As always, precision is key.
Load the patch design into your machine and hoop up a piece of heavy water-soluble stabilizer. The dieline will stitch first. Once it does, use temporary spray adhesive to stick your stabilized fabric inside the lines. Then a zigzag tackdown will stitch, followed by the inner design, and finally the satin stitch border. For the border steps, use the same color thread in the bobbin as on top.

Voila, you’ve made a patch! Skip to Finishing Up.
The Low Tech Way
Spray a piece of cutaway stabilizer with temporary spray adhesive, and smooth your patch fabric on top. Hoop the whole thing up.
(Reflective fabric + camera flash = fun.)
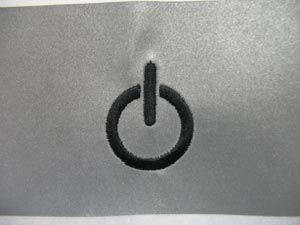
Embroider the design you want on your patch. Un-hoop the fabric.
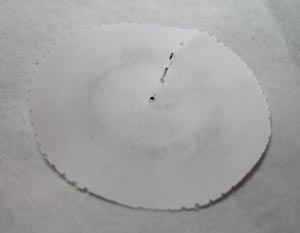
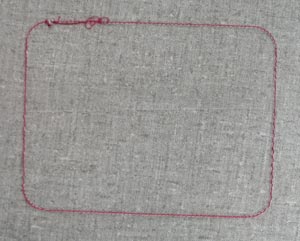
Make a template by hooping up a piece of paper (yup, really) and embroidering the dieline (the file whose name ends with DL). If your machine will let you, you can skip the thread and just let the needle perforate the fabric. Cut out right along the stitching line.
Use temporary spray adhesive to stick the template on the back of your embroidered fabric, lining it up so the embroidery is exactly where you want it within the shape. Cut out along the edge.

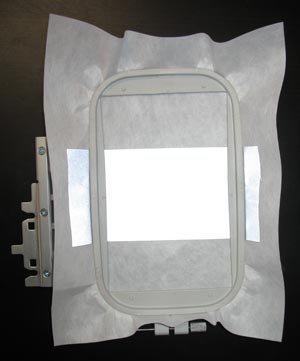
Thread a bobbin with the same color thread as you’re using for the top of the border and load it into your machine. Hoop up a piece of heavy water-soluble stabilizer and load the patch border design into your machine.
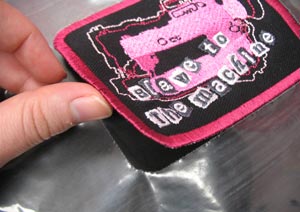
First the dieline will stitch, then you’ll stick on your pre-embroidered fabric using some temporary spray adhesive. Then the tackdown will stitch, then the satin stitch border.
Voila, you’ve made a patch! Keep reading to Finish Up.
Finishing U
Tear the water-soluble stabilizer away from the edges of the patch.
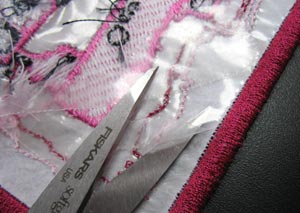
You can use a small pair of scissors to help remove the excess stabilizer from the back, then dab some water on it to get rid of any remaining bits.
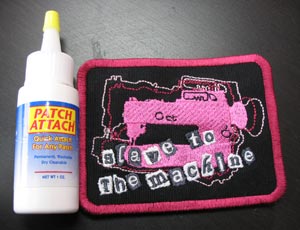
The finished patch can be either sewn or glued wherever you (or the recipient) want it. You can make your patch an iron-on by smearing a specialized patch glue like Patch Attach on the back and letting it dry.
If you're selling or giving glue-backed patches, it might be a good idea to include a little instruction card with them. (Short version: Use a pressing cloth and iron longer than you think you'll have to.)
And you're done! Once you get the process down, you'll be making patches like a pro. Stitch a bunch up for trick-or-treats or stocking stuffers, or reserve a table at your local craft fair ... and share the embroidered love!
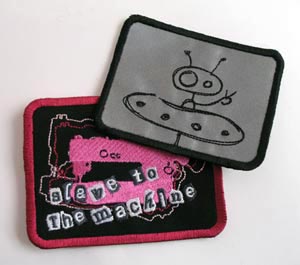
Keep that reflective fabric in mind for patch backgrounds. It's got the whole safety thing going for it, and with fun designs stitched on it, it shines with an extra layer of fun! Light, open scribbles designs are a good choice for this because they leave lots of the fabric exposed to reflect light.
Have fun patching things up!


