We all know them. Those classic dimensional stars you see dangling elegantly on trees. Sometimes they’re called “barn stars.” Often, they’re metal, but that’s not an element we often deal with around here (seriously, it does not embroider well). So we did the next best thing... 3D lace!
Supplies
To get started, you'll want to embroider two freestanding lace stars using the Shining Star (Lace) embroidery design. Check out these tips and tricks to make your lace look great! Rinse out the stabilizer and let your lace dry.
Now, you might notice something special about these lace stars. Each star point is actually connected to the next with a few stitches, so each side can fold a little bit like a hinge. This will allow us to “pop” them up for that 3D effect we’re going for, instead of just sitting flat.
In addition to your lace stars, you’ll need hot glue, and a hand-sewing needle and thread.
Designs Used
So, here’s how we make them 3D:
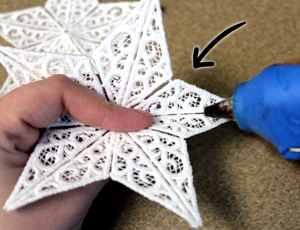
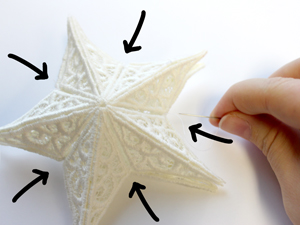
Warm up your hot glue gun and turn your first star so the wrong side of the lace is facing up. Using your fingers, very gently fold one of the star points, like so.
Run a couple dots of hot glue along that seam.
Hold that star point in place, only SLIGHTLY bent, as the glue sets. You don’t want to fold it in too much, or your star will end up looking squished.
When it dries, your star point should hold a slightly raised shape.
Repeat this on all your star points, like so.
Once your first star is done, repeat this on your second star.

When your glue is all set, you should have two stars that look like this. Slightly raised, with a 3D effect. Now we just need to put the two halves together!
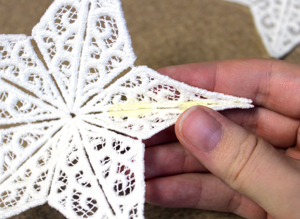
Place one star on top of the other, lining up the points as best you can. Grab your needle and matching thread.
Start by tacking your two sides together. I did this by adding a few stitches on all the inside edges of my two stars. This keeps the top and bottom pieces mostly in line as you continue working.
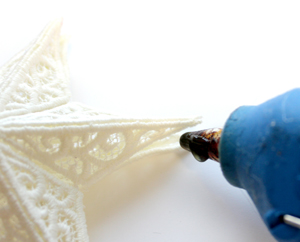
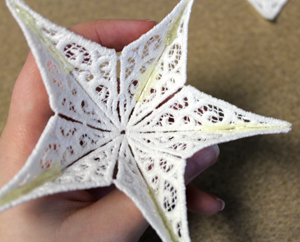
With those inside points stitched in place, you can then seal each star point with a tiny bit of hot glue.
Just run a light bead on either side of the inside of a star point, and gently push the top and bottom halves together. Don’t press too hard, or you’ll flatten out your star tips.
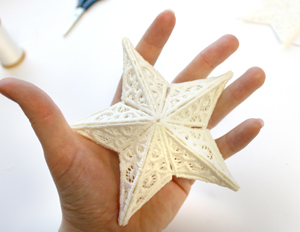
With all your points glued in place, a star is born! Sorry, couldn’t help myself. It is though.
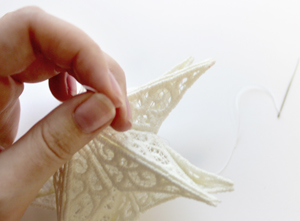
All you need to do now is loop a ribbon or thread through one of the star tips, and it’s ready to hang!

Big or small, they’ll look gorgeous and vintage on your tree, but with a subtle contemporary twist. The lace looks especially lovely when Christmas lights shine through it. Something a solid metal barn star could never do!


