Give projects a pop of 3D floral magic with this organza applique flower design. Delicate petals are stitched on organza in-the-hoop, and combined with lacy embroidery to create an amazing finished piece! This tutorial will walk you through the simple construction of this design.
Supplies
To get started on you 3D Organza Flower, gather these supplies:
- Soft Bloom (Applique) embroidery design
- Organza fabric for the petals
- Heavy duty water soluble stabilizer, such as Vilene or Sulky Ultra Solvy
- Fabric for your backdrop
- Medium weight cutaway stabilizer
- Temporary spray adhesive
- Printed templates of your designs
- Thread for your embroidery
- Scissors
- Ruler
- Hand stitching needle
- Optional: buttons or sequins
Designs Used

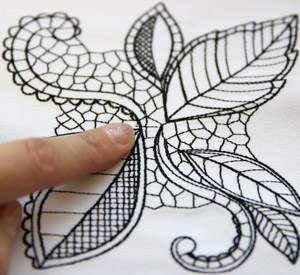
First things first: begin by embroidering the "A" file onto your project fabric. We recommend using a medium weight cutaway stabilizer, adhered to the back of your fabric with temporary spray adhesive. Hoop both fabric and stabilizer together taut for best results.
When finished embroidering, carefully remove the excess stabilizer by cutting around the back of the embroidery. Set aside.
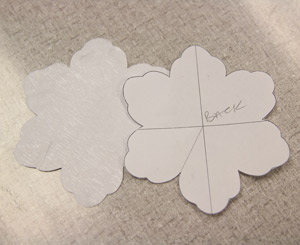
Next, use the dieline templates, labeled with a "DL" in your zipped design files (for example, UTZ2294_dl) to cut out the applique pieces from your organza fabric. There will be a "front" and "back" side to both petal pieces.
Note: Use a little temporary spray adhesive on the back of the paper, adhered to the organza before cutting.
If you don't have embroidery software to print the dieline templates, follow these instructions for stitching dielines.
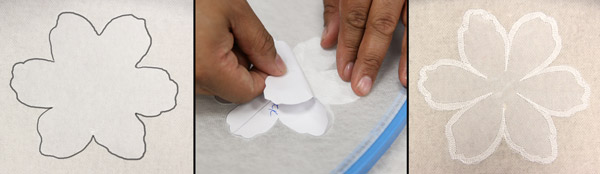
To begin your organza petal embroidery, hoop up a piece of heavy duty water soluble stabilizer, taut in the hoop. Make sure to match the top and bobbin thread color for best results. The first color change of the "B" file will stitch a dieline onto the stabilizer (outlined here in black to make it easier to see).
Carefully remove the hoop from your machine (do not unhoop the stabilizer) and spray the back side of your "front" organza piece and carefully place it within the boundaries of the stitched dieline on top of the stabilizer. Carefully flip the hoop over and place the back organza piece within the boundaries of the stitched dieline.
The next color change will stitch the front and back piece tackdown.
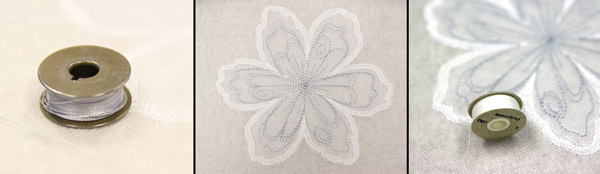
Change your top and bobbin thread to your chosen accent color to embroider the inside petal details.
Once this is finished, change your top and bobbin thread back to your first thread color (in this case, white), to stitch your finishing border.
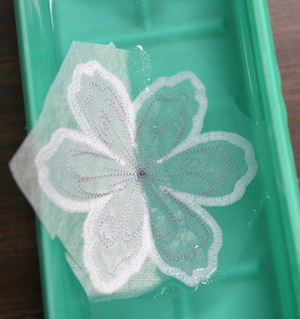
After the petal piece is finished embroidering, remove the water soluble stabilizer by soaking the embroidery until the stabilizer dissolves.
Repeat the same steps above for the "C" file to create the smaller flower petal piece.
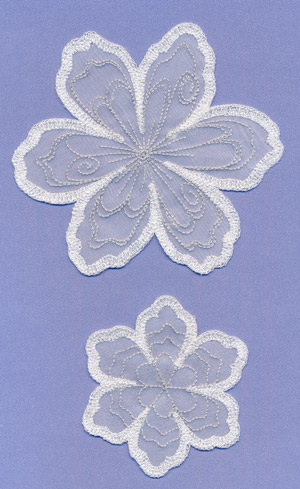
The end result will be two delicate organza flower pieces!
Make sure your petals are completely dry before proceeding to the next step.
Grab your embroidered project fabric and locate the center of the design, conveniently marked with a center crosshair.
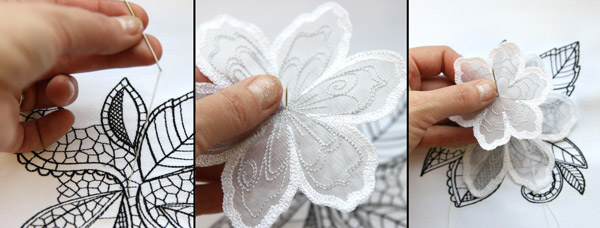
Use a hand sewing needle through the back of the cross hair to place the larger organza petal piece, then the smaller organza petal piece. Secure the bloom in place with a couple firm stitches to ensure the petals won't "wilt" and fall off your project!
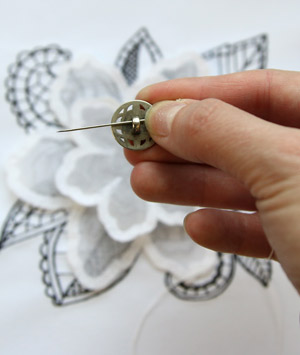
Finish your 3D bloom off with a decorative button, fancy knotwork, sequins, or whatever your heart desires!
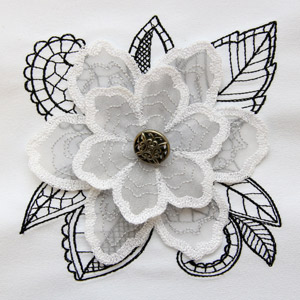
Your beautiful creation is ready to show off -- use it on tote bags, apparel, throw pillows, and more!


