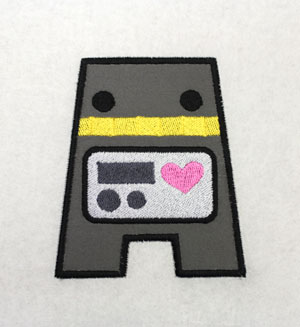
The robotic nature of machine embroidery is both a great tool and sometimes a fun aspect to play on. What better way to make an embroidered machine than with an embroidery machine? That’s right, this little guy is the Digomatic 2000! Who also happens to be rocking out to headphones, which is what a lot of us do while we’re embroidering. Why should a robot be any different? The fun way that satins, fabric, and stabilizer work together means you can create semi rigid pieces that go together to create this fantastic little toy robot. An embroidery machine making and machine that’s supposed to design embroidery. Dude, that’s so meta.
Supplies
So, just how does this awesome little figurine toy come together? Here’s what you’ll need...
- Your awesome robot design
- Fabric for your robot, enough for 10 pieces
- printed or stitched templates of each side of your robot
- hot glue
- wound bobbin matching your satin border
- black sharpie
- spray adhesive
- scissors
- tear away stabilizer (for stitching)
- cut away stabilizer (for backing, if you want a little more strength than tear away)
Designs Used
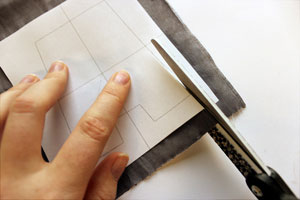
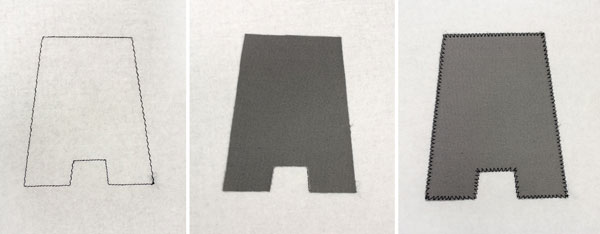
Start by cutting out your five (front, back, side, side, top) robot pieces, and their matching backs. The back and front piece of your robot is the same shape, as are the sides. The top is the only one that’s its own shape.
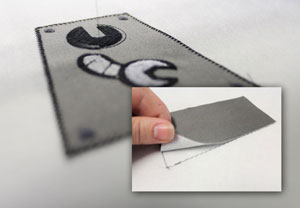
Use your template to cut out your pieces, and make sure your fabric is backed with some stabilizer. This will help these pieces from fraying, and will also help add extra structure to your robot. Remember, you’re cutting a front and a back for each side of your robot, so you’ll actually end up with 10 pieces when you’re done, two for each side.
When you’re ready to go, start by hooping up a piece of tear away stabilizer. Each of the 5 sides of your robot will be created one at a time in your hoop. Let’s start with the front of your robot. Here’s the order he’ll stitch (and for that matter, all the other pieces will too). First a dieline will stitch. Spray the back of one of your coordinating pieces, and place it carefully inside the dieline. Once you set your machine stitching again, a little zig-zag tack down will stitch.
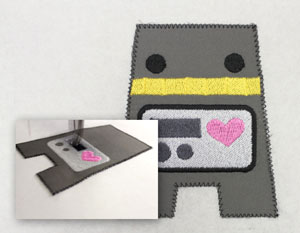
Next, all your robots inside detail will stitch. This will be different on most pieces, except the side pieces which are essentially mirror images of each other.
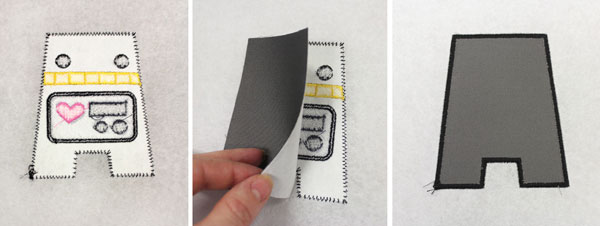
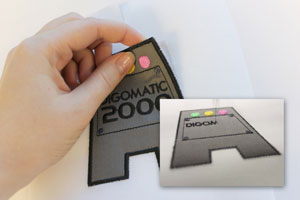
When all the decorative elements on the front are finished, we need to add the back! Carefully take your hoop off your machine (but DON’T unhoop it!) and lightly spray your matching back piece and place it inside the dieline that has already stitched. This is the point in the design where you need to change your bobbin to match your satin outline, so the little robot looks good from both sides. Turn your hoop right side up again, and place it back under your machine to sew the final satin outline (that last picture might be a bit misleading, you start it stitching from the front side, as you had before, the image is just to show the finished back).
So, from back to front, our little robot looks awesome! This is piece one completed. The steps for the other four are exactly the same. Don’t forget to put the regular bobbin back in at the start of your next piece!
Now we stitch the side pieces. Place your side piece inside it’s dieline, and a tackdown will stitch, followed by the inside detail of his arm and headphones. Flip him over and add his back, change the bobbin to match, and the put him back on the machine and let it stitch the final satin outline.
Remember there are two sides to the robot, they look exactly the same but mirrored. You need to stitch them both!
Stitch the top piece (the one that looks like a square with a line through it), which stitches in the same order as everything else. Dieline, fabric, tackdown, details, add the backing, change the bobbin, and put it back for the final satin outline.
Lastly, stitch the back! Same order as the rest.
When all your pieces are done stitching, you can carefully tear them free of the stabilizer.
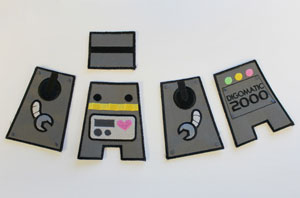
Your robot! Well, your disassembled robot. He needs to be put together.
Technically, there are lots of ways you could go about putting him together. I found the easiest to be hot glue (though it might be the messiest) but you can also use fabric glue, or just hand stitch him together using matching thread.
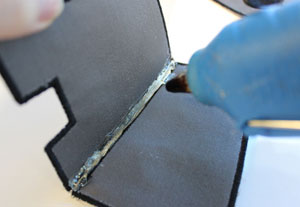
The construction idea is the same not matter how you’d like him to stay together. Start with two adjacent pieces. I started with his front and one of his sides. Hold the two pieces at right angles, and run a line of glue down the seam on the inside of the robot. Hold it in place until the glue is dry enough to hold the structure.
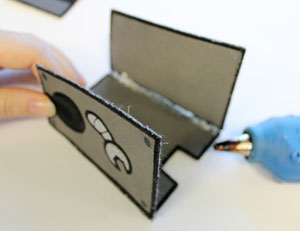
Next I grabbed his other side piece, and glued that on at a right angle to the front, so I had a kind of partial box shape.
Carefully add glue to the backs of both side pieces, and place the back piece on top of the glue, keeping the edges as even as possible. When you can, try to wipe up excess glue that’s leaking around the edges. We have a little trick to hide some of it, but it helps if there aren’t big lumps of glue coming out at the seams.
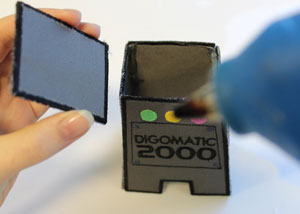
Finally, stand your little robot upright (when the glue is strong enough) and draw a line of glue around the top edge of his head.
Carefully place the top piece on the seams, with the side with the black line facing up. That’s the top of his headphones. Press lightly along the seams of his head to get both side to touch and glue together.

Since getting all your seams perfectly lined up from the outside is tricky, once his head dried I flipped him over and added more glue on the inside to seal up any areas the glue didn’t catch.
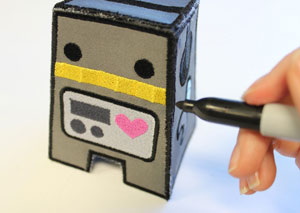
Now, you might notice when you’re done that despite your best efforts, your robot has some slightly rough edges, either from glue or from little bits of fabric and stabilizer peeking out from his satin edges. There’s a slightly sneaky trick I like to use to cover these up.
Sharpies! Yup, just take a black sharpie (or a matching color, if you didn’t stitch black) and draw over all your seams and glue, catching any white fuzz from your stabilizer, and any leftover clear glue.
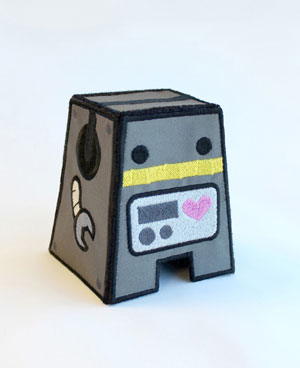
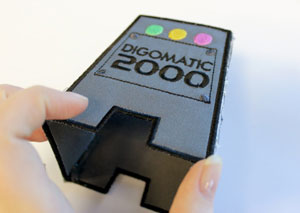
Yay! And your totally awesome machine embroidered robot figurine is complete! And you thought lace was the only cool 3D thing you machine could make...

From all angles your robot is both awesome and somewhat hilarious. He's one cool headphone-rocking robot, that you made with an embroidery machine! Hmm, come to think of it, an embroidery machine that makes more machines seems somehow alarmingly self-aware, like it’s building an army. I guess the robot uprising will start with embroidery machines.
*shrugs*
At least they’re cute robots. And as of right now they don’t have articulate limbs. I think we’re safe for awhile. Enjoy your rockin’ new robot!


