Hey guys, Karline here. On your right you will see the little rolled-up scrap of felt where I keep my hand-sewing needles. I’ve been using it for as long as I can remember, and while it gets the job done, I’ve been craving a much cooler-looking needle book to keep them in.
As UT’s resident English major, of course, I just had to take the whole “needle book” concept to the next level. A needle book that looks like a book book! An old dusty library book! With fairytale embroidery on the cover! Coffee staining and a real stitched book binding give this needle book a playful air of antique authenticity.
Supplies
To make your needle tome, you’ll need:
- Fabric for outside of book cover (I used quilter’s cotton, but canvas is a good choice too)
- Fabric for inside of book cover (more quilter's cotton here)
- Heavy-weight fusible craft interfacing
- Cutaway stabilizer
- A nice literary embroidery design for the cover of your book (less than 2.75” wide by 3.85” high if you’re using my measurements)
- Felt for book pages
- Embroidery floss for book binding
- Coffee or black tea to dye fabric
Designs Used
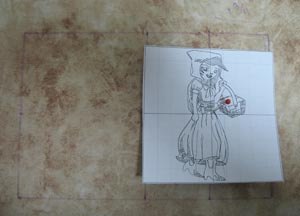
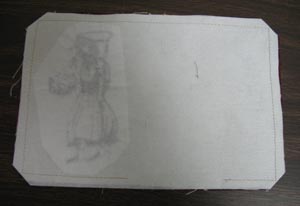
On the fabric for the outer cover, mark a rectangle 7.5” wide by 5” high using an air-erase pen. Draw a vertical line down the middle to divide the rectangle in two.
Either arbitrarily choose the location of your embroidery on the front cover of the book (that’s the right-hand half of the rectangle), or measure and find the center of the front cover. Mark the location for your embroidery design, and crosshairs to help with hooping.
These measurements suit an embroidery design up to 2.75” wide by 3.85” high. The finished book will be 3.5” wide by 4.5” high. Adjust as desired.

Use temporary spray adhesive to affix cutaway stabilizer to the back of the fabric. Hoop up your fabric and stabilizer and embroider the design. Trim the stabilizer on the back.
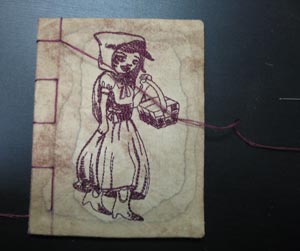
I used Little Red Riding Hood on the cover of my book, but yours can display anything you like. How about a tribute to Poe, Lovecraft, Shakespeare, or Alice in Wonderland? Check out our lovely literary designs for more inspiration…
This splotchy beige fabric will make a nice start to the old leatherbound look we'll be creating later, but you can cover your book in pretty much any pattern you like.
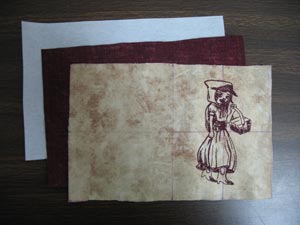
Once the embroidery is done, cut out your 7.5” by 5” rectangle. Cut out rectangles the same size of fusible interfacing and the fabric for in the inside of the book cover.
Fuse the interfacing to the wrong side of the outside book cover.
In retrospect, I probably could have used a heavy-weight cutaway stabilizer and just let it cover the whole back of the outside rectangle, and skipped this interfacing step altogether. Ah well. Moving on.
Place the outside and inside book cover rectangles right sides together.
Stitch around the rectangle 1/4” from the edge, leaving a substantial gap at the bottom edge. Clip the corners close to the stitching (but don’t cut the stitching!).

Turn the book cover inside out through this gap, poking out the corners with a pointy object (chopsticks work well) so they’re nice and neat. Press the whole thing so it’s even nicer and neater, making sure the fabric at the gap is folded over so it looks like the rest of the edge.
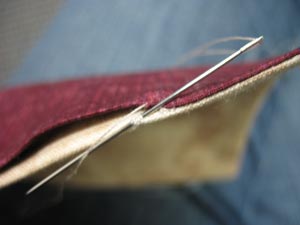
Slipstitch the gap closed by hand, hiding the knot and then picking up a bits of fabric alternately from each side with the needle.
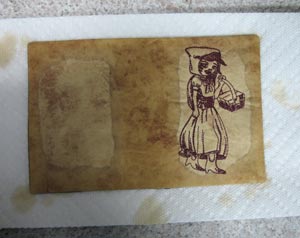
Now for the fun part! Brew yourself a cup of ungodly strong coffee, and use it to give your book cover an antiqued look. There’s no wrong way to do this – dab, splatter, or spray the coffee irregularly, or even layer on coffee grounds for a splotchy look. Up to you. I dabbed a bit of coffee around the edges of the book to make them look darker, and then just let it dry.
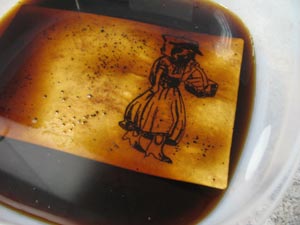
Another option is to dunk the whole thing in a shallow dish of java. Actually, if you’re doing that, you might as well dye the fabric before you cut and stitch it. Let the fabric sit in the coffee for as long as you like, checking it every so often, then rinse it and let it dry.
You can also tea-stain pretty much the same way. The color will be slightly different, but they’ll both give your fabric that old-timey feel.
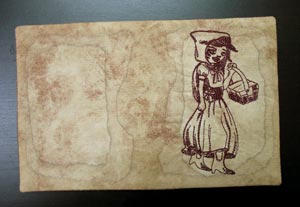
In the end, I dabbed coffee on the edges by hand, decided that wasn't enough, soaked the whole thing in coffee for awhile, rinsed it and let it dry, and then dabbed more coffee around the edges. Makin' this up as I go, people.
When you’re satisfied and your fabric is dry, move on…
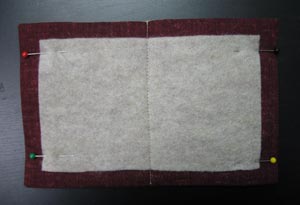
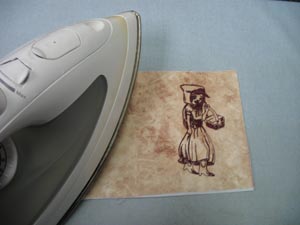
Cut a rectangle of felt that’s a bit smaller than the book cover. This will make up the “pages” of your book. Center it over the inside of the book cover, pin in place, and measure and mark the exact middle. Stitch down this line.
Fold it in half and you’ve got a book! Wrap it in another piece of fabric (to protect your ironing board from any coffee seepage) and press the book all folded and flat.
Technically we could be done here, but let’s add a cool stitched book binding…
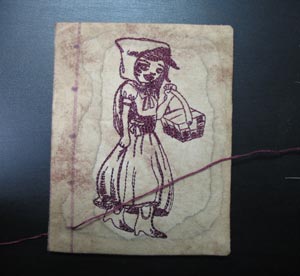
Mark a line 1/2” from the spine of your book, and mark several evenly spaced dots along this line.
Time to stitch the book binding! Thread a needle with your embroidery floss and starting at the bottom, go up through the first dot…
...down through the second dot…
...around the spine and back through the second dot…
...up through the third dot…
At which point it should look like this.
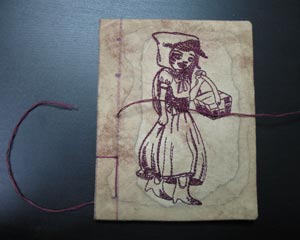
Travel up the spine in this manner until you reach the top dot. In addition to stitching around the spine at the top dot, stitch around the top of the book as well. Then stitch back down through the dots until you end where you began.
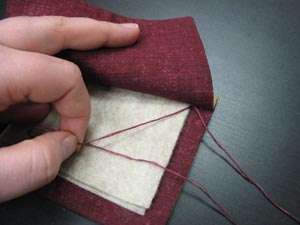
Tie a knot to finish off the binding. I hid mine under the back cover.
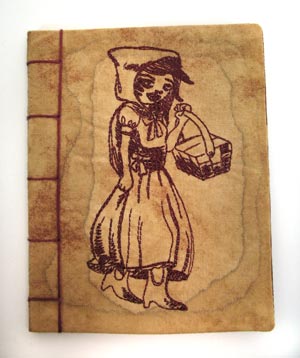
Ta da … you’re done! That was quick and easy, wasn’t it? Little Red Riding Hood makes an adorable cover for this antiquey book.
If you like, you can add a snap to keep the book closed. A brassy finish will make it look like an old book clasp. I was planning on doing this, but I decided I like the book just as it is.
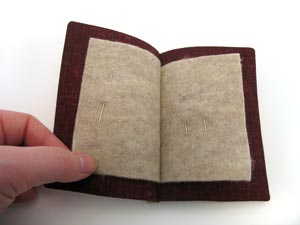
Felt pages won't unravel, so they'll be the perfect place to stash your tools of the trade for years to come.
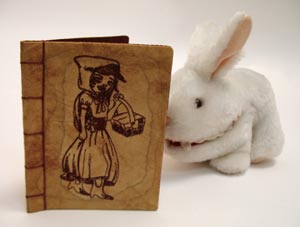
And it turns out Craft Bunny thinks Little Red Riding Hood is just as enchanting as I do!
Now I want to make a whole library of these things... they're a great little gift for every well-read stitcher on your list!


