Summer is a great time for light dresses and flowy clothes.
It's also a great time to pull out pretty thread colors and embroider bright, cheery designs! The only problem is, and you've probably discovered this by now, that heavy embroidery and light fabrics don't play well together. You want to add a big bold area of color, but you don't want to fill it with threads... what do you do?
Applique! There are some really great effects you can get from simple applique designs, and best of all, they're light-fabric friendly. So pull out all your sunny fabric scraps, and I'll show you how to add bold and beautiful accents to your simple summer wear.
We're going to get a great bold effect by overlapping and reusing the same applique design, but mixing it up by using different sizes and different fabrics. You'll see how much mileage you can get out of just one applique file!
Supplies
- Whatever fun summer wear you want to pretty up (I'm using a summer dress)
- A light and simple applique design, like my paper crane
- Printed or stitched templates for your applique
- Lots of fabric scraps, at least as large as your embroidery design
- Scissors
- No-show mesh or light stabilizer (to keep your light clothes flowing and not stiff)
- Spray adhesive
- Pins
Designs Used
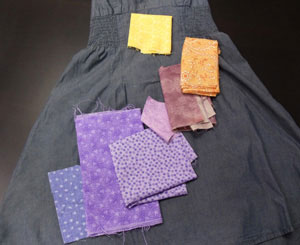
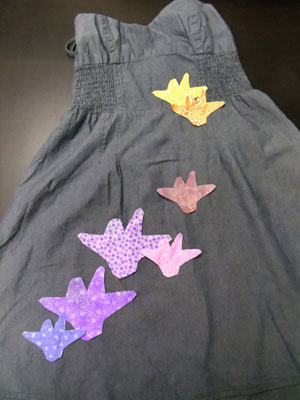
So, let's start with the fabric. The number of pieces of applique you want to add us up to you and your fabric stash. Take your pieces and lay them out roughly on your dress. I decided to go for a slight transitional effect with my colors, adding a bold summery splash to the grey.
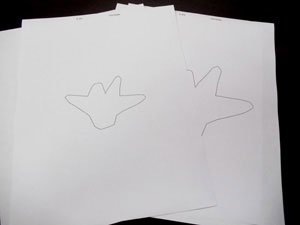
You'll want a bunch of templates for each applique design
you're using. I'm mixing it up and using both sizes of the paper crane, so I have a number of printouts of
each.
(If you're new to this, check out our more detailed raw edge applique instructions.)
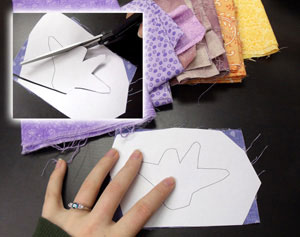
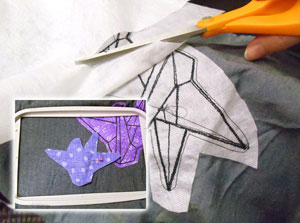
Let's start cutting! Lightly spray the back of one of your templates and place it on a fabric swatch. Start
snipping out your crane shape.
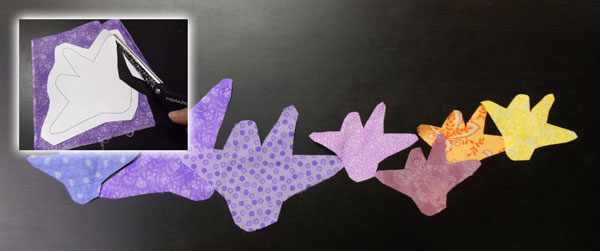
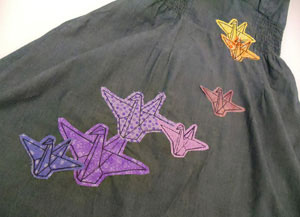
Keep working through your different fabric swatches. Remember to mix it up a bit with sizes if you want! Here I have all my different cranes lined up, ready to be appliqued.
I'd recommend laying out your cranes on your dress or tee, to give yourself an idea of how you'd like them spaced. I found it helpful to loosely pin these in place once I liked their placement. You'll have to move and unpin them as you go along, but it will help you keep your original vision in mind.

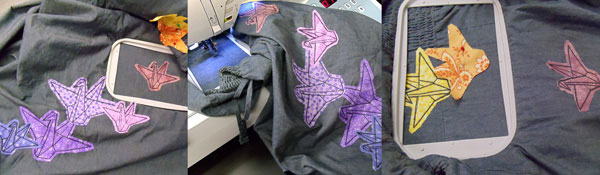
Cut a piece of your mesh stabilizer and hoop up your dress for the first crane. Your machine will first stitch a dieline. Lightly spray the back of your crane fabric with some adhesive, and place it carefully on top, so it completely covers the dieline.
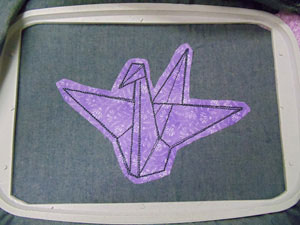
Your first stitched crane! The stitches are light on your dress and the fabric adds a bold swatch of color. Let's do some more!
Stitch on your next crane, hooping it up as you did your last. Remember to trim the stabilizer from the back of each crane as you go along, or you might find your layers of stabilizer building up.
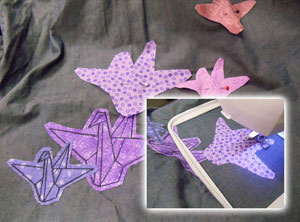
Continue stitching along. You don't have to be too precious with your placement; keep the process organic. Keep adjusting for best placement as your cranes move along. Always be sure to keep the back of the dress out of the way!

Your finished masterpiece! Bright bold colors and a fun repetition of designs really adds a dramatic touch to your previously monochrome dress.

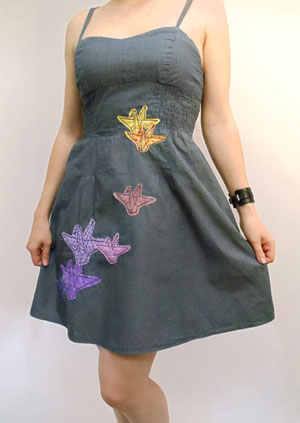
Slip it on and celebrate summer days and handmade touches!
The light-stitching applique means you can add these bold, bright designs without making your dress and light fabrics too heavy.
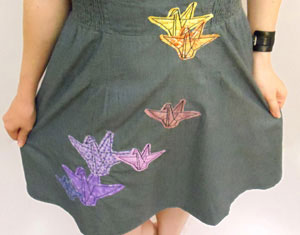
One simple design becomes a colorful geometric print when repeated and overlapped in simple sizes and colors. There's a lot you can do with just one design!
Wear your new creation with pride, and try this technique out on others! While the heat lasts, you'll want to keep yourself in as many light and bold fashions as possible, and when you can make them yourself, the possibilities are endless!


