Spring has sprung around Urban Threads, and I couldn’t be happier.I can’t wait to get out of my bulky sweaters and on to more fun things. Problem is, I’m one of those people who’s absolutely terrible at retaining body heat, so I can’t banish warm weather wear completely. So what do I do with all those old bulky sweaters? Reuse, recycle, and re-sew.
Armwarmers, made out of cozy sweaters, keep you toasty while sporting that new short-sleeved tee, so you can keep up your fashion pride. Armwarmers are showing up everywhere as a hot new fashion item, and with a few old sweaters and a little time, you can custom make your own.
Designs Used
To start, dig up some old sweaters who have had their last day.I would recommend two different kinds to add some interest to your armwarmers, but you can make them out of just one.I'm going to make an armwarmer with two foldover cuffs, one at the top with embroidery on it, one at the bottom.
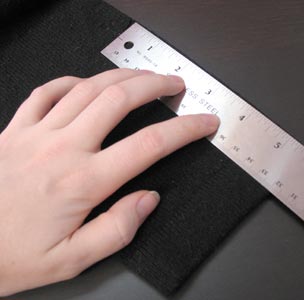
I made a simple layout below.You can modify these depending on your sizing preference, but they’re a good guideline if you don’t know where to start.The bottom and top cuffs are extra long because they will be folded over when we’re done.So find a sweater with nice finished sleeves and cut off 5 1/2 inches from the sleeve.These will be our bottom cuffs.
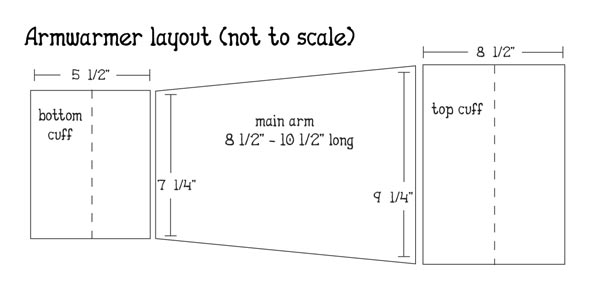
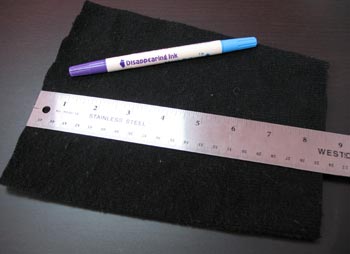
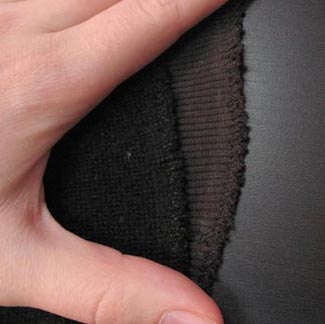
Turn the bottom cuffs inside out and carefully snip off the seam, then trim them so they’re 7 1/4” wide. Put them aside.
Next, find some fabric for the main arm.I’m using a different sweater for my middle bit, to swank it up a bit. I cut mine 8 1/2” long, which is about elbow length armwarmers.You can make yours longer if you like.
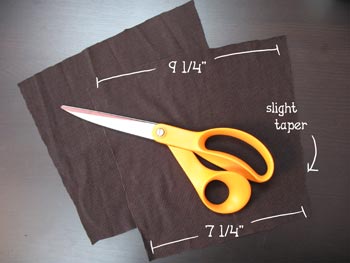
Turn them inside out and carefully snip off the seams.Open them up, and measure the top 9 1/4” across, and the bottom 7 1/4” across, and then cut, tapering slightly. This is so they become narrower at the wrists.If you’re not following my measurements, just make sure that the top width matches the width of your top cuff, and the bottom matches the width of your bottom cuff.
Lastly, cut out your top cuffs, 8 1/2 inches long.I cut mine out from the same fabric as my bottom cuffs, but you can make them out of as many sweaters as you like.If you don’t want your top cuffs this big, just make sure that whatever size you pick is big enough to fit your embroidery design when it’s folded over.For my design, the little “yar” skull, this was about the minimum size.
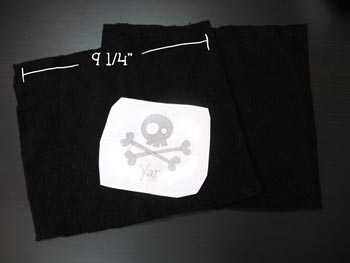
Turn them inside out, snip off the seam, and measure 9 1/4” wide. Choose which design you’d like to embellish your lovely arm warmers with.I was feeling piratey at the time. I’m often feeling piratey.A good hearty “yar” does one good now and then.
If you’re embroidering on a fuzzy sweater, like I am, it may be a good idea to add some water soluble stabilizer on top, so that the machine can sew the design without the little fuzzies getting in the way.
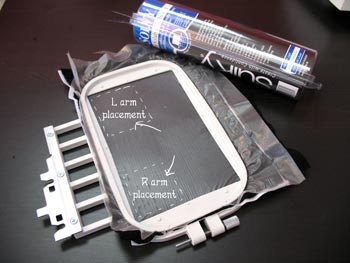
Hoop it up with regular stabilizer, getting it as close to the bottom edge of your cuff as possible.You want your right arm design to be near the bottom right, and your left arm design, the bottom left.My machine didn’t let me fit it totally in the corner, but that’s ok.Just aim roughly for this placement, so it’ll show up nicely when you’re wearing them.
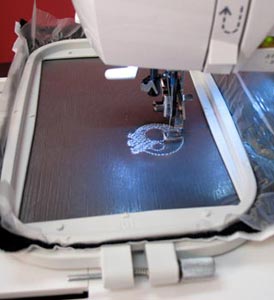
Sew, little skull, sew!Sew both the right and the left cuff, making sure you pay attention to the placement of your design.
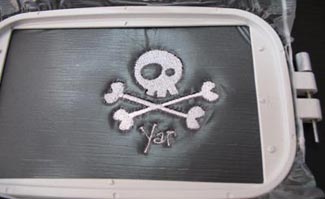
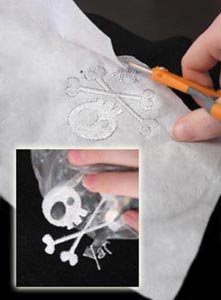
Once your design finishes sewing out, tear away the top water-soluble stabilizer, then flip your fabric over and carefully snip away the extra stabilizer on back.

Take the top cuff pieces, and fold up the edge under the design. Sew a seam to finish the edge.

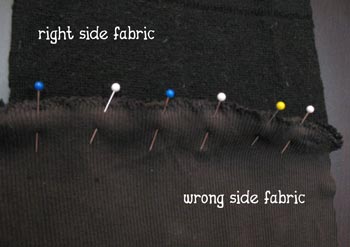
Pin the top cuff and the middle section together, wrong side of your top piece facing the right side of your middle, and sew a seam. This may seem back-wards, but since we’re folding over the cuff, it’ll end up on the right side when you’re done.
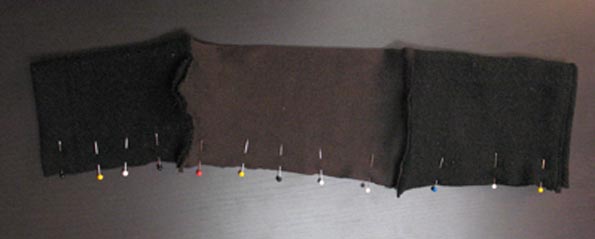
Take the unsewn edge of your middle piece, and the unfinished edge of your bottom cuff, and sew an overedge stitch. This is so when we leave a gap for the thumbhole the fabric won’t fray and will have a more finished look.
Take your bottom cuff and pin it to your middle piece, like before, wrong side of your cuff facing the right side of your middle piece. When you sew your seam, be sure to leave a 11/4” gap for your thumbhole on the right side for the right cuff, the left side for the left cuff.
Fold your armwarmer in half, design side facing out (you can’t see mine because he’s hiding on the other side) and sew a seam along the edge to finish your armwarmers.
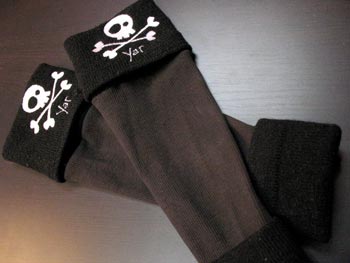
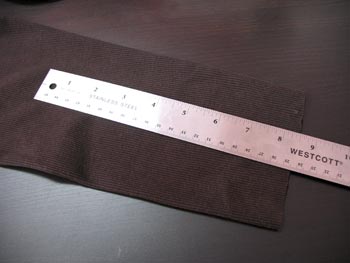
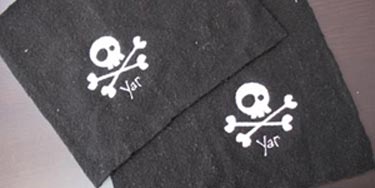
Take your newly sewn accessories and turn them right side out, then fold the top and bottom cuffs over themselves. Congrats!You are now the proud owner of a brand new pair of spiffy armwarmers.
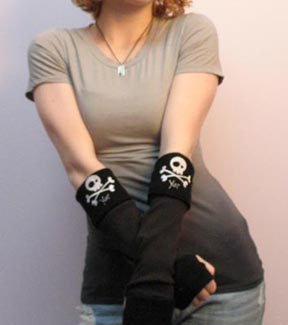
Stick ‘em on and wear them with pride! They’ll keep you warm and toasty on those brisk mornings. Pair them with an embroidered scarf and you’re set for any season where you need a little extra warmth, or a serious fashion statement.
I’m going to wear mine around my studio, at home, and on swashbuckling adventures. Have fun with yours!


