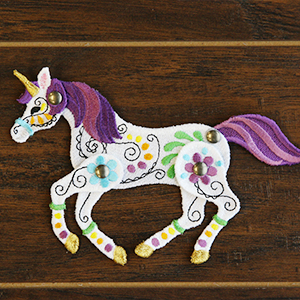
Stitch a design so magical, the stitches stand on their own -- and the joints even move! Each piece of this unicorn is specially digitized for freestanding embroidery, with holes to connect the joints. We'll show you how!
Supplies
To get started, gather these supplies:
- Enchanted Unicorn (Freestanding) embroidery design
- Heavy weight water-soluble stabilizer (such Vilene or Sulky Ultra Solvy)
- 4 brads (1/4" wide)
- 40 wt. rayon embroidery thread
- Scissors
Designs Used

Begin by winding a bobbin to match each thread color used in the design. Then follow the color change sheets and stitch out all of the pieces of the design onto heavy duty, water-soluble stabilizer.
Once finished sewing, wash, air dry, and press each piece. (Here's more on stitching freestanding embroidery).
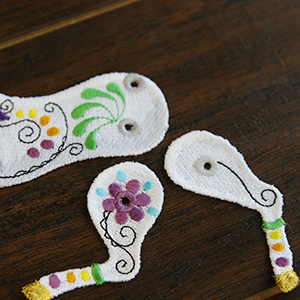
Each of the pieces have round holes called "eyelets" on them. The brads will go through these eyelets to connect the pieces. Make sure the brads being used are 1/4" wide or larger, so the pieces do not fall off.
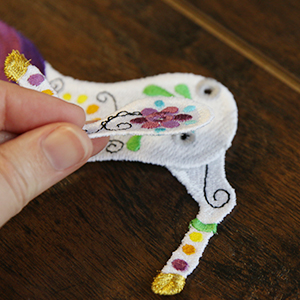
Take the first group of pieces, and line up the eyelets. For the legs place one leg behind the body, and the other in front of it. Also make sure the right side of the embroidery is all facing the same direction for all pieces.
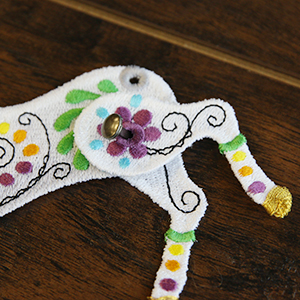
Then slide the brad through the eyelets. Make sure the round end of the brad ends up on the front side of the embroidery.
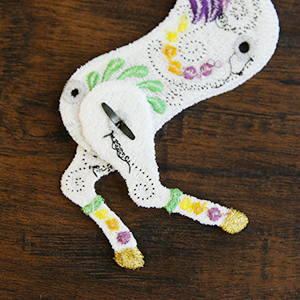
On the back side of the pieces, open up the metal prongs of the brad. This will keep the pieces in place, and allow the legs to move but not fall off.
Finally, repeat to attach all of the pieces onto the body using the brads.


