Designs Used
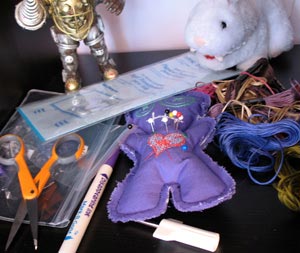
For the most part, when someone gives out to me about the state of my craft room, I fall back on the old adage that “creative clutter is more blessed than tidy idleness”. And that's true, but when it comes to the point where your embroidery thread starts to take matters into its own hands and thread itself into one colorful lump, it might be time to organize a bit.
I have all these neat little cubbies in my studio, but alas, they don’t actually keep things in much of an identifiable order. So enough is enough!I’m going to make myself a little something to help me tidy away my mess. At the very least, it will be contained in a pretty box, so it’ll look organized from the outside.
How, might you ask, on earth are we going to use embroidery on a box?How indeed...
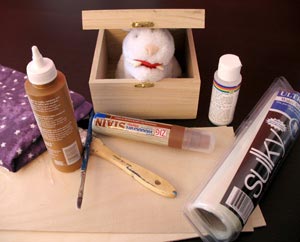
Up till now, we’ve proved that embroidery isn’t just for quilts and pillows.You can stick it on everything from messenger bags to monkeys, so why not wood?We just need to combine the right wood with the right embroidery.To pull off this daring feat, the two main ingredients you’ll need are a slick little scribbles design, and a 1/16 inch sheet of balsa wood.Ok, so balsa wood isn’t exactly the crème de la crème of the timber world, but it LOOKS like wood, and that’s all that really matters.You’ll also need a wooden box (big enough for your unruly craft supplies) glue, and some water soluble stabilizer along with your normal stabilizer.
If you want to add a little flare to your box, you can also grab some wood stain, which I found comes in handy dandy tube form, some inside fabric for lining, paint, and varnish. My box top had a little “inlay” spot, so I got some extra thick balsa wood to help it line up more flush with the top of the box. You may or may not need this.If the top of your box is simply flat, all you need is your thin balsa. Craft bunny is not required, but amusing.
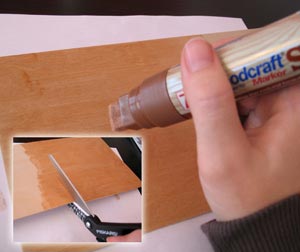
To start, grab your thin balsa wood.If you want it to have a stain, you’ll want to do this first, before you embroider on it.No good staining over your pretty embroidery.
Once the stain is dry, you can cut out a piece of balsa that’s just a bit smaller than your hoop.Make sure though that the piece you cut out is larger than the top of your box.Yup, you can cut it with scissors. The wood is thin enough.Just take care that you don’t bend the wood as you’re cutting, as it’s brittle and can snap.

Now, here’s how to hoop up that wood.Cut yourself out a piece of regular cut-away stabilizer large enough for your hoop.Now, take your piece of balsa and spray the back thoroughly, and stick it onto your stabilizer.Next cut out TWO sheets of water soluble stabilizer and lay them on top.These will help protect the wood from too much damage, caused by the needle sinking in too far and essentially punching out sections. Carefully hoop it all together, making sure your hoop doesn’t press on the edges of the balsa and break it
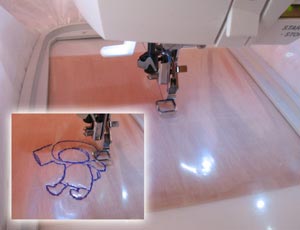
Now stick it all under your machine, and load up your design.It’s important to note here that really only scribbles designs work well for this.Anything that has that back-and-forth satin stitch will just punch out pretty shapes in your wood.
I chose little Astroman, because he’s cool and I found some neat star fabric in my stash that inspired me.
When you get your machine sewing, be prepared for it to be a bit louder than usual. No worries, it’s mostly just the wood thunking up and down as the needle hits it.I didn’t use any special needle either, but do keep in mind if you do this a lot it will begin to dull.

When he’s all done, it’s time for Astroman to take a swim!
Snip away at the top two layers of water soluble stabilizer, trimming out as much as possible.The less stabilizer is left on the wood the less there is to dissolve.
Take Astroman and soak him in water according to the directions on your stabilizer package.You’ll want to let him sit nice and long, to make sure all the gooey gunk is gone. When he’s done take him out of his bath and gently pat him dry.When you let him fully air dry, you might want to keep an eye on the wood as it has a tendency to curl after it gets wet.Keep it as flat as possible while it’s drying.
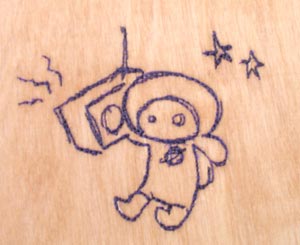
While you’re waiting for Astroman to dry, it’s probably a good time to stain the rest of your box to match the top balsa wood.If you’re really ambitious, you can sand it first so it’s nice and smooth.
Astroman looks pretty slick on his new wood digs.Now that you know you can embroider on balsa, there are all sorts of things you can do with it.You can make ornaments, wood coasters, bookmarks, signs... anything.Plus, because it’s stitched on wood, there’s a great opportunity for a little embellishment.If you like your Astroman the way he is, you can skip these next few steps and just join back when we’re constructing the box.
I, on the other hand, see a blank canvas, and being an Illustrator, I couldn’t resist!
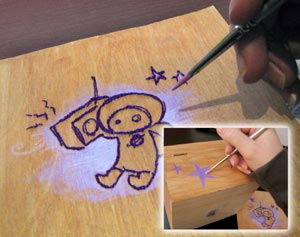
I grabbed my set of acrylics and got to work. You can do absolutely anything at this point.I gave my Astroman a little celestial space to groove in, and then painted some spiffy stars around the box. Scribbles are especially nice for this because it’s almost like a paint by numbers.You can fill in your design in any way you choose.I like leaving a bit of natural wood shine through, because after all, part of what makes it so spiffy is what it’s embroidered on. You don’t want to cover it all up!
A photo doesn’t do it justice, because there’s something really neat about the flat color of paint against the slightly raised surface of the embroidery. It’s such a cool effect!
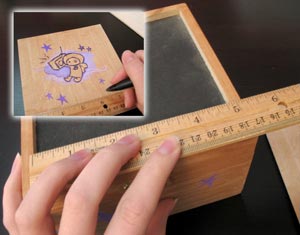
Now, back to construction. Measure out the top of your box that you want to cover with your balsa.Mine has a little inset, so I’m sizing it to fit into that.If you have a normal flat top box, measure the full size of the top.
Mark those measurements out on your embroidered balsa, making sure your design is nice and centered.You can then cut it out carefully with a sharp pair of scissors. Remember, it’s always better to cut it too big than too small.Cut a corner and then measure it against your box to make sure everything is lining up properly.
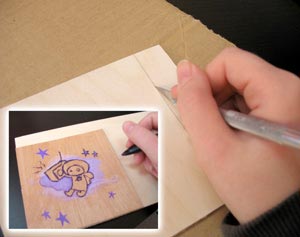
I need a slightly sturdier, thicker piece of wood to help fill in my inset.If you have a similar box, follow along...
Use your cut piece of embroidered balsa and trace it onto your thicker wood to get exact sizing.Now, cutting it involves a little trick.I’m a crafty person to be sure, but on a day to day basis, I find myself not in need of carpenter tools, so I didn’t have a wood saw about.What I did have, was an exacto knife.
To cut a thick piece of wood, score the line with your knife, and then go over that line again and again until you’re about halfway through the wood.Then, using the marks on the side, score a mark on the back of the wood that matches your line, and snap it in half.Ta da! You might need to sand the edges a bit, but it should be a clean enough break.
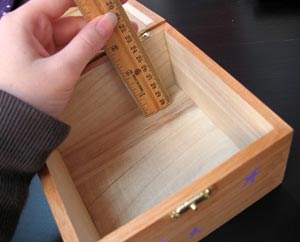
Now, before we glue everything to the top, take some measurements of the inside of your box. Measure all the dimensions of the bottom, and then the height of the box. These are for the lining we’ll make while we’re waiting for our box to dry.It’s best to do it now, because it’s awfully hard to measure the inside while it’s clamped shut with books and heavy things on top, and we might as well make ourselves useful while we’re waiting.After all, just sitting there is about as exciting as...well, watching glue dry.
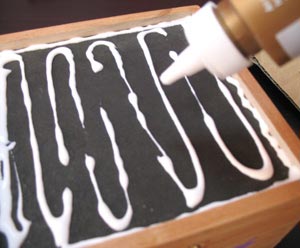
Once your measurements are taken, glue it down!Be sure to cover your surface with a generous coating of glue, paying special attention to the corners.Wood glue works best, but most types of craft glue will hold down something as light as balsa wood.
I glued my thicker piece of wood in first, then glued my embroidered balsa on top of it. If you’re gluing it flush with the top of a box, make sure all your corners line up with your edges.If something’s too big, don’t worry because when it’s dry you can flip it upside down and run an exacto blade along the edge to make it flush with your box.
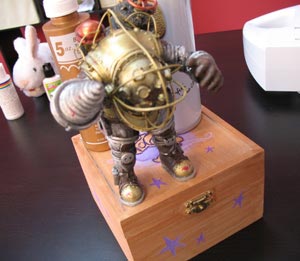
Now weigh your box down with heavy things to let it dry.If you have a flush flat top, big heavy book, that works best.Since mine was a little inlay that didn’t match flush with the top, I had to weigh it down a bit differently.I found big heavy video game figurines have uses beyond their aesthetic abilities.See?There’s a practical reason why my studio is filled with strange toys.
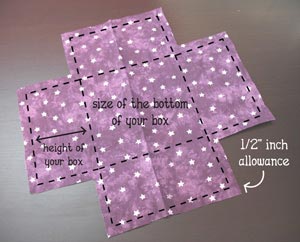
To make the lining, use your box measurements to mark out a cross on your fabric of choice.It’s basically the bottom size of your box, with four flaps for the sides.Leave some seam allowance for stitching, and at the top of your flaps so we can fold it over and hide the raw edge.
Once you have your cross, take two of your flaps, right sides in, and fold them so their seams line up together. Just imagine these four sides coming up to form a little box. All we’re doing is mimicking the interior shape.
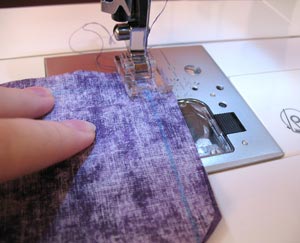
Hopefully you can see what I mean here.
We’re making one of the four corners of our box lining.The right sides are folded in, and we sew 1/2 inch from the edge, along the marked seam. Repeat this for all four corners and you should have a little fabric box to line your wood box with.
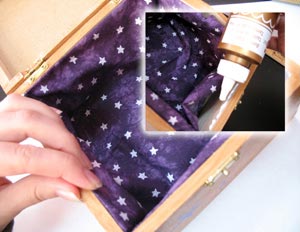
Once the glue on your box is dry, you can open it up and put in the lining.
Place your lining inside the box, and fold down the raw edges, about 1/2 inch in like your measurements.Run a line of glue along the top of one side of your box, and glue one side of your lining in place.Go all the way around, gluing one side at a time.Don’t worry about your lining being a bit big, it’s just a soft fabric interior to hide the ugly raw wood inside.A little excess fabric just makes it look more cushy.
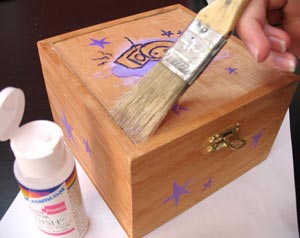
To give your box that last bit of finesse, you can seal it with some varnish.This will protect the wood stain and your fantastic paint job, as well as give it a polished, finished feel.There are lots varnishes available, from shiny to matte.Choose the one that you like best. Mine’s shiny, because I’m easily amused, and shiny things attract me. Me and raccoons.
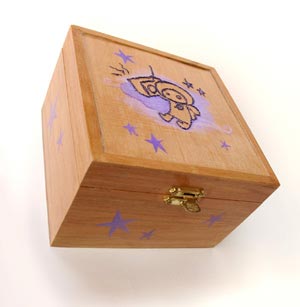
Once it’s all dry, you have a fabulous new craft box!The balsa blends right into the rest of the wood, and people will be amazed at your ability to embroider on what appears to be a thick wooden box.Shhh....it can be our little secret.
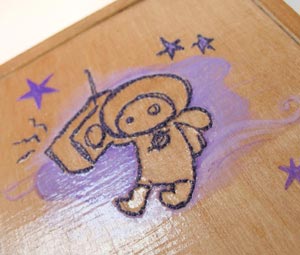
The embroidery really does result in a cool, crafty box, because of the slightly raised 3-D quality of the stitching.There’s no other effect like it!Plus embroidering on wood makes it oodles easier to add embellishments to your designs.There’s no messing with fabric paint or bleach, worrying if it will keep it’s color.It’s a sturdy, colorful, customizable way of using embroidery!
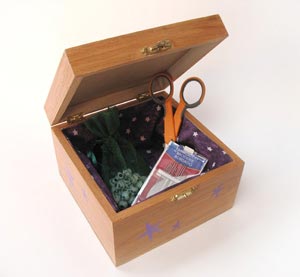
The interior lining adds an extra pleasant surprise when you open your box to store all your wayward crafty bits.Now I have a place for all my leftover embroidery thread, my little scissors which I keep losing (or craft bunny keeps eating), my newly acquired skull beads, needles, bobbins and more!
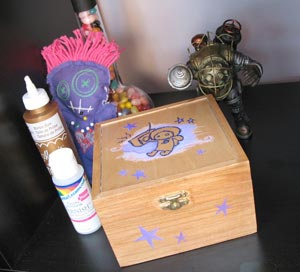
Look how much tidier it all is!
No unwrapped embroidery threads everywhere, no unwound bobbins.Craft bunny will have to figure out how to work a latch with his teeth to eat my craft scissors.It’s all tucked safely away in my spiffy little embroidered Astroman box.You can make one for you own studio, or customize one as a gift.They’d make great gift boxes, jewelry boxes, craft boxes, and more. Try it out!


