Summer days might be creeping closer to the fall, but I say that’s all the more reason to go out with a crafty bang! There’s nothing quite like running barefoot in the warm summer grass, and sometimes you just don’t want anything between your feet and the world. That doesn’t mean your feet can’t still have the benefit of some delicate glam! These beauties are called barefoot sandals, and they’re very easy to make to celebrate those last hot summer nights.
Supplies
We’re going to be creating our sandals with the help of some freestanding lace, and then some chains, ribbon and charms. Here’s what you’ll need:
- Heavy duty water-soluble stabilizer (we use Sulky Ultra Solvy)
- The bottom half of this design, and this feather design
- 30 to 50 weight 100% cotton thread
- Hand sewing needle
- Small chains (I used three necklaces, because I wanted to use the clasps that came with them)
- Jump rings
- Jewelry pliers and clipper
- Ribbon
- The jewels and little charms are optional, but fun
Designs Used
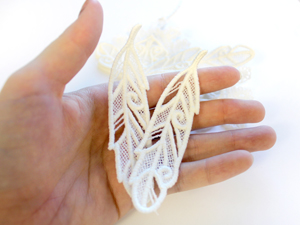
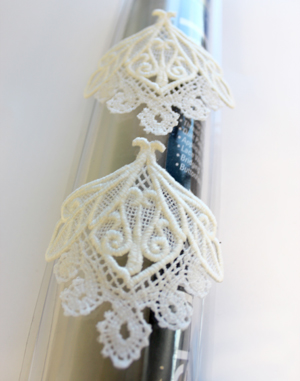
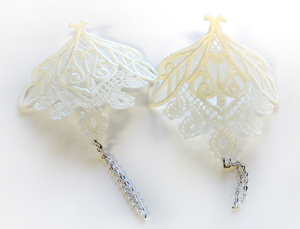
First things first. We need some lace! Hoop up your water-soluble stabilizer and stitch your pieces. You’ll want two lace feathers and two bottom pieces from the lace cuff. These are both from the Evenfall collection. Never stitched freestanding lace before? Check out this tutorial for tips and tricks to get it to turn out just the way you want it!
Once your lace is done, soak it according to the package directions to remove the stabilizer.
I found it kind of helps to let the lace dry into the shape you wish it to be. Since these two pieces are going to be going on the feet, I wanted a bit of a curve. I set them out to dry on the curved plastic tube of the stabilizer. The feathers I left to dry flat.
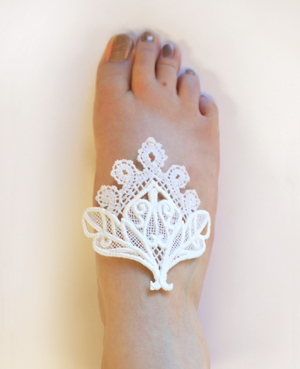
Once it’s dry, try it out on your feet!
Yeah yeah, I’ll never be a foot model. At least I remembered to paint my toenails...
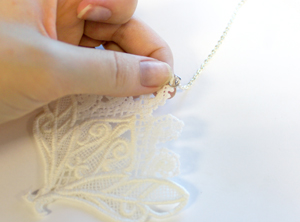
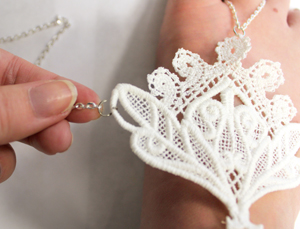
First we’re going to make the loop for the toe. Start by attaching a jump ring to the top loop of your lace. With all the open loops, it’s easy to slip one on. Then attach a length of chain to the jump ring.

Try your lace on again!
With the lace in the position on your foot you like, loop the chain around your middle toe and measure how long the chain needs to be.
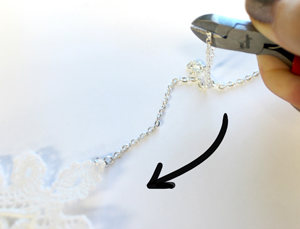
Snip the chain at that point, and then attach it in a loop back to the jump ring.
Do it on both pieces!
Remember, from here on out, you’ll want to do each step to each piece of lace, provided you have two feet!
Next measure a loop of chain that’s just wide enough to slip over your foot. You can dress this chain up a bit with small jewels, beads or charms.
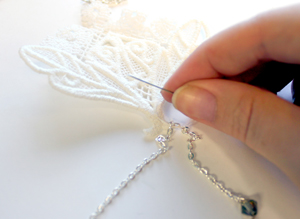
Once you have your loop the right length, you’ll need to attach it to the other side of your lace. Since this area is much heavier in stitches. I found it easiest to just stitch this directly onto the lace, using the same cotton thread. If stitching the delicate chain on directly is tricky, stitch on a jump ring and attach it from there.
Slip your lace piece on! Start by pulling the large loop over your foot, then loop the bottom chain over your toe.
You’ll probably find this loop is way too loose to keep the sandal taut on your foot. That’s OK! We have a plan for that.
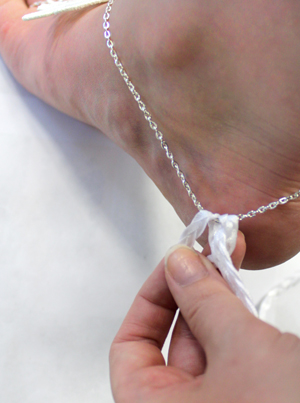
Cut a long loop of your ribbon, and then loop it around your chain, at the back of your ankle. The ribbon should be long enough that you can wrap it around your leg a few times.
While your lace is on, you’ll also want to measure the chain that secures it down. I like using the chain clasp for this part, because this is the one part of the sandal that will need to be clasped closed.
Add a jump ring to either side of your lace, like so, with the chain attached.

It should loop around long enough to secure to your foot, and then you can use the attached clasp and a jump ring on the other side to close it.
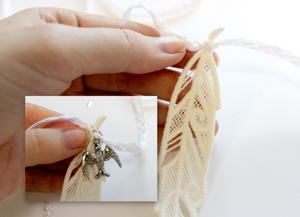
Finally, for a little bit of added flair, tie on your lace feather to the ribbon, and if you’re feeling fancy, add a charm using another jump ring.
You’re done!

Put on your sandals by pulling the large loop over your foot first, then looping on the toe. Pull the chain loop up and snug using your ribbon, then wrap that around your leg and tie in place. Finally, secure the clasped chain around your foot. Your sandals are snug in place!
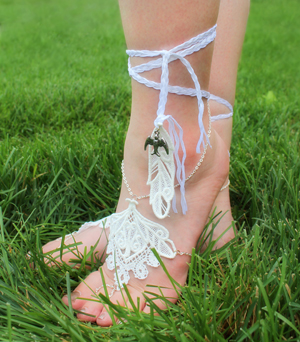
Light and delicate, these sandals let you feel the cool summer grass beneath your feet while still adding an airy statement.
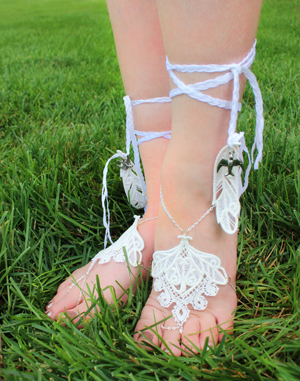
Celebrate the last hot days with these chic summer sandals. A little lace and some delicate chains go a long way to make a bold statement, while still letting you feel the world beneath your feet!


