I’ll apologize right up front about the image to the right. My inner nerd made me do it...
Still, embroidery and space. They’re destined to be together! Not, you know, in an obvious sort of way, but stick with me. The best embroidery shines with just the right kind of canvas, and I think some space designs deserve a little something more...celestial... to live on. Don’t you think?
Well, if you have a dark fabric and a little household bleach lying around, I can show you how to whip up a pair or space pajamas (or space anything really) in no time.
Supplies
What do you need? Well, if you’re awesome like me and always wanted to have an excuse to say you embroidered some space pants, then a set of PJs is the perfect thing to try this out on. So, you need:
- A set of PJs, black or dark colored
- Household bleach
- bleach pen (optional, but fun for detail)
- Scissors
- Pins
- No-show mesh stabilizer
- Brush
- Water container or nearby sink
- Rubber gloves in case you’ll be contacting bleach
- Awesome celestial embroidery design, like this Pegasus
Designs Used
Basically what we’re doing here is using bleach to create a cool celestial space effect on our fabric. We’ve used bleach before to have fun with fabric, and I still find it one of the easiest ways to modify fabric without messing with dyes...
So the real trick to getting the space effect is layering, and wet vs. dry bleaching.
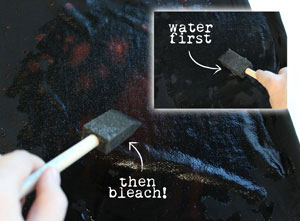
Let’s start by laying down our first layer of “space” which we want to be all glowy and soft... for this effect, first saturate a large area of your fabric with water. This should be the same area you plan to add your embroidery later.
Once it’s saturated with water, drip some large splotches of bleach in with your brush. Keep it towards the center so it has plenty of room to bleed.
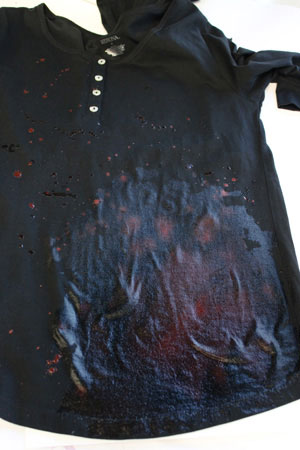
One thing that’s a little unpredictable about bleach is what color it will turn your fabric. I found that blacks often bleach out to a reddish orange color, which I think is just dandy for space stuff, but other colors or fabrics might react differently...
Let your bleach sit on your tee for awhile. You should start to see it working. Now, for a more focused, “star” pattern, put some more bleach on your brush, and then flick it on to your fabric, so it leaves little dots of bleach. You can see those on my tee outside the water saturated area. Doing this on dry areas mean you will get small star “dots”. Doing this on wet or damp areas mean your stars will bleed a bit. Not a bad effect, just different.
Remember, this ain’t a science, despite the fact that we’re dealing with outer space here.
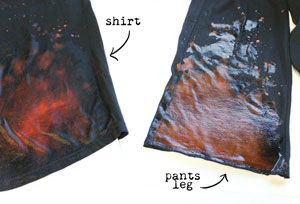
Don’t forget about your PJ pants! Add some water and bleach to those too, and some splatter stars for good measure.
When you’re satisfied with how far along this pass of bleach has gone, quickly take your fabric and dunk it into cold water. (Now’s a good time to put on those gloves!) Rinse it out really really well. The bleaching process will ONLY stop once it’s been rinsed out.
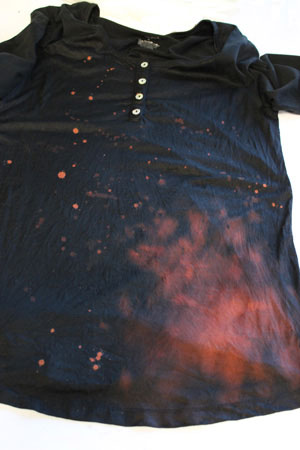
At this point, I would let your fabric dry a bit. I find the best way to get a good “space” effect is to layer your bleaching. There are many ways to do this, however. If you’re looking to add more soft bleeds, then you can go back in on your fabric while it’s still damp. If you’re looking for more sharp, crisp bleach effects, wait until it’s totally dry before you attack it again.
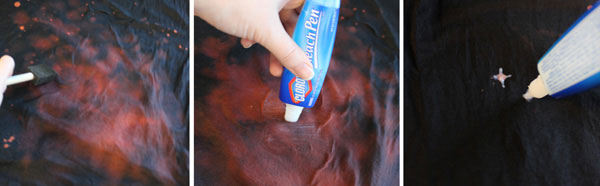
I was mostly looking for more spacey, blotchy effects, so once my tee was semi-dry, I saturated an even larger area with water, and plopped on some more bleach. Don’t forget about that bleach pen! (if you have one) The scrubber tip is great for adding focused areas of bleach (especially where your design will go, so it’s nice and light) and the gel pen tip is great for drawing “star” effects and such. Don’t forget about your pants either!
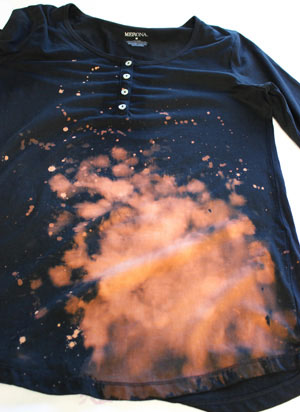
As usual, as soon as your bleach has reached a phase you’re happy with, dunk it immediately in water. Also remember that a wet shirt is going to make your bleach marks look darker, so you might be further along than you think you are.
DON’T leave the bleach on too long, as it WILL eventually weaken your fibers.

Once your fabric is rinsed and dry, you should have some totally spacy fabric that’s now perfect for a little celestial embroidery. I’m adding two sizes of the same Pegasus design, the large one at the bottom of my tee, and the small at the bottom of the pants leg. It’s kinda a fun way of creating a “matching set” for your PJs.
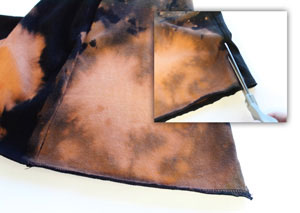
If your apparel is not hoop friendly yet (like my pants leg) use your scissors and cut up along one side seam. You only need to cut about 6-7 inches or so in order to open it flat enough to hoop.
I managed to hoop my shirt without cutting it up, but it all depends on your PJs.

Hoop up your design with your stabilizer (again, I’d recommend a no show mesh, something soft against your skin!) Set it to stitching.
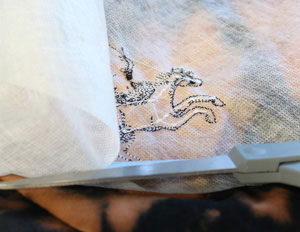
When you’re done unhoop and carefully cut away your excess stabilizer.
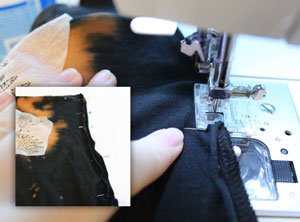
If you had to cut up your PJs, turn them inside out, and pin together the side you cut open. Sew a seam along the edge to stitch it closed again, good as new.
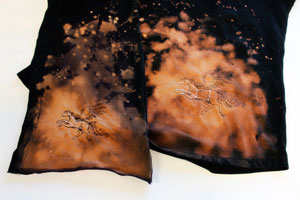
Here’s how the final pieces look bleached, embroidered and stitched back together.
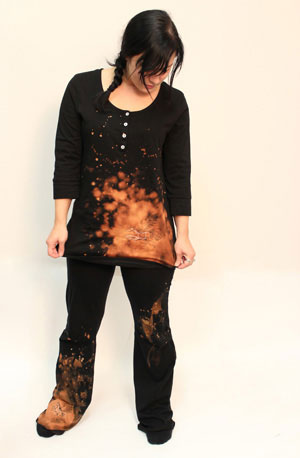
Now you have a totally rad set of custom jammies, space-ified with bleach and embellished with beautiful constellation embroidery!
This technique means you can pick out just the PJs you want, whatever size, shape and style, and still make them totally your own with this cool technique.
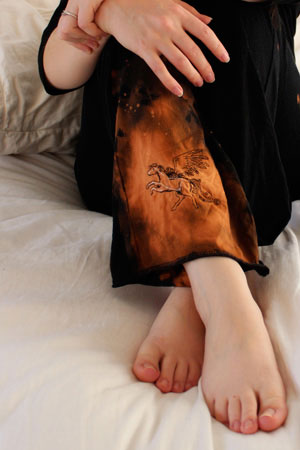
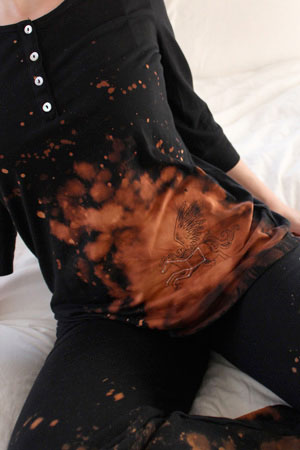
Bleached out areas give you the perfect celestial canvas for your design, allowing them to really pop on your fabric.
Best of all, this can work on anything you can bleach and hoop... bags, hoodies, scarves, tees, onsies. The effect is color safe since it’s just using bleach, no dyes!
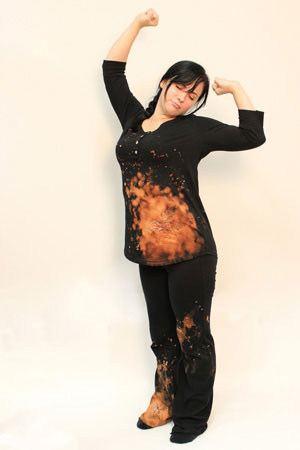
Yup, you and your space pants can rest easy tonight knowing you made something super cool and comfy using just bleach and some awesome designs, on the cheap and with minimal effort!
Now if you’ll excuse us, we have some naps to take. These things are pretty comfy.


