If you've never heard of a bleach pen before, then boy, do I have a treat for you.
I discovered this little wonder of the crafting world while wandering through my local mega-mart every-chain store (i.e. Target). I saw this little guy sitting in the aisle, and I know the first thing you're supposed to think of is perfectly pressed white crisp laundry with naught a stain anywhere. But all I could think of was how cool my jeans would look with little skulls bleached into them. My brain does these things on its own, I swear.
Upon purchase of said little bleach pen, it became a swank little tool for all sorts of things. Heck, it even helps me with my laundry from time to time....
Designs Used
This week I made a slick little scribbles-collage-embroidered-bleach-pen-pillow cover, However dauntingly long the name may be, be assured that it's simple and fast, and gives some really cool results.
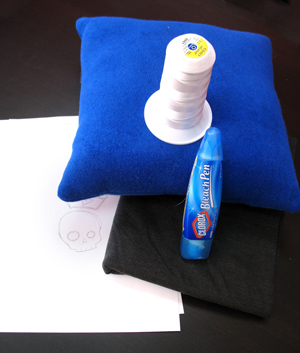
I used the Queen of Hearts scribbles design, but was really tempted to use Yorrick...and really, any scribbles-style design will do. I also had a pillow form (truly a pillow that I was bored with), fabric, thread, and a handy-dandy bleach pen.
I'm not usually one for product placement, but Clorox is the only one making these little pens and selling them in my neighborhood store. They're cheap, easy to find, and fabulous, so I'm all about Clorox at the moment.
The first thing I did, before I cut or measured or really did anything, was test how the fabric reacted to the bleach. I thought that bleach would always make fabric white, but not so. There's a veritable rainbow of colors that can result when fabric meets the power of bleach. Some are fabulous; some are pretty nauseous.
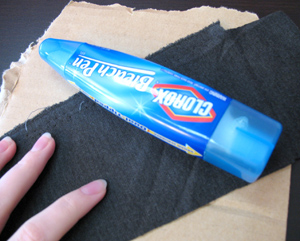
You won't know what your fabric is going to do until you test it, so grab the bleach pen, a scrap of fabric, and something to put under the testing area so you don't bleach pretty patterns into the table.
I'm a high tech kinda girl, so I'm using cardboard.
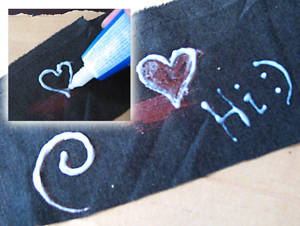
Doodle away...
Your bleach pen probably has two different tips -- one fine "pen" side, and one "scrubby" side. Don't discount the scrubby side, it can have some cool effects.
After you've doodled to your satisfaction, you might have to wait a bit for the bleach to work. Depending on the fabric, it can take anywhere from 5 minutes to 30, but most fabrics will show the results pretty quickly.
After your bleach has sat long enough, take it away to the sink and rinse it thoroughly. Remove all traces of bleach, lest some of it stays on and keeps bleaching, or rub off on some other part of the fabric, which would be sad.
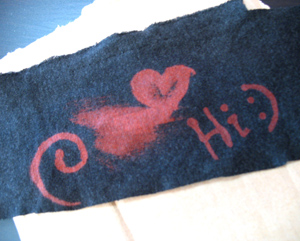
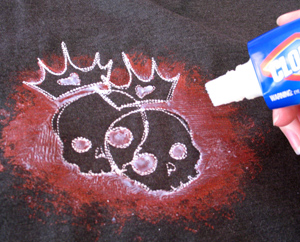
To my surprise, the fabric didn't bleach a nice pasty white, like I expected from a charcoal-colored fabric. Instead it bleached a deep, blood red (hooray!).
I was happy with my surprise results, but you might not be, so test the fabric first.
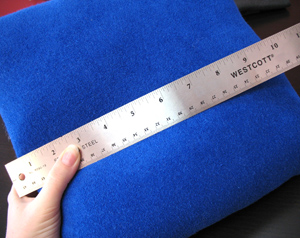
Once you've tested to your satisfaction, grab your pillow.
I want to say right away that I have nothing against my little blue pillow, but all it was doing was sitting there being...blue. I thought it had much more potential than that. Plus, the cover I'm making is easily removable, so blue can come out again later if it wants.
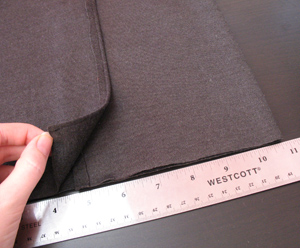
Measure the pillow. Mine is a weird 11 inches wide. Most pillows come in sizes like 12 or 14 inches. The cover I'm making is meant to be snug.
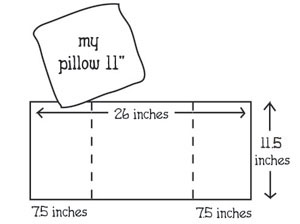
Now comes time to figure out how large the fabric should be. I want to end up with fabric long enough to wrap around the pillow with 4 inches of overlap. I'm also adding another 1/2 inch so it's snug, but not too snug.
For an 11 inch pillow, the fabric is going to be 26 inches long, measuring in 7.5 inches from the ends to fold over. A 12 inch pillow would be 28 inches long, with 8 inches folded in at the ends.
Here's something noteworthy that I discovered the hard way...when you take your nice little bleached fabric and soak it underwater, it can sometimes SHRINK. Use a bit of scrap fabric to find out if yours does, before you cut your fabric, and add any measurements accordingly. This will save you a lot of headaches later on. Someone might as well learn from my mistakes, because I never seem to...
Once you have the fabric cut out, fold in the edges so you can have a better idea of where the front of the pillow is, and what you have to work with.
So...here is where you can really have fun with the scribbles designs. Because they're so light and fast-stitching, you can create some really spiffy effects by layering them on top of each other without the stitching getting too heavy. Pick a few you like and play around with how you think they'd look together, or you can be like me and just take one design and layer it over itself. I'll show you what I mean...
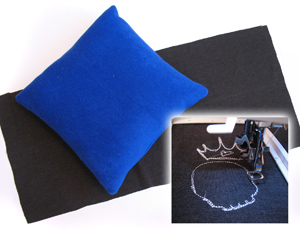
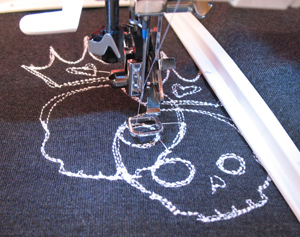
Hoop up your fabric with stabilizer and sew the first design, keeping in mind where you want it to go on the front of the pillow.
After the design has sewn, you can either sew the next one with abandon, or, if you have something specific in mind, line it up.
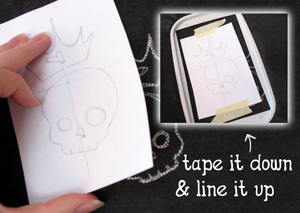
Use a template of the design to help give you an idea of where it's going to overlap the first design. When you like where it is, tape it down and use the crosshairs on the template it line it up with the marks on the hoop.
Once it's lined up, remove the paper template and sew away.
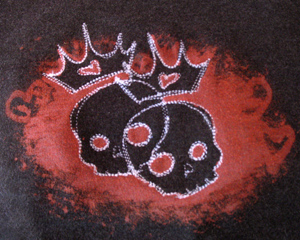
I decided to use the same design, and mirrored it, but you can do any number of things to get cool layering effects. I also decided to use white embroidery thread, because I won't be able to see any difference in the coloration when it's attacked by the bleach.
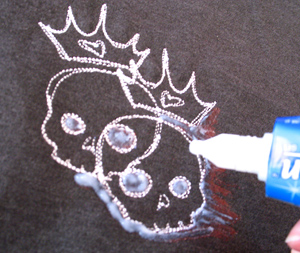
Now it's time to pull out the bleach pen!
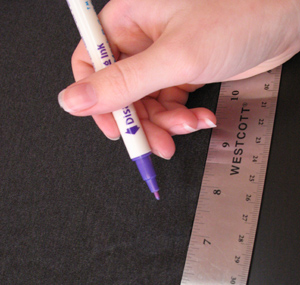
I think it's fun to play with the negative space the design leaves behind, so I'm bleaching around the skulls instead of bleaching the skulls themselves.
The pen tip can be pretty exact, but you still have to be careful of bubbles and splatters. Don't worry if it goes out of line a bit, it's all part of the look. Often accidents result in the coolest effects.
Don't forget about the scrubby side of the pen! You can get some cool gradation and splatter effects by stamping away with that end.
When you're done with your first once-over, wash it under the faucet, making sure you get all the excess bleach off.
You can see here it leaves behind a pretty neat effect, but we can go one further...

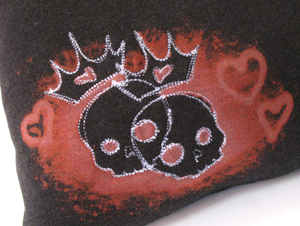
I want more areas of contrast, so I'm going over the design with the bleach pen again, pulling out details and adding lighter shades.
I really wanted to lighten up the white areas, so I left the bleach sit for a while.
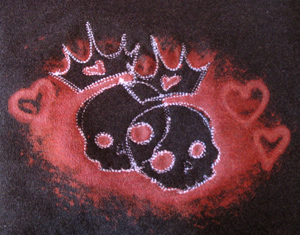
Then, after a little lunch, I washed the bleach off again.
Now I have lighter gradations and some little hearts that pop out from the fabric. You can do this again to get even more gradation and contrast, but keep in mind that fabric can only take so much bleach before the fibers weaken or disappear altogether.
Once you're happy with your design, it's time to turn it into a pillow cover.
Pin a 1/2 inch fold along the short sides of the rectangle, and sew a 1/4 inch seam.
Fold the fabric, right side in, according to your measurements. Mine should fold over 7.5 inches on either side -- but mine shrunk just a bit, and yours might have, too.
The most important thing is that when your pillow cover is folded closed, the cover is at least as wide as the pillow, and there's still a good amount of overlap.
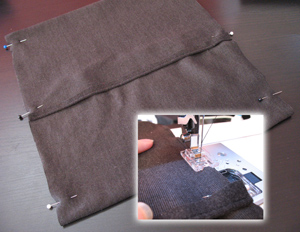
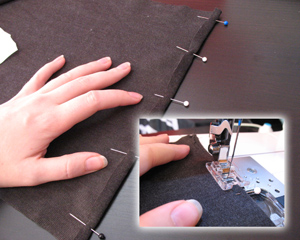
Pin the fabric in place and sew a 1/2 inch seam down the two open sides. Make sure the two overlapping pieces don't move around and get caught under the machine as you're sewing (again, someone might as well learn from my mistakes, as I'm not going to).
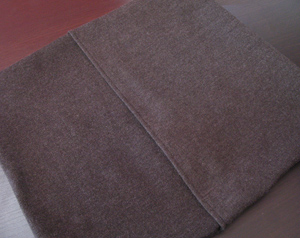
Once you're done, turn the cover right side out and push out the corners.
Grab the pillow or form, and stuff it inside! It'll be a snug fit, but pillows are squishy, and it'll look nice and plump when you've stuffed the little bugger in there.
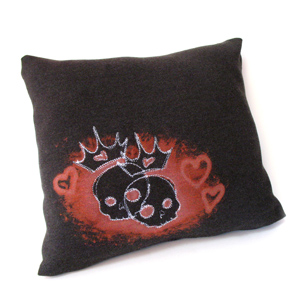
Now you've got a really sweet little cover for your pillow that was once feeling blue.
The cover itself is a snap to make, and there are endless ways you can play with overlapping scribbles and bleach pens.
No one would guess that all it took to make this were a few simple embroidery designs and a bleach pen! Best of all, with bleach there's no sticky paint or transfers. The fabric stays soft, the colors are permanent, and there's no worry of any fabric paints rubbing off on your couch.

You'll love your little squishy creation. You can use it to brighten up a room or studio, or make a fantastic little gift for someone. Or just snuggle it all to yourself.
Try it on lots of different fabrics to get all sorts of colors and effects, and make a whole array of fantastic squishy art!


