Bulletin boards, especially ones in homes, offices and kitchens, are often full of interesting things. Ticket stubs, gift cards, coupons, business cards, photos, notes, lists, doodads and whatzits. They're a canvas of signs of life and adventure. The problem is, the canvas is often totally dull in comparison, a boring old corkboard, cheap wooden frame, no life at all. There's no problem with having a nice blank canvas to paint your life upon, but does it really have to be so... ordinary? Why not give your life a better canvas to fill!
With this super easy, no-sew project, we'll dress up a boring ol' corkboard with some fresh neutral fabrics and a little hint of embroidered attitude.
Supplies
To make your memo board, you'll need:
- An old memo board (or you can buy corkboard at a home store, but I find plain corkboard is never as thick or sturdy as the ones you get from pre-made boards)
- An awesome embroidery design to add a little personality
- Cutaway stabilizer
- A large flathead screwdriver, hammer or other tool to pry off the frame
- Scissors
- Fabric to cover the board (you can pick a bold fun print, but I find neutral fabrics work best so they don't compete with the stuff you stick to the board)
- Stapler
- Upholstery tacks
- Large sheet of tag board
Designs Used
If your corkboard is thinner than your upholstery tacks are long, we'll need some extra supplies, but we'll get to those later.
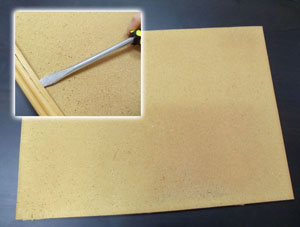
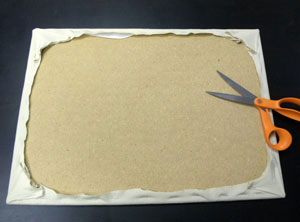
So, let's start by removing that hideous frame. Be gentle, as removing the frame can score up the corkboard a bit, but don't worry too much, as it will soon be covered with pretty fabrics. What you really don't want to do is gouge out a big chunk of corkboard. That doesn't cover as well with fabric.
So, frame removed! Now we should have a nice, big, sturdy piece of cork for our memo board.
If your frame had any hanging hardware attached, pry those off too -- we'll put them back on the board later.
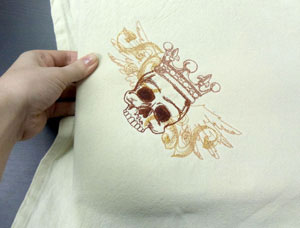
So, let's start with the only part that takes a bit of stitching, the embroidery! Choose something to complement your style, that goes well with the neutral and rugged look of your fabric. I picked up this skully that was a freebie a little while ago.
First take your fabric, and cut out a rectangle about 4 inches wider (around each side) than your corkboard. We'll trim off the excess later, but it's good to have extra for hooping and later stretching. If you like, you can print a template to help you decide where best to put your embroidery.
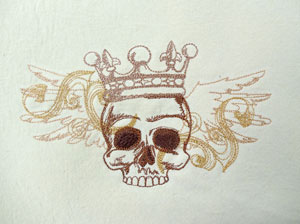
Hook up your fabric with some cutaway stabilizer, and embroider away! My light-stitching little skully, with some fun metallics to dress up our rustic little memo board, was done in no time.
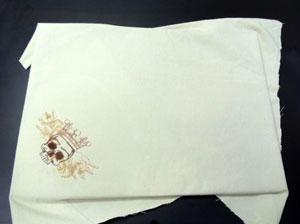
So, all that remains now is covering the board with our spiffy embroidered fabric. Lay your fabric on top of the front of the cork, wrapping the edges and adjusting the placement 'til you get your embroidery in just the right spot.
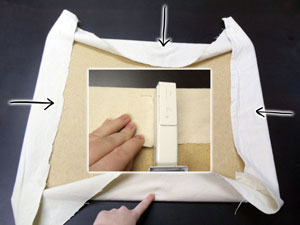
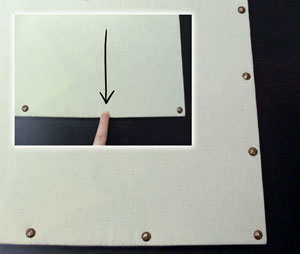
When you're happy with where things are, carefully flip your whole board over, fabric and all. Grab your stapler! Don't worry if you don't have a staple gun, cork is so soft and forgiving that a regular stapler will work just fine! Start by adding a staple right in the middle of one of your sides, like where my finger is pointing. Then, go to the opposite side, pull the fabric nice and taut, and staple one in the middle there. Now repeat that on the other two sides, until you have four staples holding down the middle of each side.
Before we go off stapling the rest, like a crazy person, flip your board over and see how everything's looking on the other side. If you don't like where your embroidery is lying now, it's much easier to undo four staples than a billion, which is how many you would totally add if you were stapling like a crazy person.

So, once you've given the all clear to the placement, it's time to staple the rest! If this looks a bit familiar, that's because it's pretty much exactly how we stretched a canvas in this tutorial. Start by working from the middle out. Staple one side, turn 180 degrees, staple the opposite side, then turn 90 degrees, staple one side, turn 180 degrees, staple the other, like the numbered diagram shown. Continue stapling from the middle out until you've reached the edges.
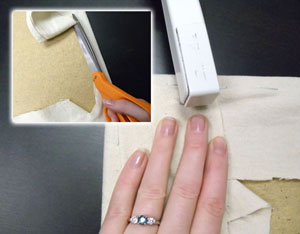
Finally, fold the excess fabric at the corners flat, and staple in place. When everything is neat and stapled a billion times, you can grab your scissors and trim away the excess fabric.
This is what the back of your board should be looking like right now. Not very neat, but we'll get to that.

So, back to the front. It's time for our nifty little upholstery tacks! They don't really do anything other than make your board look neat and rustic, but do you really need more of a reason than that? Start by adding a tack to each of your corners, and then one in the middle edge of each side. We're going to space it out like this so we can get even placement, instead of just guessing willy nilly.
Once you've got your middle and your corners placed, find the space between a middle and a corner tack, and mark the halfway point. This is where we'll put our next tack. Continue working, adding tacks to the middle of each segment, until you have a board that looks like so. There are other ways of adding tacks, like I said before, you could just start sticking them in, but this assures everything comes out evenly.
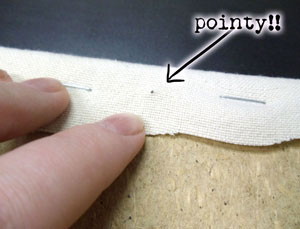
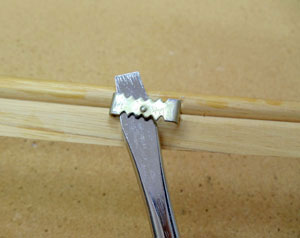
Now, be careful when you flip your board over! Unless you were lucky and got a really thick board, or some shorter tacks, you probably have a little bit of a point poking through the back. If you happen to have some more serious hardware tools in your sewing box than I do, you can file them down.
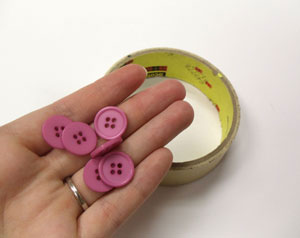
If you're like most of us, and your sewing box lacks serious metal working tools, I have a solution for you that involves things everyone has around their craft room. Tape and buttons!!
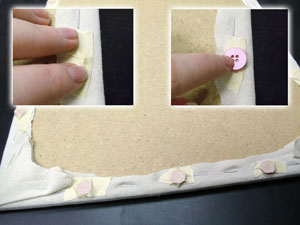
Here's how it works. Begin by wrapping one of your points with a few layers of tape. Don't just place the tape on top of it, it will poke right through. Kind of wrap the tap around it, giving it a little protective case. Now, take a button, and position one of the button holes over the point bit of the tack. Hold that button in place, and put a strip of tape over it. The button should be high enough to cover the tack point, and covered in tape and buttons, the point is no longer as stabby as it once was. Do this for all the points that come through the back of your board.

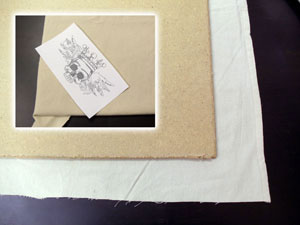
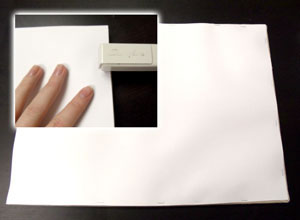
Now, time to cover up all that excess fabric, buttons, and tape! Lay your fabric corkboard on top of a piece of tag board, and trace around it. Cut out this shape, so that the tag board perfectly fits the back of your board.
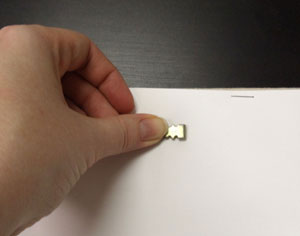
Lay this piece on top of all that unsightly stuff at the back, and grab your stapler again! Staple down the sides (if you added button backings, you're probably stapling in between each of the buttons) just enough to keep it in place and give it a smooth back to hang on your wall!
Finally, if you had some hardware from the frame, reattach it now so your corkboard is ready for hanging!
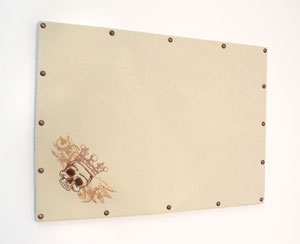
There we have it! Simple and stylish, it won't compete with all the neat stuff you're going to put on your memo board, but it has a splash of personality and style all your own.

Fill it with all your notes, pictures, doodads and important lists (to do: take over world!). Much better! Your board is no longer humdrum or ho-hum. It's got class and style to suit any room, and if you ever get bored with it, just pull of the fabric, embroider away and staple like a crazy person once again!


