Business cards are a great mark of any professional. They’re sleek, easy to hand out, and great for self-promotion. Still, when digging in your bag, and say “Sure! Here’s my....er...
...card.”
It doesn’t look as professional as you’d hoped. Cards take a beating without a little care, and it takes but a moment to whip up something to up your crafty business credibility and save your pretty cards!
Supplies
So, to make your new business card holder, you’ll need:
- Felt or other non-fraying material
- Scissors
- Cutaway stabilizer
- Cute and crafty embroidery design
- Lining fabric (optional)
- Temporary spray adhesive (if you’re adding lining)
Designs Used
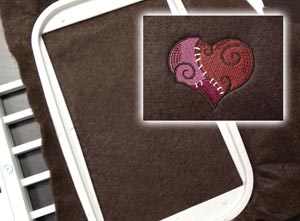
Let's start with the embroidery. Hoop up your felt with a piece of cutaway stabilizer, and embroider your pretty design. You might notice that my stitchy heart is missing one of its steps, all the little curly bits. You can skip certain stops if they don't interfere with the rest of the design. I left these out so it would better fit on a business card holder.
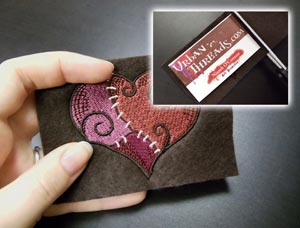
Now let’s cut it to size to fit your business cards. Most business cards are pretty standard in size, so even if you don't have your own on hand you should be able to use any one you've got. Place your card centered over your design and snip around it, leaving a little excess around the edges for the seams.

If you'd like to add an inside lining, now's the time. Spray the back of your piece with some spray adhesive, and place the two pieces wrong sides together. Snip the lining fabric to size so they're the same size.
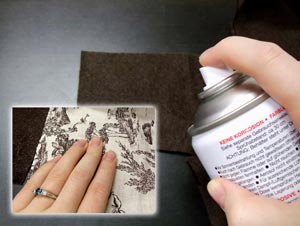
Now let's prepare the other size of the business card holder. Spray a piece of scrap felt with some spray adhesive, and smooth on some lining wrong sides together.
To get both pieces the same size, lay the embroidered top piece on top of your fabric you just put the lining on, and trim it to size, so you have two matching pieces.
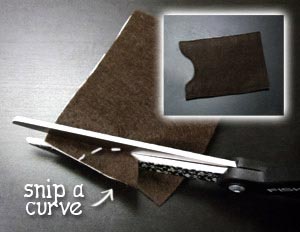
Take your bottom piece (the one without the embroidery) and snip a small curve out of one edge. If you're having trouble getting the curve to come out even, you can fold it in half when you snip it. You want to cut a piece out just large enough for your thumb to grab a card.
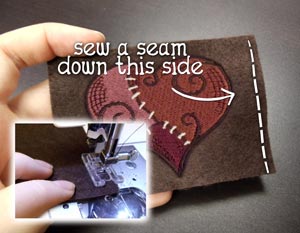
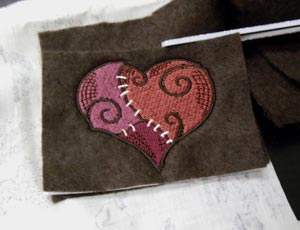
Take your embroidered piece and pick which side you'd like to be the open edge. Sew a seam down that side to finish the edge.
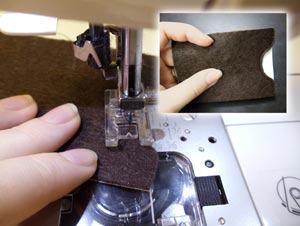
We'll also want to finish the edge of the piece with the small notch you snipped out. Sew a seam along that edge, carefully following the curve you clipped.

Finally, place the two pieces lining sides together, with the two finished seam edges on the same side, and sew a seam around the remaining three edges, leaving the top open.
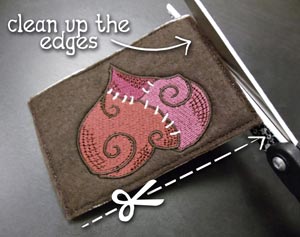
If you like, snip a little of each side of your holder to tidy up the edges, and make everything nice and pretty.
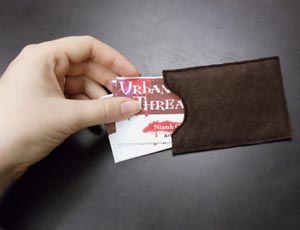
That's it! The easiest tutorial thus far! Slip your business cards inside your holder, ready and waiting in their snug and crafty little sleeve.

Awesome embroidery on one side, with a small little notch perfect for grabbing the edge of one of your cards quickly and easily while the rest stay snug and safe inside their little fabric lined pocket. Plus, if you happen to run a crafty embroidery business like I do, it makes it really quite easy to explain what you do. Instead of “well I have this big machine thing and then I change out different threads and then it stitches out these pretty...Oh heck, I do this...”
*points to awesome embroidery on other side of card holder*
And it'll all be clear.
Plus, my business cards stay professional and untarnished. It's a win-win! After all, if you're going to advertise your craftiness on your cards, you might as well do it with your card holder too!


