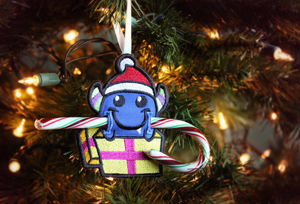
As well as a time for giving, laughter, and way too much shopping, Christmas is a fabulous time for nommy foods. This little monster is no exception. Monsters love nomming on things, especially candy canes. Lucky for you, though, monsters are polite, and will patiently nom on your candy cane and keep it safe until it’s ready to go to its rightful owner! This little Christmas monster will hang onto your candy cane and keep it safe on your tree until it’s ready to be shared.
Supplies
Ready to make your own little candy cane monster holder to life? You’ll need:
- Nom-tastic little monster design
- Fabric for monster (enough for both sides)
- Tearaway stabilizer
- Scissors
- Spray adhesive
- Printed dieline templates
- Ribbon
- Candy cane for nomming
- Tape (optional)
- Small knife
Designs Used
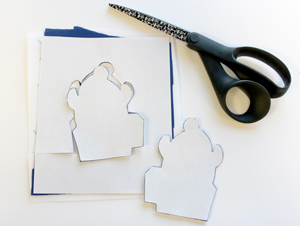
Start by getting your monster shapes ready. Spray some stabilizer and smooth your fabric on top. Then lightly spray the back of your printed template and smooth it on top of your fabric.
Carefully cut out each side of your monster, following the dielines.
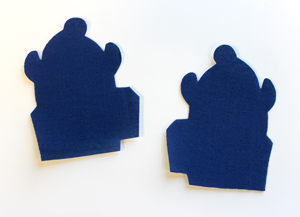
Once you peel away the paper template, these are the shapes you should be left with. Now we just need to stitch him together!
Hoop up your tearaway stabilizer and get your machine ready. In addition to your regular thread colors, you’ll need to wind one bobbin of black (or whatever color you want your outline to be) and one color bobbin that matches your fabric.
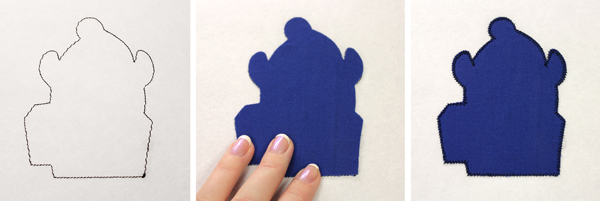
The first thing that will sew is your dieline. Once this has stitched, take your front fabric piece, spray the back with adhesive, and place it carefully inside your dieline. Your machine will do a quick zigzag tackdown stitch to keep everything in place.
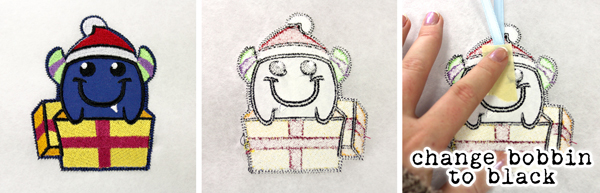
After the tackdown, your machine will stitch all the pretty inside elements to make your monster look sharp. Once those elements are done stitching, stop your machine, and flip the hoop over but DON’T un-hoop it. Tape in a loop of ribbon, and change your bobbin to match your satin outline (in my case, black).
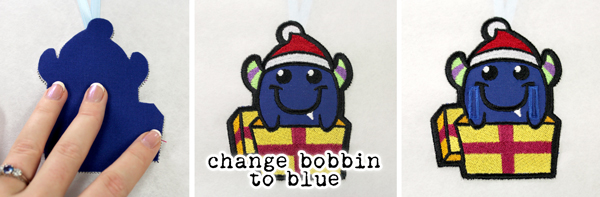
Once your ribbon is taped in place, spray the back of your final fabric piece, and place it carefully on the back of your design. Now you can put the whole thing back under the machine, and it will stitch a final tackdown and then a full satin border. But wait! We’re not done yet. Change your bobbin one more time, to the same color as your fabric (and the final embroidery step) so the little holes for the candy cane will match back and front. With the bobbin changed, let your machine stitch does final button holes, and you’re done!
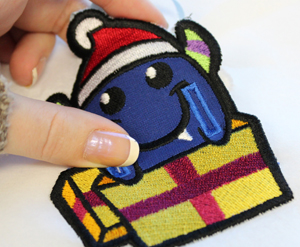
With your little guy stitched, you can now tear him free from the stabilizer.

To let him nom on his candy cane effectively, we need to open a slit in the button holes. You can do this with a small scissors or a little X-Acto knife, like I’m using. The satin edges will keep these slits from fraying beyond the borders.
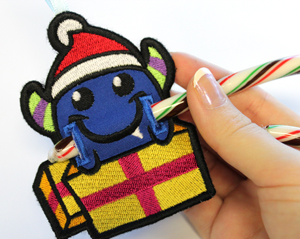
Now your monster is hungry. Administer one candy cane as needed to feed your monster. Proper monster care usually requires lots of candy (or in some cases, cookies).
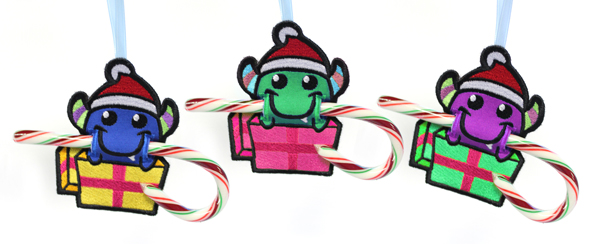
These little guys are just perfect for adding a monstrous little touch to your tree, while still keeping the candy cane tradition alive. Hanging candy canes on your tree? So boring. Hanging candy nomming monsters to do it for you? Awesome. Make them in a bunch of bright fun colors and give them as little gifts or stocking stuffers!
Monsters just love hanging out in trees (see how much you’re learning about monsters today?) and they love Christmas most of all (perhaps with the exception of Halloween).
Bring a quirky new twist to your tree, and let some monsters have some candy this season. After all, isn’t Christmas all about giving?
Plus, I’m pretty sure when you need your candy, your little monster will give it back. I think.


