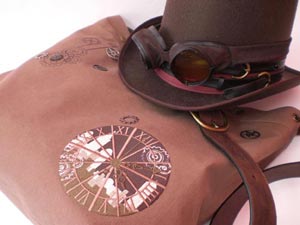
Hey, Karline here. I’ve had steampunk on the brain quite a lot lately, and in keeping with this week’s theme, I’ve put together a nifty steampunk satchel. I like this bag because it’s super utilitarian – the shape is nice and simple, and it’s a good excuse to use hardware like snaps and grommets. If you haven’t used these before, now’s the perfect time to sail into the unknown. Brassy adventures await!
Supplies
What you’ll need:
- Canvas for outside of bag
- Thinner fabric for lining of bag
- Foam board
- Old leather belt, for the strap
- Leather punch kit
- Leather cording
- Grommets and the tools to apply them
- Snaps and the tools to apply them
- Hammer
- Decorative hardware – cogs, keyholes
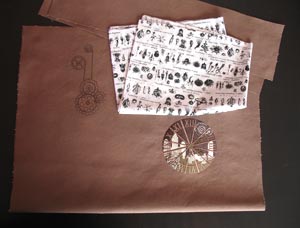
- Steampunky embroidery design(s)
- Medium weight cutaway stabilizer
All seam allowances are 1/2 inch unless otherwise noted.
Designs Used
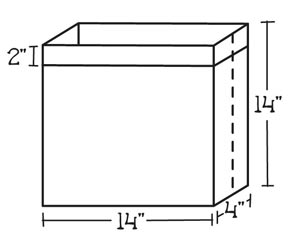
If you’re at all particular about the measurements of your finished bag, make a quick sketch. The real thing isn’t going to be quite as boxy as it looks here, but thinking about it this way helps with planning. Here are the measurements I used.
The outside of this sorta-boxy bag is all made from one piece of fabric, that wraps around the front to the bottom to the back, joined with a side seam. So the width of your fabric should equal the width of the front plus half of each side, plus an extra inch for seam allowance. That 2-inch wide edge strip is a separate piece of fabric – we’ll cut that later. That leaves 12 inches of height for the front and back, plus four inches for the bottom, plus an extra inch for seam allowance.
So I’m going to cut a 19-by-29 inch rectangle of canvas for the outside:
Outer fabric width = 19 inches = 14+2+2+1
Outer fabric height = 29 inches = 12+12+4+1
Or you could just cut a big rectangle and wing it.
Cut another rectangle the same size for the lining. Actually, the print on my lining fabric has a top and a bottom to it, so I cut two 19-by-15-inch pieces and stitched them together to make one 19-by-29-inch rectangle.
For the top edge pieces, cut two pieces the same width as the other pieces. For the height, double the desired finished height of the border, then add an extra inch for seam allowance.
Two top edge pieces = 19 by 5 inches
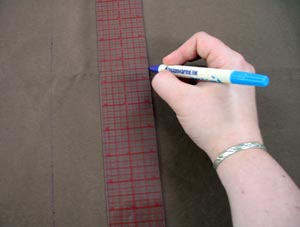
Calculations over. Use an air-erase marker to mark out these rectangles on your fabric, but don’t cut them out quite yet.
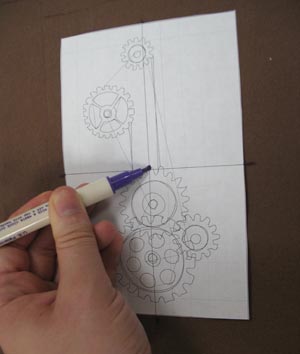
Mark the locations where you want your embroidery. I found it useful to sketch out “landmarks” so I knew where the bottom and sides of the bag would start. Air-erase markers are amazing things.
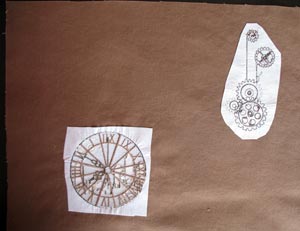
Embroider the designs. Trim away the excess stabilizer from the back.
Cut out all the rectangles.
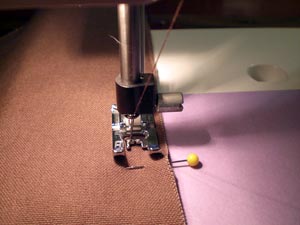
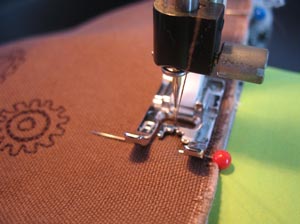
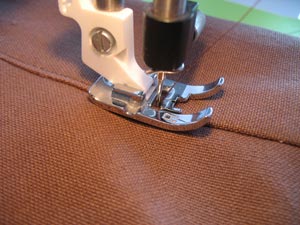
Fold the outer fabric right sides together, and stitch up both side seams.
Why’s there a purple post-it note on my sewing machine, you ask? Because I am terrible at maintaining consistent seam allowances. I stick a piece of tape (or apparently a post-it if no tape is handy) on the machine to remind me where the seam allowance I’m currently shooting for is. It helps.
Hmmm, weird lighting. That’s what happens when you work on these things long into the night like a mad scientist.
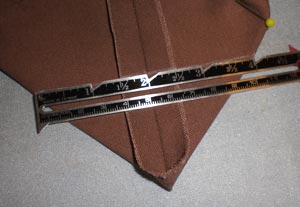
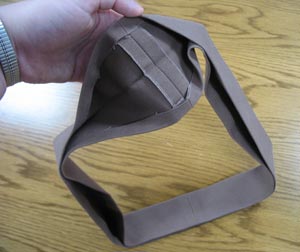
Now that the side seams are stitched up, use an iron to press a crease at the bottom of the bag. It’ll help with lining things up for the next step. Also press open the side seams.
It’s time to square off the corners. Manipulate the bag so the side seam is lined up with the crease you just made. Use that nifty air-erase marker to draw a seam line, as far up as it needs to be to be the desired width (in this case, 4 inches). Do the same for the other corner. I found it helpful to use a couple of pins to keep everything in place.
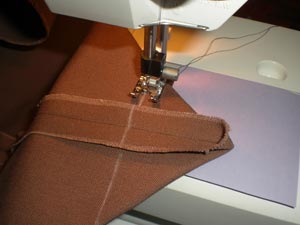
Stitch along the seam lines.
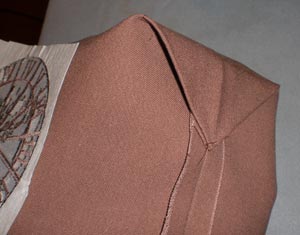
Use a quick hand-stitch to tack the pointy flap to the side seam of the bag.
Turn the bag inside out.
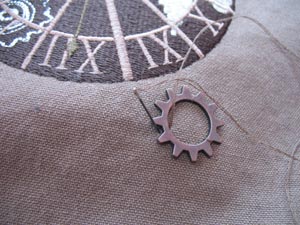
Now’s the time to stitch on any decorative bling you’ve got. Strangely enough, I found these cogs with scrapbooking supplies. You can find some neat treasures with jewelry supplies, too.
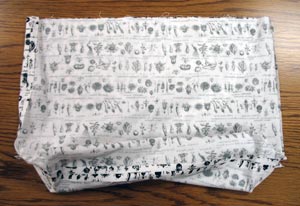
Construct the lining in the same way as you did the outside.
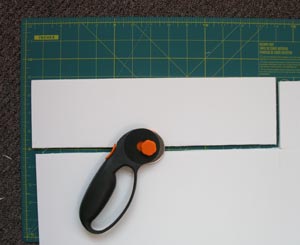
Measure the bottom of your bag. Cut a piece of foam board slightly smaller than that, to give the bag some structure. A rotary cutter or X-acto knife are going to work better than scissors for this.
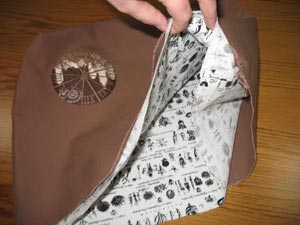
Slip the rectangle into the bottom of your bag, then slip the lining in into the outer bag.

Take a little hand-stitch at each bottom corner to hold the outer fabric and the lining together. This will help keep the board in place.
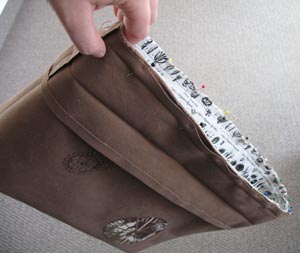
Stitch the outer fabric and lining together along the top edge, a little less than 1/2 inch from the edge.
Stitch the top strips together at the short ends, so they form a big loop. Press those seams open. Press each long end under 1/2 inch, then press the whole thing in half lengthwise. It should look something like this when you’re done.
Unfold the top edge piece and pin it to the bag as shown. Stitch them together along the crease.
Re-fold the top edge so it folds over to the inside of the bag. Pin it in place like this, and stitch along the outside, right next to the fold, to attach everything together.
Sewing done! Now for the fun part … hardware!
To tell the truth, I’ve always found hardware a bit intimidating. I shouldn’t. Like so many things in crafting, it’s totally easy if you just take it step by step. And immensely satisfying … pretty soon you’ll be finding excuses to put grommets and snaps on everything.
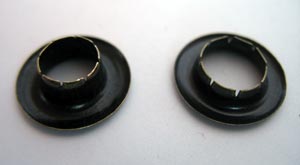
This is a grommet. Notice the top piece (on the left) is longer than the bottom piece (on the right).
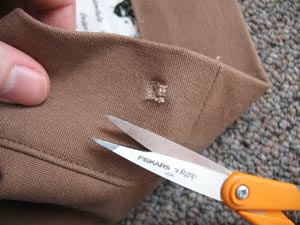
We’re going to use grommets near the top of each side seam to help attach the strap to the bag. Use an air-erase pen to mark the spot where you want your grommets. Now grab a pointy pair of scissors, take a deep breath, and poke a hole in your fabric.
Keep wiggling around the scissors and trimming off little bits of fiber until the longer half of the grommet (the one on the left in the above picture) can poke through, from the outside to the inside. Stick the other part over it from the other side.
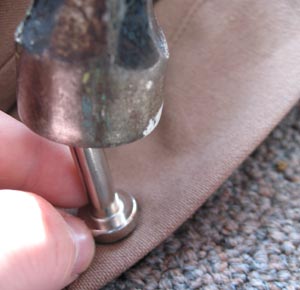
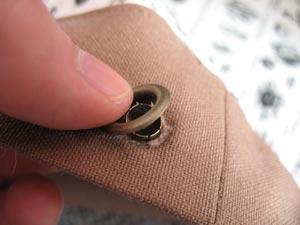
Some grommets can be installed with a special pliers-type tool, I’m using this little tool and a hammer. There’s a separate base part of the tool that goes underneath everything (not pictured) to help keep the bottom side looking nice. Your grommets should come with instructions – please read them.
It’s not a bad idea to test this on some scrap fabric before you do it to your bag.
Repeat for all four grommets. Ta-da!
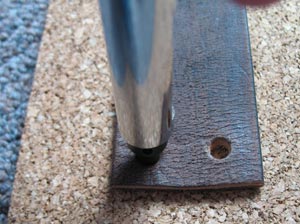
Now to attach the strap. Buckle your old leather belt, then cut it somewhere in the middle so you have free ends to attach to the bag. Use a leather punch (available for a few bucks at craft stores) and a hammer to make two holes in each end.
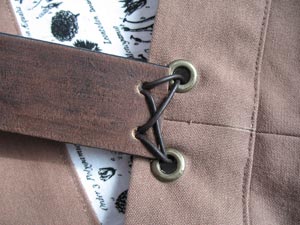
Use the leather cord to lace the two together in whatever manner pleases you. Tie a square knot in the back. I left the ends long for security, and called it style. Funny how those things work.
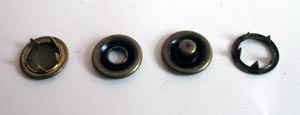
This is a snap. There are four parts.
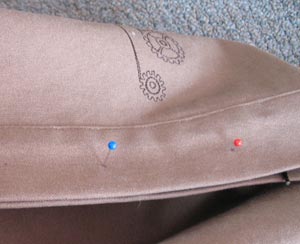
Mark the spots where you want your snaps along the top edge. Since they’ll need to line up, I found it useful to position the edges exactly together, poke pins through the spots where I wanted the snaps, and then mark the spot from each side with an air-erase marker.
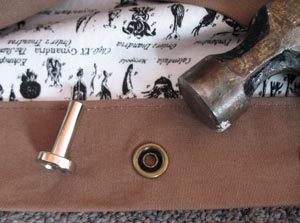
Installing a snap is pretty much like installing a grommet, except you do it twice and there are no holes to make. Again, read the package instructions. Basically you poke the pointy part through the fabric, stick its mate on the other side, then use the little hammer-tool (or pliers-tool, if that’s how you roll) to stick them together.
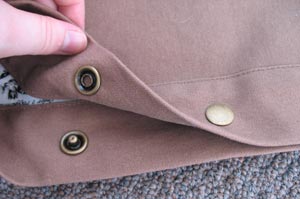
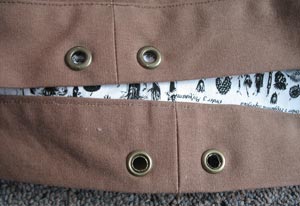
When you’re finished, the top edge of your bag should look something like this. I hand-stitched a metal keyhole (also found with scrapbooking supplies) at the center of the top edge for a bit of extra flair.
And you’re done! Next time you go exploring in your dirigible, you’ll have all your notebooks and maps close at hand.
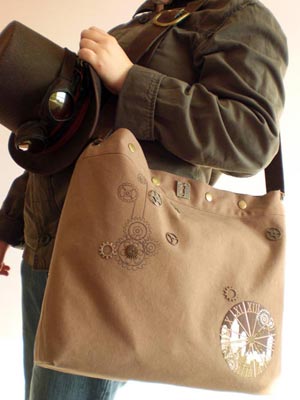
Or, do like I do and bring a bit of fantastical style into everyday life. You may not be able to get away with wearing a corset and bloomers to the office, but a rugged, brass-adorned tote that you made yourself is guaranteed to be a hit.
Happy steampunkin’!


