Hey, Karline here (aka Niamh’s trusty sidekick who takes care of a lot of Urban Threads things that are not drawing pretty pictures). I grew up sewing clothes, but I’m generally not much of a fashionista. Give me jeans and a cozy sweater, and I’m a happy camper. Lately, though, either styles have become much more awesome, or I’ve been assimilated into the soul-sucking mind-hive of fashion. There are so many great things out there right now - and the best has got to be the cape. It’s a cute alternative to a fall jacket, and it’ll be just as stylish as the holiday season approaches. Follow along to make your own - it’s as easy as it is chic!
Supplies
To make your capelet, you'll need:
- 1 1/4 yards outer fabric (I suggest wool suiting for breathable warmth)
- 1 1/4 yards lining fabric (mine is a printed quilter's cotton - pick something fun!)
- 2 yards ribbon or strap for tie
- Medium weight cutaway stabilizer
- Temporary spray adhesive
- Tape measure
- Tailor's chalk or air-erase pen
- Embroidery design of your choice
Designs Used
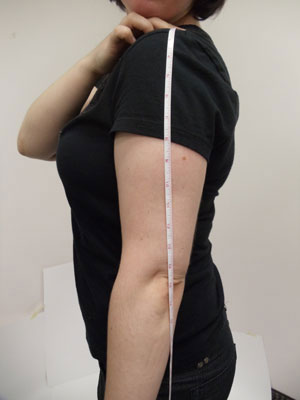
Math time. This one's easy, I promise. Take a tape measure and stick the end at the base of your neck, on the side - about where the top edge of your cape will rest. Figure out where you want the lower edge of the cape to fall. Add 4 inches to that measurement. This will be the radius of the circle you’re going to cut.
My total is 20 inches, for a cape that ends just above my elbows. That means I’ll be cutting out a circle that's 40 inches across - which works out nicely, since the swirly printed fabric I got for the lining is only 44 inches wide. Keep the width of your fabric in mind - if your desired circle is wider than the fabric, you might have to modify these instructions by cutting out two half-circles. You're a smart cookie. You can do it.

Take your outer fabric and fold it in half, so the selvedges are together. Fold it in half again, the other way, to bring the raw edges together. You should have four layers.
Time to break out your gigantic compass. What, you don’t have a gigantic compass? No problem.
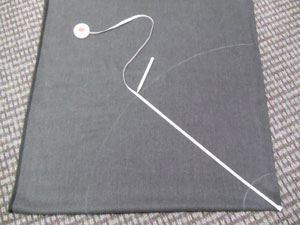
Take the end of your tape measure in one hand, and hold it in place at the corner of the fabric where the folds meet. In the other hand, take your dressmaker’s pencil or air-erase pen, and hold it together with the tape measure at the measurement you figured out earlier (in my case, 20 inches). Swing the pencil end around to draw a quarter-circle on the fabric.
Yes, my dressmaker’s pencil is actually a regular old colored pencil. Eh. It won’t show.
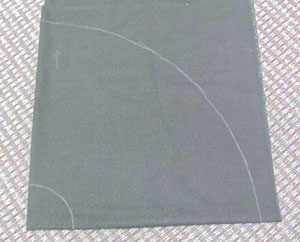
Do the same thing, holding the pencil at 4 inches, to draw the neck hole. If you’re making this cape for a young’un, you might want to make this measurement smaller. If you’re making this cape for an elephant ... I want to meet you.
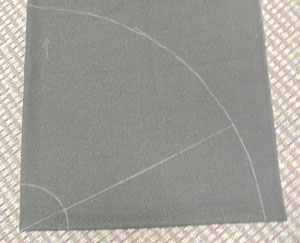
Now, if you want a nice dramatic circle cloak, go ahead and skip this step. But I want mine to be a little less than a full circle. I like capes with a wingspan of about 120 degrees (aka 1/3 of the pie). So I used a yardstick to mark a nice straight line from the center to the edge of the circle, to slice a little off of what will be the shoulders of my cape.
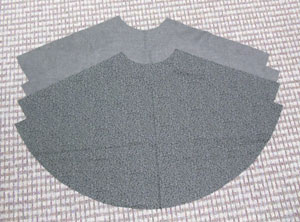
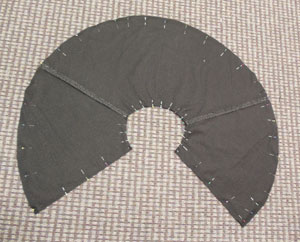
Cut out along the curves and the straight line. This will give you your cape front and back.
Do the same thing with your other fabric to make identical lining pieces. This is what you’ll have when you’re all done.
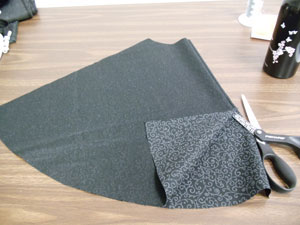
Fold one of your outer fabric pieces in half, matching the straight edges. Cut right down the middle. These are the two halves of your cape front.
Do the same thing with one of the lining fabric pieces.
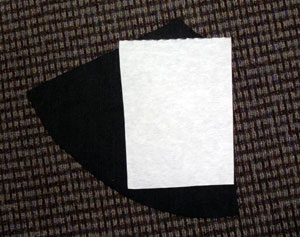
Time to embroider. Figure out where you want your design. Mine’s on the left chest of my cape, but a big design across the back would be awesome too. Cut a piece of medium weight cutaway stabilizer a bit bigger than your hoop, and stick it on the back of the fabric on the area to be embroidered. Hoop ‘er up and embroider the design.
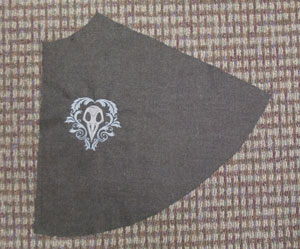
Here’s my cape piece all stitched out.
This bird skull is the perfect design for it, yes? Thanks, Niamh!
Lay the two cape front pieces right sides together with the cape back piece, matching shoulder edges. Pin, stitch, and press open the shoulder seams.
And then, you guessed it ... do the same thing with the lining pieces.
Clear some floor space and put on your perfectionist hat.
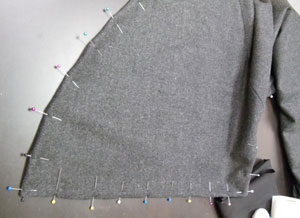
Lay out the outer fabric and the lining fabric, right sides together. Match them up and pin - first at the seams, then at inner curve, then at the outer curve. If the outer curve doesn’t match up exactly, grab your scissors and trim it until it does. Pin the straight side edges, too.
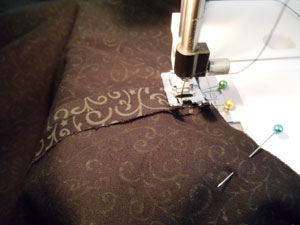
Sew all the way around the perimeter of this shape, leaving a gap in one of the straight side edges for turning.
After this seam is stitched, clip across all four corners as shown.
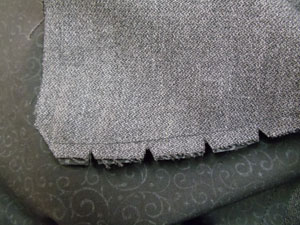
On the lower edge of the cape, cut little notches in the curve all the way around. When this seam gets flipped to the inside it will get scrunched into less space than it has now, so taking out a little of the bulk will help it lie flat.
On the neck edge of the cape, snip into the seam allowance as shown. This seam will cover more space when the cape is flipped, so the snips allow it to expand.
Be careful not to cut the stitching when you’re doing all this snipping, or it’s back to the sewing step for you.
Turn the whole thing inside out through the gap in the straight edge. Make sure to poke out the corners nice and neat.
Pin all the way around the edges, manipulating the fabric so the seam is nice and flat on the very edge of the cape. Depending on your fabric, you may find an iron helps with this; I did better without. But do make sure to press the seam allowance under at the gap so it looks like it matches the rest of the edge.
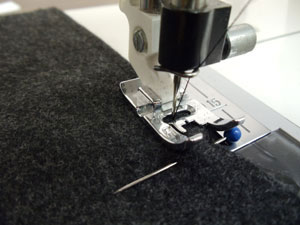
Sew close to the edge, all the way around the shape. This keeps the edge nice and crisp, and has the handy side effect of closing up the gap.
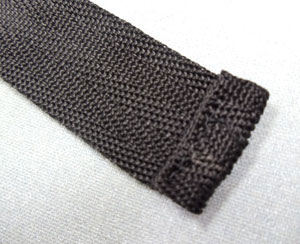
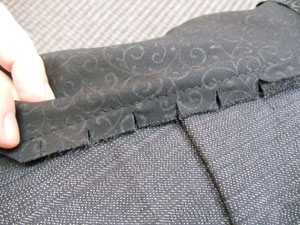
Grab your ribbon, strap, or whatever you’re using as a neck tie. To finish off the ends, fold under each end 1/4 inch, then 1/4 inch again. Sew in place.
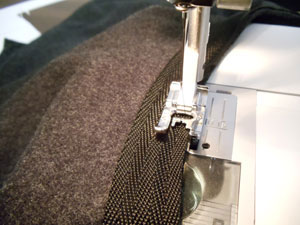
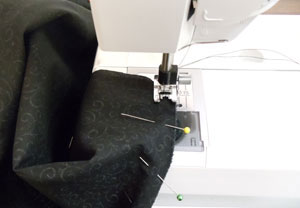
Pin the neck tie to the top edge of the cape along the outer fabric, matching centers. Stitch in place.
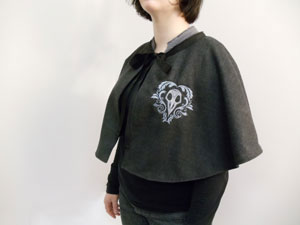
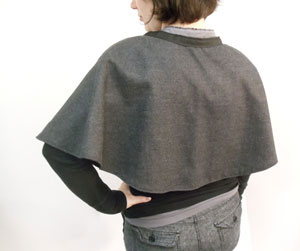
Ta daaaa! Your cape is done. Wear it as a stylish alternative to a fall jacket, or make it part of a costume. Or both. That’s a good option.
Vary the length from short like this one to sweeping the floor. Make it a full circle if you want yet more fabric billowing around you. Add a drapey collar, cut from another circle like the cape, or a straight stand-up collar for that Dracula-chic look, or even a hood. Try making it out of fleece for a casual winter wrap, or satin for a special event. Embroider a design on the front like I did, splash a big one across the back, or repeat a border along the bottom edge. Choices, choices.
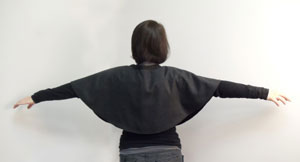
And the best part? The awesome winged silhouette! Come to think of it, this might be how I put together my raven outfit for Halloween...


