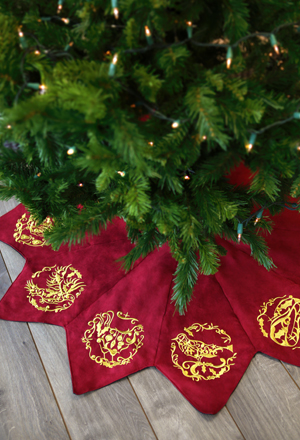
The holidays are always a great time for crafters. Everything from ornaments to decor to and gifts can get a crafty touch. In fact, sometimes there are so many things to craft, it's easy to get into a last-minute scramble. It's never too early to get started on those wow-factor projects! Give yourself a little extra time this year to get started on this elegant but simple tree skirt, featuring the Gilded 12 Days of Christmas designs. Lots of gorgeous ornate embroidery, along with simple construction, makes this a great project to do ahead with minimal stress, getting you in great shape for the holiday season!
Supplies
This tree skirt is easily constructed from 12 panels and a simple button closure, which totals 3 feet 6 inches in diameter when finished. But it's the embroidery that really lets it shine! To make your tree skirt, you'll need:
- Gilded 12 Days of Christmas designs, or 12 of your favorite embroidery designs (we used the 5.91 x 5.98 inch design pack; you can use smaller designs instead if you like)
- 1 1/3 yards of top fabric to make your 12 panels
- 1 1/3 yards of backing fabric to make your 12 panels
- A little extra to make your closure flap
- Panel pattern template (linked below)
- Medium weight cutaway stabilizer and temporary spray adhesive
- Pins and scissors
- Marking pen
- Buttons and buttonhole embroidery design in a size to match
Designs Used
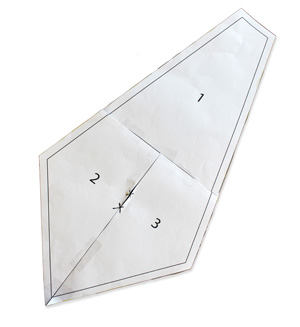
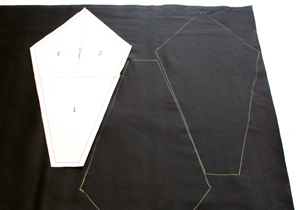
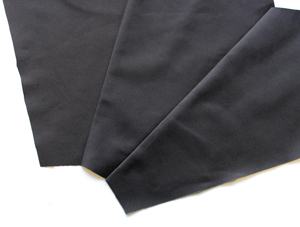
Let's start with the panel template (this can be printed using the link above). Print and piece it together as shown. This template comes together at about 20 inches long and includes a 0.5 inch seam allowance. You'll be using this for the top and backing fabric, so keep it around.
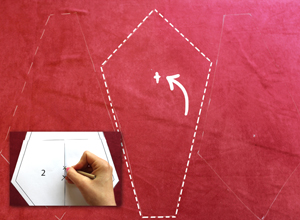
Roll our a long section of your top fabric, and lay your template out by one side. Mark the fabric by tracing around your template, and also mark the center point where the embroidery will go.
To make the most of your fabric, I found it best to alternate the template as you mark out all the pieces.
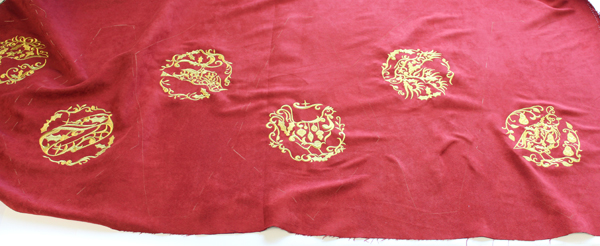
Now it's time to stitch out your 12 designs! Add one design per wedge, using your center marking on each wedge to perfectly place each design on the fabric. Take your time and make sure to stabilize the designs properly -- adhere your medium weight cutaway stabilizer to the back of your fabric using temporary spray adhesive. Hoop the fabric and stabilizer tightly together. Remember, working ahead gives you more time to get it right.
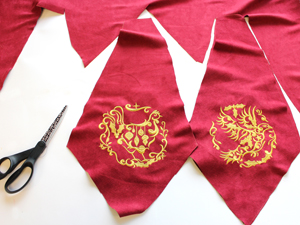
When all 12 of your embroidery designs are complete, cut away the excess stabilizer on each design, then cut out each of the 12 wedge shapes.
Now it's time to assemble it all together!
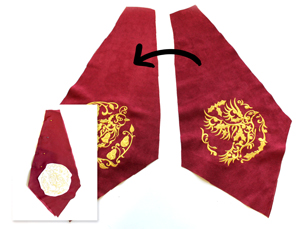
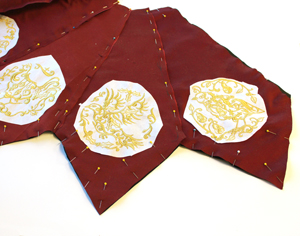
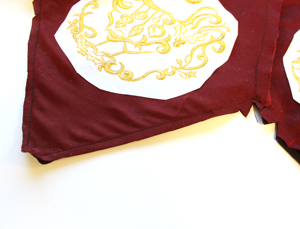
If you want your Gilded 12 Days of Christmas designs in order, start with your Partridge and your Turtle Dove, sandwiching the designs inwards on top of each other and pin the right side together. With the turtle dove on top, sew a seam along the right-hand side of the long edge of your wedge, using the 0.5 inch seam allowance.
When you open up the left side, you have your two pieces neatly sewn together. We're going to repeat this all the way around the skirt.
Next, place your French Hen face down on top of your Turtle Dove and pin in place on the right side. Sew along this edge following the same seam allowance.
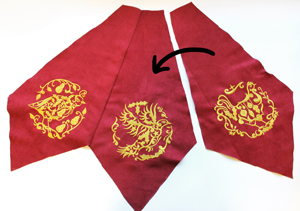
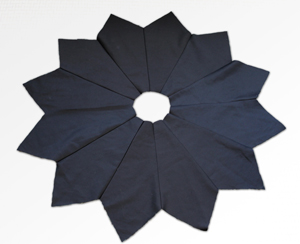
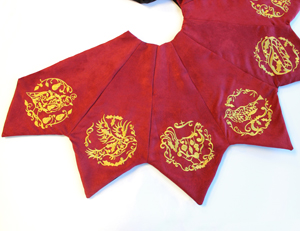
Continue adding your pieces in the same fashion, making sure to check your order if you're sewing the Gilded 12 Days of Christmas. When you get to the 12th panel, don't stitch it to the back of the first. Leave the sides of both the first and the last open.
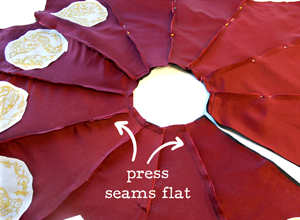
Once your panels are done, press your seams in the same direction all the way around the skirt.
Now it's time for the backing! This is done pretty much exactly like the front, but without the embroidery.
Mark and cut 12 pieces of your backing fabric using the same template as before.
Repeat the process you used to stitch the front panels together, taking two backing pieces and sewing one seam at a time, right sides facing each other. Don't forget the 0.5 inch seam allowance.
Keep adding pieces one seam at a time, until you've sewn all 12 together. Press your seams in the same direction around the skirt.
Fancy tip! If you press your seams in the opposite directions on the top fabric than the bottom fabric, they will lay smoother when you turn the tree skirt right side out.
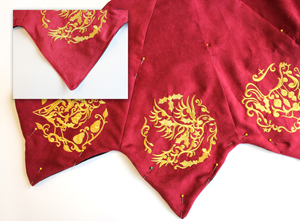
Now to put the two layers together! Place your two skirts right sides facing in together, and carefully pin them in place. GO SLOWLY and use plenty of pins to keep everything lined up! I pinned the seams of the wedges together for extra stability.
When you're all pinned and ready, sew a 0.5 inch seam allowance all along the pointy outer edge.
Once the outer edge is stitched together, stitch around the inner circle using your 0.5 inch seam allowance.
You'll still want to keep both edges open for turning and adding our button panel closure.
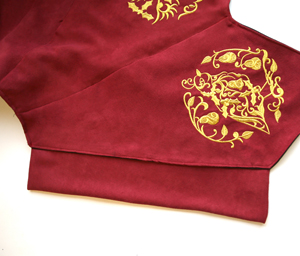
When you are finished sewing, you can trim down the excess fabric around your seam allowance, and clip the inner corners (cut a notch up to the stitching). This will let everything lay a little more flat when it's right side out again.
Turn your tree skirt right-side out! Make sure you push out all the corners so everything lies nice and flat.
I was working with a pretty stretchy fabric, so to finish my skirt and give it a nice crisp edge, I stitched along the outer edge to make everything lay flat.
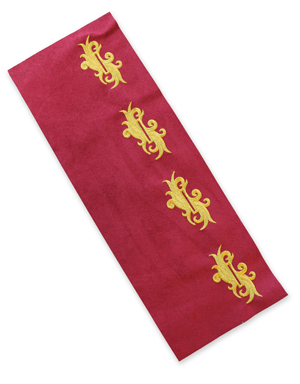
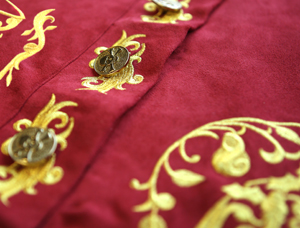
Now we just need to add a strip for buttons to close up the skirt around the tree. Stitch your favorite buttonhole embroidery designs with the centers about 4 inches apart. (I used the Baroque buttonhole with 1 inch opening). When they're finished, your fabric strip should measure 15 x 5.5 inches, as shown.
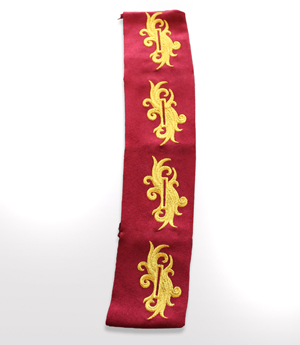
Fold the strip in half, and stitch the short ends together. Turn and press. Make a second strip of equal height and width for the other side of your button panel.
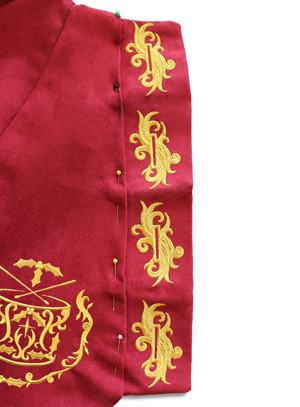
To attach the buttonhole side, truck the raw end of the embroidered panel into the left edge of your tree skirt. Fold in a 0.5 inch seam allowance on the raw edge of the tree skirt. Pin in place and sew a seam to seal it up.
At this point, you can also carefully cut open each buttonhole.
Repeat this on the other side. This panel is where you'll add the buttons.
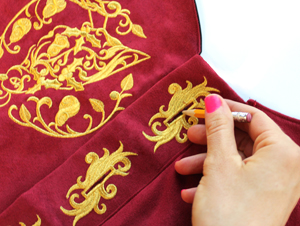
To get prefect placement for your buttons, overlap the two panels, with the embroidered buttonholes on top. Using a marking tool, mark where the center of each buttonhole opening is on the fabric underneath.
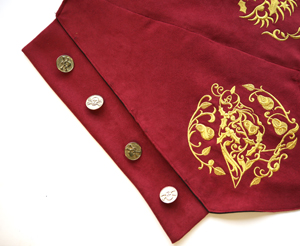
Use the markings to stitch each button in place.
With each button secured, you can now overlap the panels and button your skirt up to test that everything is lined up. It it's looking good, it's ready for your tree!
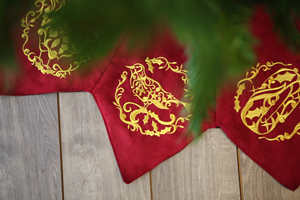
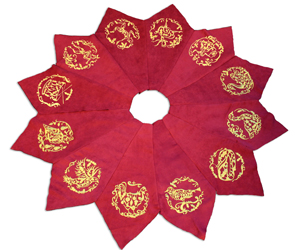
Gorgeous embroidery and simple design ensure that this project will be a classic look for Christmases to come!
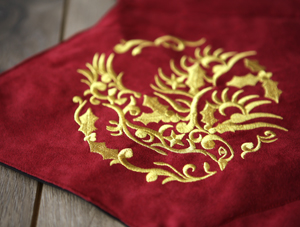
Lush, gold stitching shines on each panel of your skirt, bringing life to the floor beneath the tree.
With this easy project, it's simple to embroider and assemble your pieces at your own pace as the days tick by to the holidays. You can take time to perfect your favorite pieces and make one stunning heirloom holiday piece that you're sure to treasure each season.

No matter when you begin, this project is a chic and easy way to bring the holiday spirit to life! Plus, it's one less thing to have on your list during that busy crafting season. Which I'm sure you'll manage to fill up with lots of other fun holidays projects anyway... At least you know one is done!


