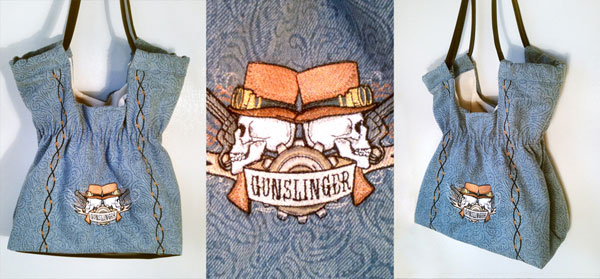
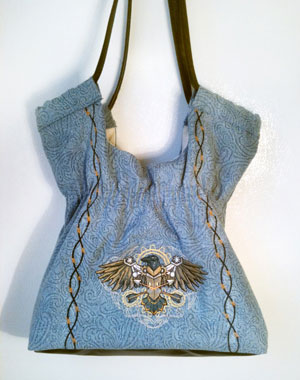
When we shared this beautiful creation by Karen on our facebook page, folks went nuts over it. And how could you not? Adorable fabric, lots of Parisian embroidery, gorgeous pops of blue, and a super cute pattern. Everyone wanted to know how to make one! Well, lucky for us Karen is so awesome, and she offered to share a guest tutorial on how to make this pretty purse. She made a brand new steampunk western purse just so we can all see how she put it together. So, we hand it off to Karen, as she walks us through how to make your very own embroidered bag.
Supplies
What you need:
- Large paper for pattern
- 1 yard sturdy purse fabric (woven works best)
- 1 yard interfacing (optional)
- 1 yard lining fabric (woven works best)
- 24” of 1/2”or 3/4” elastic
- Embroidery designs of your choice (I used the Western Steampunk Gunslinger and Raven and the barbed wire border)
- Various tools (scissors, pins, tape measure, marking pen)
- The interfacing is used if your purse fabric isn’t sturdy enough. Otherwise, you may not need it.
So, let’s start with the pattern. Start by folding your large paper in half.
Designs Used

Using the drawing as a guide, measure out the pattern according to these numbers, and mark your dots. These measurements are using a 1/4 inch seam unless otherwise noted.
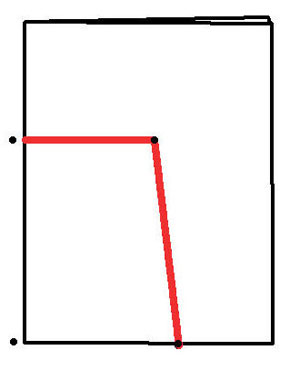
Connect these first dots to get the main shape of the bag.
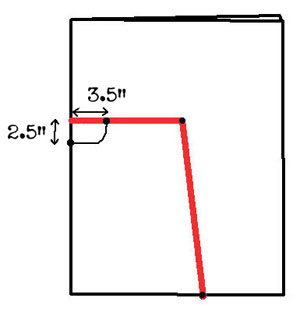
Mark out another small area using these measurements to make a dip for the handles. Once these are marked, you have your pattern for the bag! Cut out your paper pattern to prep it for your fabric.

Use your pattern to cut out two sides out of your bag fabric and then cut two more using your lining fabric.
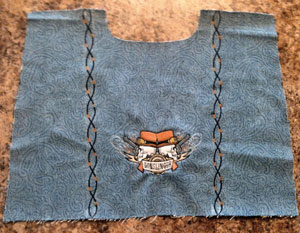
Now is the time to embroider whatever designs you want to onto the purse pieces. Have fun with this!
For this new bag, I used the gunslinger design on the front of the bag, the steampunk raven on the back, and a repeating barbed wire border up the sides.
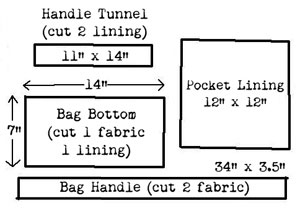
While we’re at it, let’s mark out the pattern for the rest of the purse. Mark these measurements on some paper and then use it to cut the rest of the pieces you need for your bag. The pocket lining is optional, if you don’t feel like adding it.
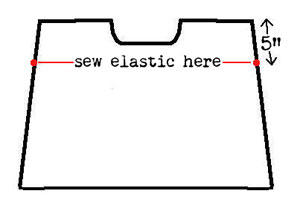
Now let’s start the construction. We’re going to start by marking where the elastic goes. Make a mark 5” down from the top on each side. On the wrong side of the fabric, draw a line between the points. Do this to both front and back pieces of the purse.
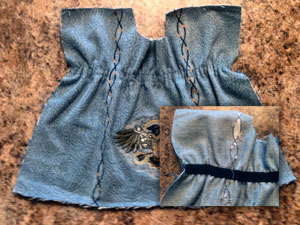
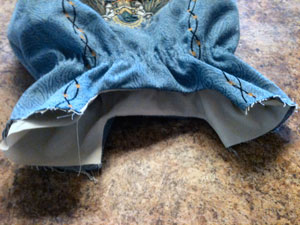
On the wrong side of the fabric, pin the ends of a 12” piece of elastic to each point, so it stretches across the front piece. Sew along both the top and bottom edges of the elastic. Do this for both front and back sides of the purse. Your purse should now look like this, with the elastic in place.
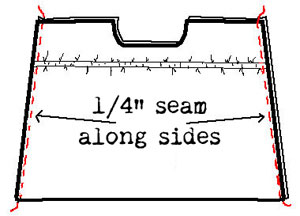
Right sides together, sew both sides of purse together along the left and right sides. To make the lining, repeat these steps but without adding the elastic.
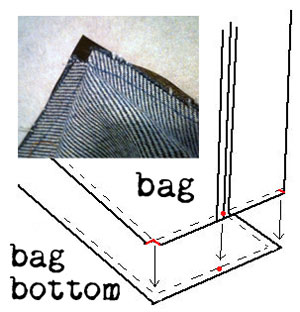
To attach your purse to the bottom piece, pin the seams at the bottom of the purse to the center of the short side of the bottom purse piece. Clip the purse 1/4” at the corner, to making turning at the corners easier. Sew together.
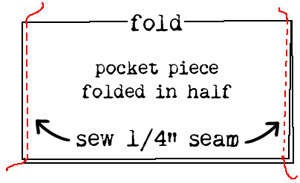
If you were planning on adding a pocket, now is the time to use your 12x12 piece of fabric. Fold that piece in half, and sew a 1/4” up the short sides.
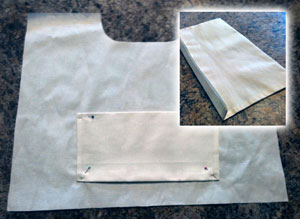
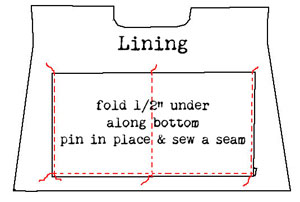
Turn the pocket and iron up 1/2” along the raw edge for bottom hem. Position the pocket centered, and about 1.5” up from the bottom of the lining.
Sew a seam around the bottom and short sides. If you want, sew a straight line right down the middle, and voila! A big divided pocket.
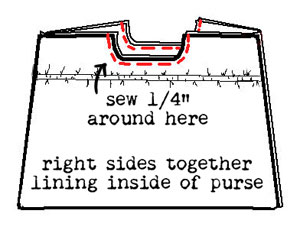
Now, time to sew it all together! Start by turning the purse wrong side out, and the lining right side out. Place the lining inside the purse, right sides together.
Sew the lining to the purse along the curvy half-circle parts ONLY, like marked.
Clip the curves and turn it right side out again, stuffing the lining down inside the purse. Iron the curvy seam flat (you may topstitch if you want to).
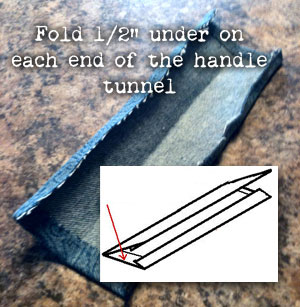
Hem 1/2” on each short end of both handle-tunnels, and then fold the handle-tunnel pieces in half lengthwise, wrong sides together, and iron.
Fold 1/2” toward the inside, along the long raw edges, and iron.
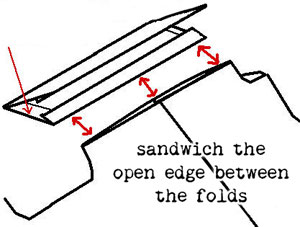
Pin a handle tunnel to each side of the top of purse, sandwiching 1/2” of the raw edge of the top of purse between the folded up edges of the handle-tunnel. Topstitch along the folded edge of the handle tunnel, catching all layers.
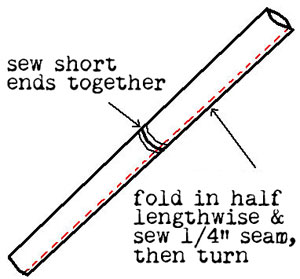
To make the handle, put the pieces right side together and sew the short end of one handle piece to a short end of the other. Press open. Next, fold the handle lengthwise and sew a 1/4 seam with the right sides together. Turn.
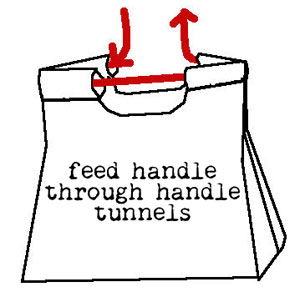
Feed the handle through the handle tunnels as shown.
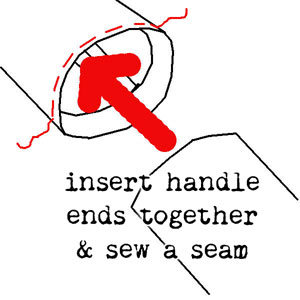
Then, turn under 1/2” (to the inside of the tube) on one end of the handle, and insert the other end of the handle into it. Topstitch closed.
Tadaa! You are finished!