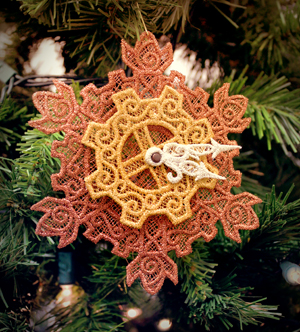
'Tis the season for traditions and festivies. Though many folks celebrate wintry holidays, we don’t all celebrate in the same way. Some of us like traditional snowmen ornaments and the like, and some of us, well... we want steampunk ornaments on our tree! Nothing wrong with that, and no reason those ornaments can’t be as festive and chic as their snowmen counterparts. This elegant layered ornament lets you ring in the holiday season in exactly the kind of style YOU want, which makes for a very merry holiday season indeed!
So there are a couple of ways you can make this ornament. Either way, what you’re going to want to start by stitching out the four lace pieces in the Clockwork Snowflake Ornament (Lace) design onto a heavy water-soluble stabilizer such as Sulky Ultra Solvy, then rinse to leave only the thread, and let the lace pieces dry. In this case, I stitched mine out in metallic thread for that extra steampunky sparkle, but that’s not required. Check out this tutorial to learn how to stitch freestanding lace that looks great!
Supplies
Steampunk Ornament: Awesome Level 1
So, there’s a very simple way you can make this ornament, which really doesn’t require much. All you need for a Level 1 Awesome ornament is:
- Your stitched lace pieces from the Clockwork Snowflake Ornament (Lace) design
- A metal brad
- A small ornament hanger
Designs Used
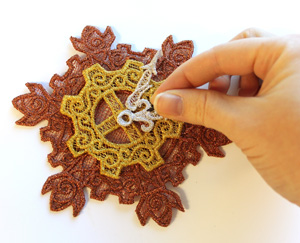
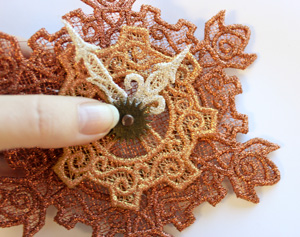
Layer your ornament up like so. You’ll notice there is a small opening at the center of each lace piece. Line all these up, and then take your metal brad, and secure it through this hole, locking all the layers in place.
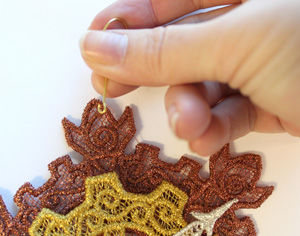
Take your ornament hanger, and poke it though any of the spokes of your lace in order to hang it.
Boom! Level 1 Awesomeness in two easy steps. Well, three if you count stitching the lace.
This ornament looks pretty great straight off the machine, but of course, there are always other things you can do to up the level of awesome. Introducing...
Steampunk Ornament: Awesome Level 2
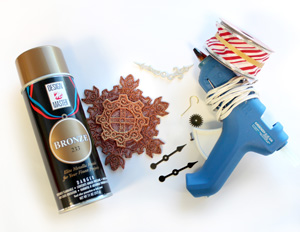
Now we want to give it just a touch more flair. In this instance it’s the same lace pieces, but I stitched them in slightly more similar colors, in order for the whole piece to blend with the extra bits I’m adding. For level 2, you’ll need
- All the supplies from Level 1
- Small steampunk accents (these are from the Tim Holtz steampunk scrapbooking kit I used on our steampunk mask)
- Hot glue
- Ribbon
- Spray paint
It’s all about the little details here. For instance, I thought I’d layer in a little metal gear behind my brad to add that extra level of steampunkiness.
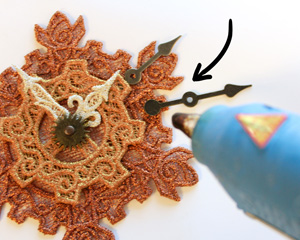
I also used a few of the leftover clock hand pieces to add even more dimensionality. I glued the ends between the two steampunk layers, to hide where they start.
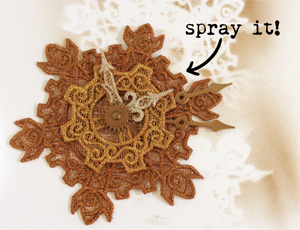
Then, in order to blend everything into a lovely similar brassiness, I gave it all a shot of spray paint.
Fun fact! If you stitched your lace in metallic thread, the spray paint won’t stick. However, if you stitched it in regular thread, this is a fun way to get everything the same lovely steampunky color.
In this case, it really helped those little metal accents to blend with the piece.
Set your ornament aside to dry for a moment.
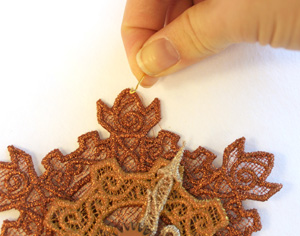
Then as before, hook your metal hanger into one of the tips of your snowflake.

As an extra little bonus, I think a little ribbon with add that touch of color back in and help it feel extra festive. I cut a length of wired ribbon and tied it into a little bow.
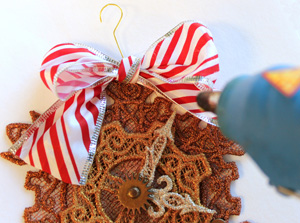
Glue that ribbon to the same area you added your hanger.
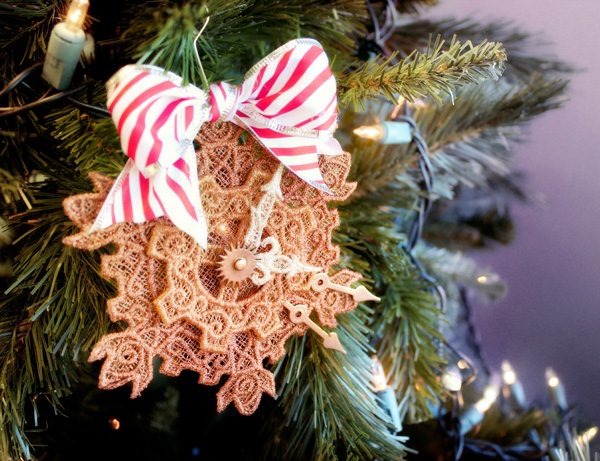
Your steampunk snowflake ornament has now reached Awesome level 2! Is there a level 3? Of course there is! That’s all on you... add chains, more gears, charms, maybe even some gems. There’s no telling how many levels of awesome this little ornament can achieve. What I do know is that it’s going to look steamtastically awesome on your Christmas tree this year!


