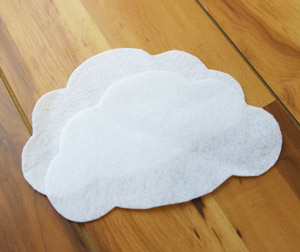
Express more than just weather patterns with this instantly lovable plush cloud! Use stiff felt weather "accessories" to create a skyscape mobile in minutes. This cherished piece is perfect for kids' rooms and adult cubicles alike.
Supplies
To craft your little cloud stuffie, you will need:
- Good Day Cloud (Stuffed) embroidery design
- Plush fabric, like felt, fleece or a microseude
- Stiff felt for the cloud accessories
- Printed templates of the dieline files, which come with the design and have DL in the filename (here's how to print dieline templates, or stitch if you don't have software)
- Tearaway stabilizer
- Temporary spray adhesive
- Scissors
- Needle and thread
- Polyfill stuffing
- Clear nylon string for hanging
- Velcro stickers (optional)
Designs Used
Let's start with those printed dieline templates...
Lightly spray the back of each with temporary spray adhesive and put it on your chosen fabric, cutting out your fleece shapes along the two printed dielines. Make sure both pieces fit together almost exactly -- this will help you out later.
Also use your templates to cut the sun, moon, lightning bolt, stars, and raindrops out of your stiff felt.
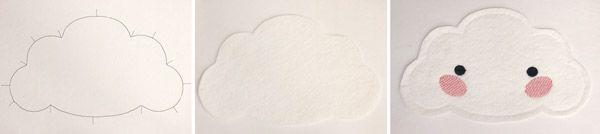
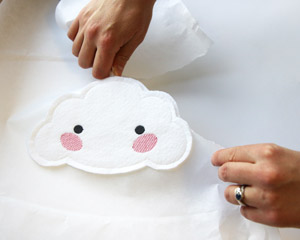
The first thing that sews is a dieline. Mine in shown here in black so you can see it, but I would recommend matching your top and bobbin thread with the color of the cloud fabric you've chosen. Lightly spray the back of one of your cloud pieces with temporary spray adhesive, and place it so it completely covers the dieline. After that, a dieline will stitch to tack down your fabric, and then all the face details will stitch out.
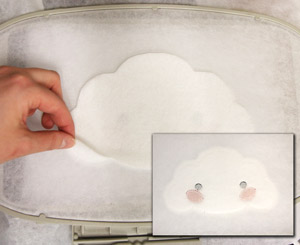
Next, Carefully remove the hoop from your embroidery machine, but DON'T unhoop your design.
Flip your hoop over, then take the back piece of your cloud fabric, lightly sprayed with temporary spray adhesive, and gently lay it inside the dieline on the back.

To secure your cloud in place, flip your hoop back over again, and lightly press on it from the front. If you push on it from the back, you might tear your stabilizer out of the hoop.
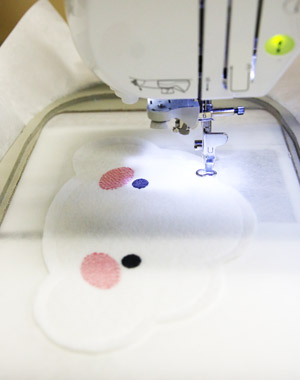
Once your fabric is secure, carefully place your hoop under your machine again.
Let your machine stitch the final seam. You'll notice your machine will sew around your cloud, but not meet all the way back up at the bottom. This is because you need a small gap in the seam for stuffing your cloud.
Unhoop your stuffie and carefully tear away the stabilizer, just leaving the cloud behind.
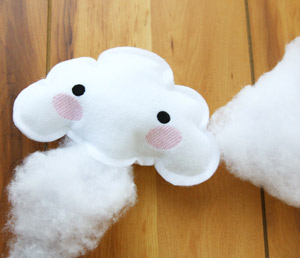
Fill your cloud plump with polyfil! If you get stuck, wiggle your finger or a pencil eraser in to release the stabilizer inside your cloud.
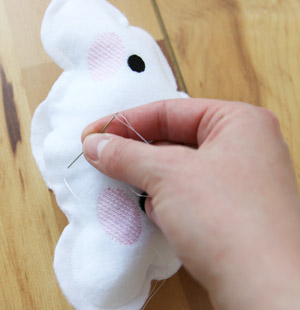
Finish your cloud by hand-sewing or using your sewing machine to close the opening. It helps to follow the front tackdown line for a clean closing.
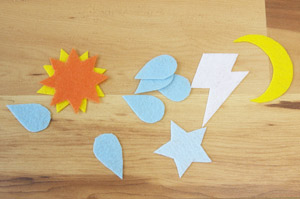
Now that your cloud is complete, it's time to add on some accessories! Cut out your stiff felt weather shapes in a variety of colors for extra appeal.
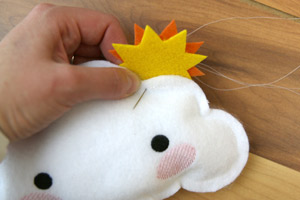
For a mobile, it's important to make sure your pieces stay put. I chose to stitch mine permanently to my cloud with a hand-sewing needle, again working with the already stitched seams for a clean finish.
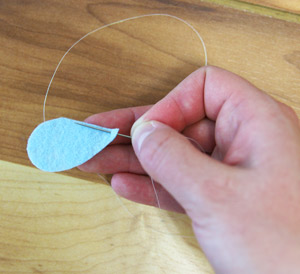
Using a clear nylon thread, I started gathering my raindrops and stitching them to my cloud piece.

I stitched several raindrops under the cloud, individually to create a more dynamic look.
When you're finished attaching your accessories, string the nylon thread through the top of your mobile and create a loop to hang your piece from.
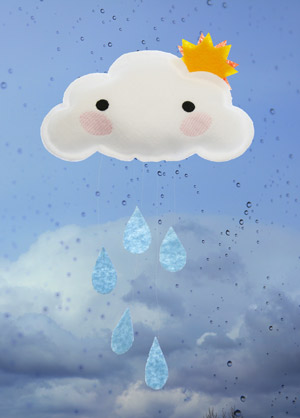
There you have it! Your cloud stuffie has come to life in an awesome mobile.
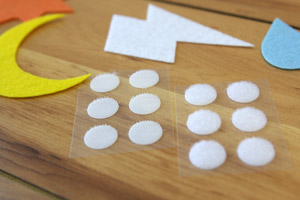
Alternatively, you could use Velcro stickers to adhere different weather shapes to your cloud at different times.
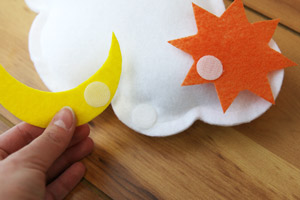
This allows you to change your little guy to reflect the current weather, your moods, or just have fun with.
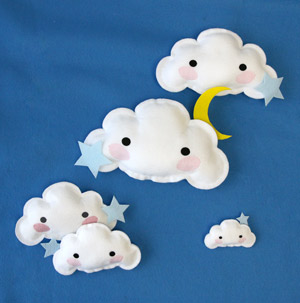
Make several clouds in all the sizes and set up a cute scene on a child's bedroom wall, or set up a mat to play with. There's no wrong way to create a cute scene for adults and children of any age!


