To modernize an old sweater I have chosen to add some "cold shoulder" openings and a subtle buckle design, repeated on the shoulder blade area. This is a great way to recycle old tops in your closet with fashion-forward embroidery!
Supplies
To get started on you new sweater, gather these supplies:
- Your favorite embroidery design(s). (We used the 5" x 7" version of Buckle Down)
- A sweater (new or used)
- Sheer mesh cutaway stabilizer, such as Sulky Soft 'n Sheer or Floriani No Show Mesh
- Temporary spray adhesive
- Printed templates of your design(s) for placement
- Thread for your embroidery
- Scissors
- Ruler
- Air erase marker or tailor's chalk
NOTE: Tailor's chalk is best for marking dark colored fabric, as it tends to last longer and show up better. However, this wax-based tool may leave residue if used on some synthetic fabric. It is best to test a small corner of the fabric before committing to chalk.
Designs Used
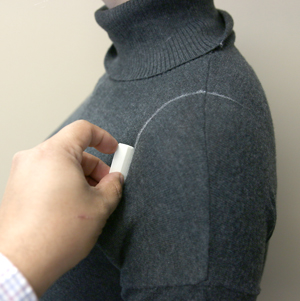
First things first: decide where you'd like your cold shoulder to sit. These instructions are to be used as guidelines, but should be modified for your personal style and fit.
The best way to find where to mark the "cold shoulder" will sit, is to try the top on and mark the desired area to be cut out (you may need to ask a friend for help marking!). Typically, the cut out starts about 2" from the collar (neck line) and can be any shape desired.
Mark only one shoulder to start, as you will use this as a guide to mark the other shoulder evenly.
The line creating the shape will be referred to the as the "finish" line.
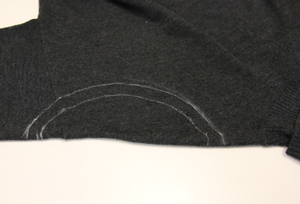
Remove the sweater and lay flat on a table (making sure the fold line for the sleeve is nice and flat). You will then draw another line 0.5" along the inside finish line (this will be the cut line).
At this point, use a ruler to measure the distance of both end markings of your half circle from the neckline, and from the fold line. Mark these measurement on the other shoulder and connect into your shape.
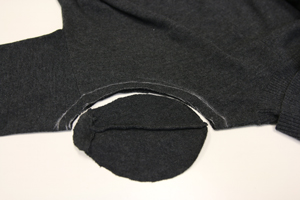
With the sleeve still folded, cut your half circle shape from each sleeve. When you unfold the sleeve, there will be a circular shape removed.
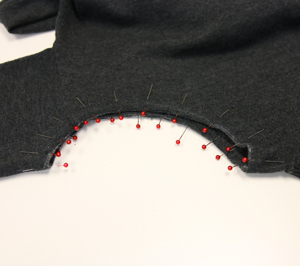
Use the finish line as a guide to fold and pin the seam allowance inward.
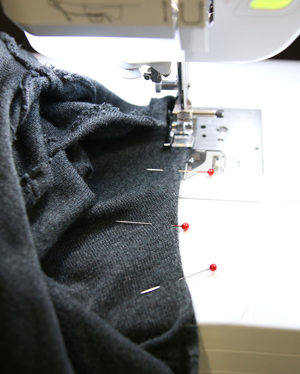
Stitch the fabric down, about 0.25" away from the finished edge, using a high stitch count (10-12 stitches per inch) to avoid popping seams. Don't forget to back-tack!
Now onto the embroidery!
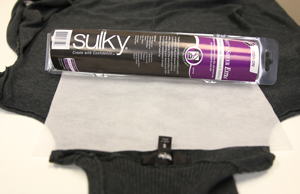
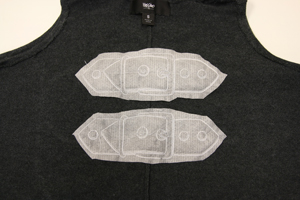
A sheer mesh cutaway is your best option for lighter-stitching apparel designs. It is more flexible and be softer against the skin than regular cutaway or tearaway stabilizer.
Spray your stabilizer generously with temporary spray adhesive, and smooth it onto the back of the sweater in the area to be embroidered.
For this example, we embroidered on the middle of the back of the garment, but you can position embroidery anywhere you'd like!
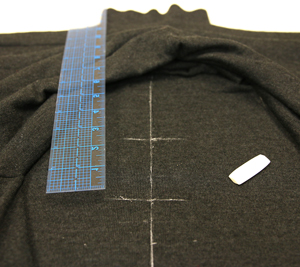
Using a ruler, measure and mark the center of the panel (front or back) of the garment. Create a straight (vertical) line down the center.
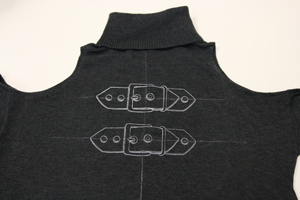
To add repeating embroidery to your garment, like the Buckle Down design, draw a horizontal line below the collar (neck line) where you'd like your first design to sit. Then draw another horizontal line below that, based on how large each design is (height-wise) and how far apart you would like the designs spaced. In this case, we spaced the lines 3" apart from each other because the height of the design we are using is 2.20".
Continue to dark your horizontal lines as guides, depending on how many times you'd like to repeat the design.

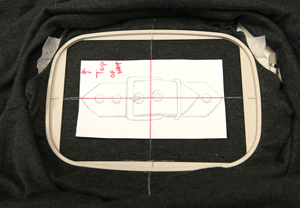
Now for placement. Using printed templates of your design will make it easy to map out exactly where each embroidered piece will go. (Here's more on how to print templates.)
Place the design template along the center vertical line.
Using chalk, mark the center and the horizontal axis points of the design template onto the garment. Use a ruler to draw a straight line connecting and extending the two horizontal marks. You will need these to line up exactly with the crosshairs on your embroidery hoop.
Hoop the garment and stabilizer taut together, but make sure not to stretch or distort the fabric.
Remove the template and embroider away!
Once your embroidery is finished, carefully trim the excess stabilizer from the back of the design.
Finish your project by removing your chalk lines with steam, or your marker lines with a damp cloth.

Wear your newly styled shirt out on the town!
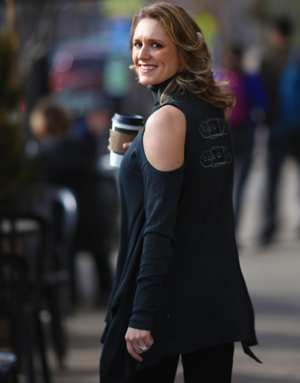
Look at that! You've brought an old sweater back to life and created a modern look that compliments your personal style!


