Most of the time, embroidery designs are used for decorating a tee, updating a project, adding that certain je ne sais quoi. In the case of these bold and cute kawaii faces, there is really only one thing I wanted to make with them. Crazy Kawaii Critters! Such happy little faces begged to be made into cuddly plush buddies. So combine your favorite crazy mouths and eyes, and follow along with this simple template and tutorial to create your own plush friend with just simple sewing skills!
Supplies
So, to make your new plush friend, you’ll need a few things:
- Awesome Kawaii Factory embroidery designs (see also: Monster Factory) - for this bunny I used the medium size of this mouth and the small size of these eyes)
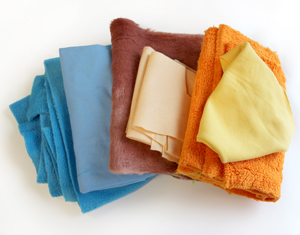
- Plush fabric (fur is fun!)
- Non-fraying fabric to embroider on (for the face)
- Cutaway stabilizer
- Scissors and pins
- Polyfill stuffing
- Downloadable critter template
Designs Used
I’m going to show the construction of one simple plush, but the downloadable template includes ears for either a bunny, bear, or kitty, so really it’s three plushies in one design! Pick fun crazy colors and go to town creating whichever one you want.
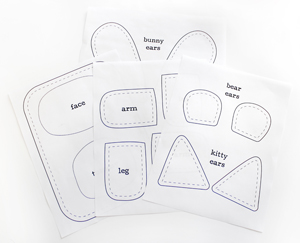
Here’s my PDF template printed out. All the templates should fit on a standard letter size piece of paper. Check your print settings and "fit to page" or otherwise adjust as needed to make sure none of your template gets cut off, as all printers are a little bit different.
The main template includes the body and appendages, as well as three different ear options. I’m making the bunny first, but you can pick a different one or even create your own ear shape to make a totally new critter!
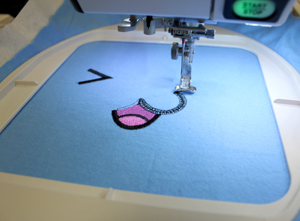
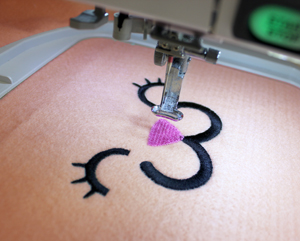
So, let’s start with the fun part. Creating your kawaii face! There are dozens of combinations you can choose from with the Kawaii Factory pack, and you can go even further if you combine it with the Monster Factory pack. Put together a face that’s about 4.5 inches wide for its stitch area.
You can either create your critter's face by stitching each element separately, or by combining them in embroidery software. Either way, the Embroidering with Alphabets tutorial will have some handy tips for you. Faces are not words, but other than that it's pretty much the same.
Once you have your face picked out, hoop up your non-fraying fabric with some cutaway stabilizer and stitch out your critter's face! Patching our face on after the fact lets us skip the hassle of stitching directly on our fur, but you can try that too with some of these tips if you feel like it.
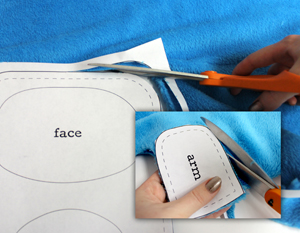
While your face is stitching, you can prep your furry body pieces. Use your template to cut out your critter’s body, arms, legs and ears. Remember to cut out two sides of each piece, a front and a back! Also, keep in mind the “right” and “wrong” side of your fur while you’re cutting everything out.
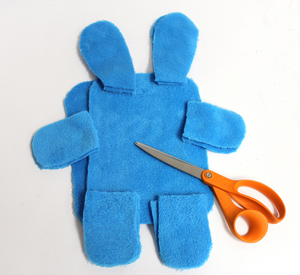
Here are all my critter pieces cut out and ready to go! The template is super simple to follow and stitch, so if you’re feeling more advanced feel free to modify it as you wish!
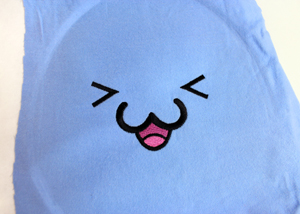
By now your face should be all done stitching. I decided to create one excited bunny face. Doesn’t he just look just thrilled to be done?
Un-hoop him and set it aside for the moment.
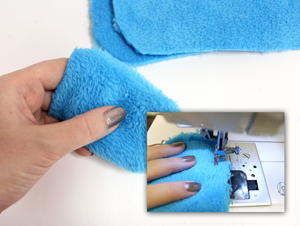
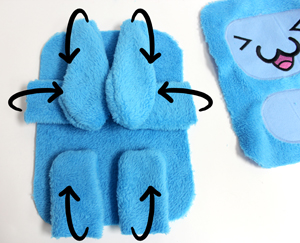
Let’s start assembling some of our critter pieces. Place each pair right sides together (if you’re using fur, the fur side should be facing in, towards each other) and sew a seam around three sides. I recommend pinning these pieces together as you stitch them because fur can be kind of tricky to catch with both seams.
Once your piece is stitched together, turn it right side out and push out all the corners. Repeat this on all the arms, legs, and ears of your critter.
Ah, but what of the body? Well, first we need to give our buddy his awesome kawaii face!
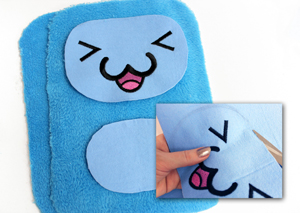
Using the face shape on the template, cut out your fabric in a wide circle shape. You can also cut a small circle shape out of the same fabric if you want your critter to have a tummy. Pin this piece in place on the front of your body piece.
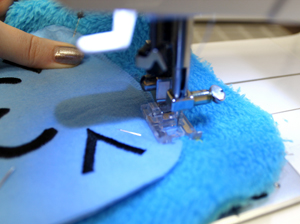
Using a tight zigzag stitch, applique on your fabric pieces to the fur body. Though your fabric shouldn’t fray, this will keep the fabric edge nice and neat on your fur.
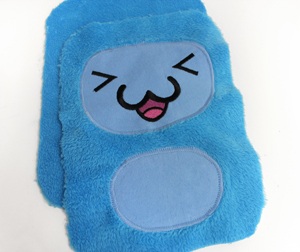
Here’s the face and tummy all stitched on and ready to go. Now we just need to stick everything together!
First, take all the appendages of your critter, and place them pointing in on your back body piece. The back piece should have its furry side facing up right now. You want to point all these pieces IN towards the body, so the point the right way out once everything is turned right side out again!
Also, make sure your appendages overlap the edge just a little bit, to make sure the seam will catch them.

Place your front face piece right side down on top of all of that, like a little furry monster sandwich. Pin everything in place! This is important to not only keep your arms and legs from shifting around, but to keep the back and front fur pieces in alignment while sewing. If your critter is furry, this piece is probably pretty bulky at this point and pins will help keep everything in place while you’re stitching.
Sew a wide seam around your critter body, leaving a 3-4 inch opening at the side for turning.
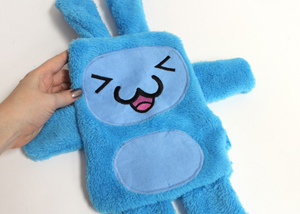
Once you’re done, clip all the excess threads and turn your plushie right side out. Look how happy he is to be nearly done! Just a few quick steps left.

OK, so I forgot to take a picture of the polyfill part, but it’s pretty standard. Fill up your plushie with handfuls of polyfill until he’s nice and plump. Once he’s full, stitch the opening closed!
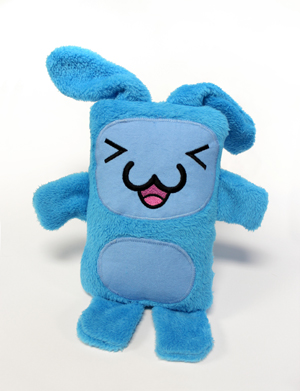
Done! A few simple steps and basic sewing skills, and you have a new SQUEE worthy plushie!
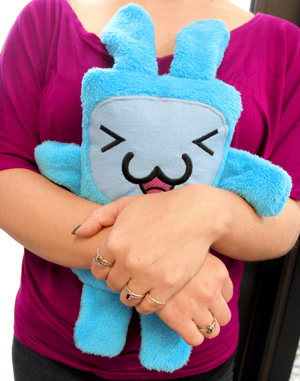
Soft fur, stitched features and simple applique make this not only an easy project to make, but a perfect companion for all ages, as there are no small parts to come off and only soft plushie edges. Of course, that didn’t stop everyone in the office from trying to steal Mr. Squee Bunny.
Don’t want to stop at just one? Well, that template can be used more than once you know...
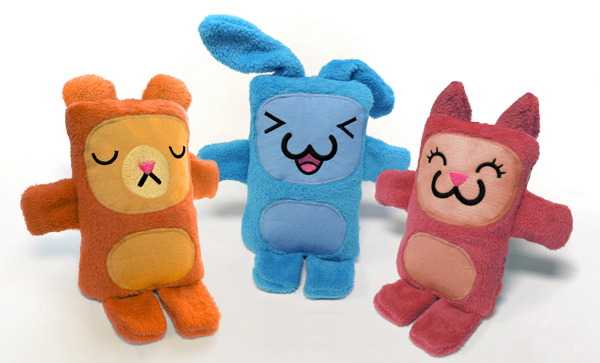
Make a whole gang of Kawaii Critters using that one simple template! A bear, bunny or kitty are all easy to whip up and the combos of fun faces are endless. Turn it into a request fest for kids and let them design their own! Anyone with basic sewing skills and some awesome designs can make themselves a new plush friend.


