Hey! Karline here, bringing you yet another book-related project, because apparently I am The Bookish One around here and that's what I do. Truth is, I'm surrounded by book nerds of the highest caliber. In the past year or so, they all seem to be getting Nooks and Kindles -- and requesting special custom-made covers for their e-readers. And the winner of this one is ... the Nook! Read on and I'll show you how to make your own to fit any newfangled bookish gadget you might have on hand.
Supplies
- An embroidery design. May I suggest something literary?
- 1/2 yard heavyish fabric for the outer cover -- I used black canvas
- 1/3 yard fabric for the inner cover
- Hard cardboard to support the covers and spine. This is going to protect the screen, so make sure it's thick and sturdy. That foam board stuff from craft stores would be another good choice. (Lori wrote in and recommended plastic canvas - it's washable!)
- 1/2 yard heavy iron-on interfacing
- 1/2" or 3/4" wide elastic for corners, in a color to match fabric
- Narrow elastic cord for closure, in a color to match fabric
- A big button -- since there will be a screen behind this, use the flat kind you stitch through, not the kind with a loop on the back.
- Medium-weight cutaway stabilizer
- Temporay spray adhesive
- Air-erase pen or dressmaker's pencil
Designs Used
All set? The first thing you'll need do do is figure out your cover size. The Nook that's modeling for this project is about 5" wide by 7 3/4" high, so my covers will be 5 1/5" wide by 8" high.
Cut two pieces of cardboard to this cover measurement.
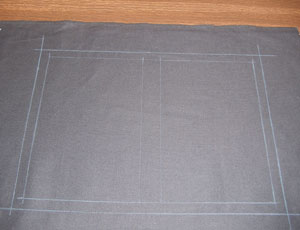
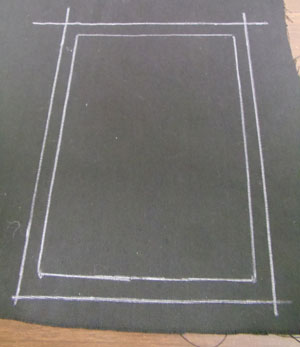
Use a dressmaker's pencil or air-erase pen, whatever will show up well but disappear later, to mark the outer cover fabric as shown. Make two rectangles the size of your cover measurement, with 1" of space in between them for the spine. Also draw a 1/2" seam allowance around the whole thing. My total rectangle, with seam allowance, is 9" high by 13" wide.
Once your book cover is all drawn out, figure out where you'd like the embroidery and mark that too. Don't forget to consider where your button closure will be. I learned that one the hard way.
Spray a piece of medium-weight cutaway stabilizer with some temporary spray adhesive, and smooth it on the back the fabric. Make sure the stabilizer covers the back of the whole book cover -- it will double as interfacing to support the fabric.
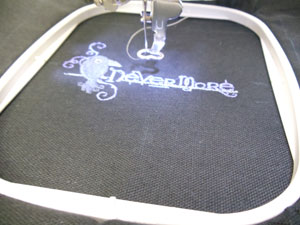
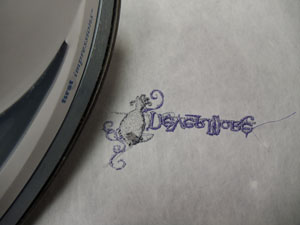
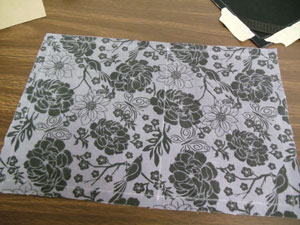
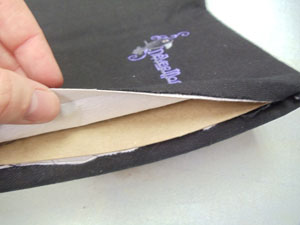
Hoop up the outer cover fabric and embroider as desired. I picked this awesome Nevermore design, which you can barely see in this picture. You get the idea, anyway.
Don't cut away the stabilizer when it's done stitching.
Unhoop the fabric and press from the wrong side to remove any hoop marks.
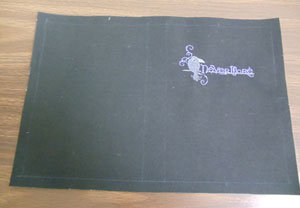
Cut out the outer cover -- don't forget to include the seam allowance that you marked earlier.
Cut a rectangle of the inner cover fabric that's the same size as your outer cover.
Iron interfacing onto the back and trim away any excess. Or, if you're like me and have a LOT of cutaway stabilizer around but no interfacing, you could always use that, stuck to the back with some spray adhesive.
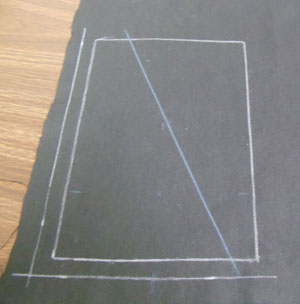
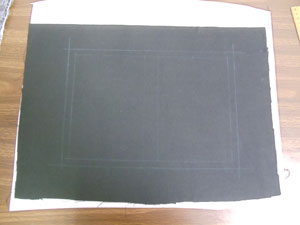
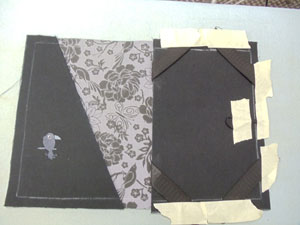
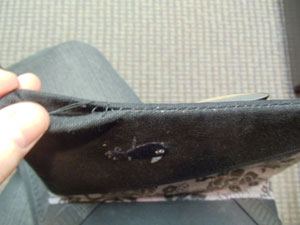
To make a pocket, draw a rectangle the size of your cover measurement (handy tip: trace the cardboard), add seam allowance, and draw a diagonal line through it something like I've done here to make a nice slanty pocket.
Stick more stabilizer onto the back of this piece. It should cover the entire pocket, plus at least the same width of the pocket again on the right.
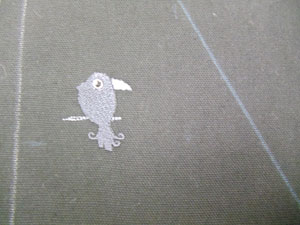
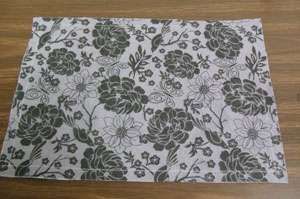
Hoop it up and add a bit of embroidery if you feel so inspired, but don't cut away the stabilizer when you're done. I isolated this little raven from the above design using embroidery software, but it's possible to do the same thing by just skipping through the stitches and only embroidering the parts you want.

Fold the fabric along the diagonal line and press. Cut out along the seam allowance line, through both thicknesses.
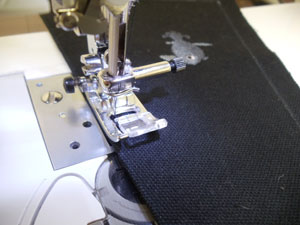
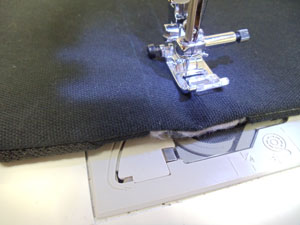
Stitch along the folded edge of the pocket to add stability.
Now for the part that will hold your gadget. Draw yet another cover-size rectangle onto your fabric. Add 1/2" seam allowance.
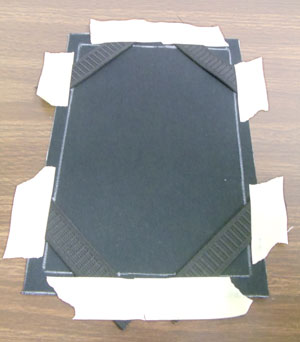
Cut a piece of elastic for each corner. I measured about 2" from each corner along each side; the edge of the elastic that's closest to the center of the fabric is touching those marks. Tape the elastic in place.
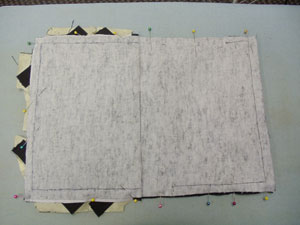
Remember that big inner fabric rectangle? Pull it back out and mark the 1/2" seam allowance around the edge. Then draw on the vertical lines that separate the covers from the spine. As with the outer cover, this will be two cover-size rectangles separated by a 1" spine in the middle.
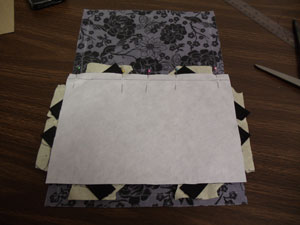
Take the thing you just assembled with the elastic, and lay it face down on the inner fabric. It should completely cover the spine section in the middle, with (as shown in this photo) the top stitching line on the elastic piece lined up exactly with the top spine line. (Read the next few steps and this might make more sense.) Pin in place and stitch along this line.
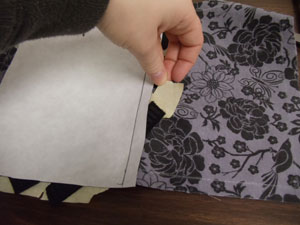
Take off the tape and trim the elastic only along the seam...
...and fold over the part with the elastic so that it hides the seam allowance. See where this is going now?
I used a bit of temporary spray adhesive to stick the back of the black fabric to the printed fabric below it. They won't need to come apart anymore.
Stitch along the marked stitching line, 1/2" from the edge, to hold the two layers together.
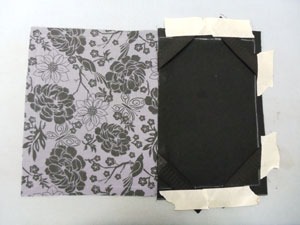
Lay the pocket piece onto the left side of the inner cover, and stitch around the edges to hold it in place. Cut a 4" piece of the thin cord elastic, fold it into a loop, and tape it onto the right-hand side of the book as shown -- with the loop part facing in.
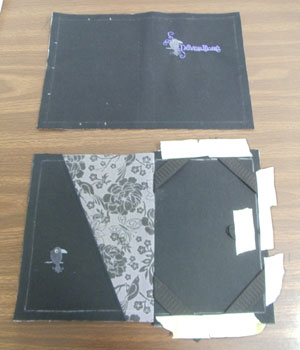
Here are the inner and outer parts of your book cover!
Lay the outer cover piece on top of the inner cover with all its parts, right sides together, and pin the edges together.
Stitch around the edge, leaving an opening large enough to insert the cardboard pieces once it's turned. I left the side of the front cover open, but next time around I think I'd leave the opening along the bottom of the front cover and spine.
Clip the corners close to the seam, but be careful not to cut the stitching.
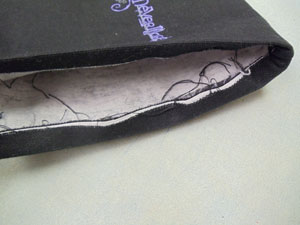
Turn the whole thing inside out. Poke out the corners so they're nice and neat. Fold under the remaining raw edges so they match the seam, and press in place.
Stitch your button onto the front cover.
Slide the first cardboard piece inside the fabric and toward the back cover, as far back as it will go. Slide in the second cardboard piece and move it into place for the front cover.
Hand-stitch the opening closed.
Sew along the two spine lines to hold the cardboard in place.
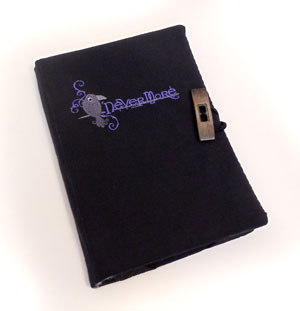
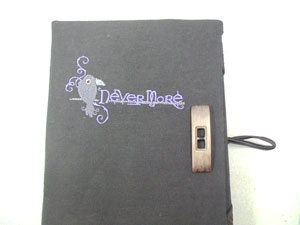
Your stylin' cover is done! Perfectly literary embroidery and a big awesome button give your e-reader lots of personal flair.

Elastic straps at the corners hold your e-reader securely, and a pocket holds little notes. The gadgets themselves may all look the same, but nobody will have a cover quite like yours!


