It’s time again to ask ourselves that age-old question...
…what can we add embroidery to now?
Well, ever have one of those days when you’re staring at the ticking hands of the clock, willing time to speed up? Maybe it’s Monday at the office, or you’re stuck at your aunt Bertha’s house for three hours watching slides of her last cruise. After you spend so much time watching that clock, don’t you wish it was a little more interesting to look at?
Say no more!
Supplies
Don’t worry, we’re not sticking a clock under an embroidery machine. Oh no, we’ve got craftier (and hopefully more successful) methods than that. With a little help from a DIY kit, we can make our own! Now, for this project I ended up with a lot of random supplies. Don’t panic! You have most of them anyway, and the rest is mostly your choice on how you’d like to decorate your clock. So, for each section, there’s what you’ll need:
For the embroidery:
- Fabric
- Cutaway stabilizer
- Scissors
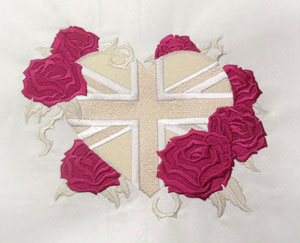
- Embroidery design -- like my Union Jack and Roses
For the clock:
- Foam core board
- Ruler
- DIY clock kit
- Masking tape
- Stapler
- X-Acto knife
- Craft glue
For the decor:
- Fancy scrapbook paper
- Hot glue
- Number stitckers
- Decorative chain
- Jump rings and charms
- Jewelry pliers
- Spray paint
Designs Used
The first thing you’ll want to do is the embroidery. Cut a piece of fabric about 6 inches wider than you want your clock to be, and obviously plenty big to hoop. If you’re using a light or see-through fabric like mine, cut an extra large piece of stabilizer so it can cover the whole clock face.
Hoop everything together and stitch up your chosen design. I picked this slightly punky little British piece, and changed up the colors a bit.
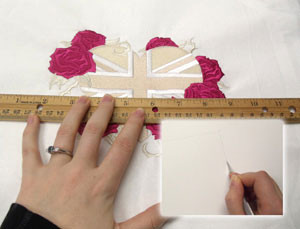
The size of your design and your planned clock might vary widely, so at this point I’d take a ruler and measure out the planned width. What you’re looking for is a couple inches of space around the design to add the letters. I added about two inches to either side, and decided my clock would be 11 inches square.
Measure your clock size out on your tagboard and cut it to size with an X-Acto knife. Remember, right now this measurement is just for the tagboard, don’t cut your fabric yet!
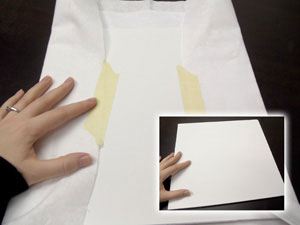
Ok, so now you should have a square or rectangle of tagboard for your clock. Carefully center your design on the front, and then pull the fabric tight around the back and tape the two corners in place to start getting an idea of placement and size.
Once you have it taped, take a peek at your design from the front. Does everything look centered and even? If not, rearrange and tape it down again, until it looks just right.
Don’t worry right now if it looks a bit lumpy, it will smooth out in our next step.
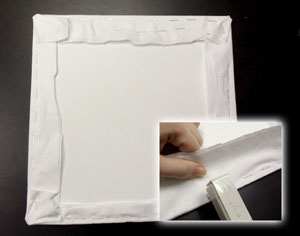
Once you have your design centered, open up your stapler and begin pulling the edges taut and stapling them in place. In order to get everything to pull evenly, you’ll want to alternate sides every time you staple.
For a better explanation of how to stretch it evenly, check out this tutorial from Danielle on stretching designs on a frame.
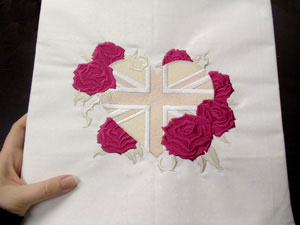
Once you’ve got everything stapled in place, trim off the excess fabric from the back.
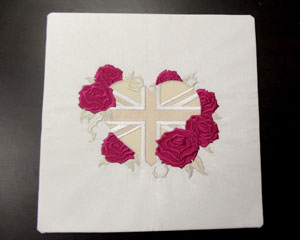
Yay! A nice neat and smooth embroidery piece, ready to be turned into a clock!
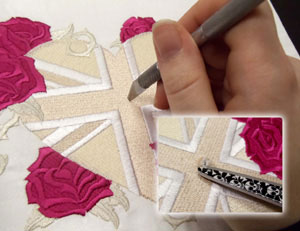
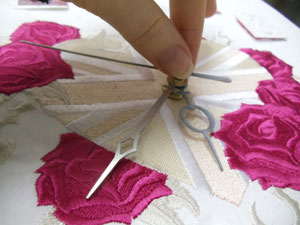
You’re first going to need to punch a hole in your piece in order to put the clock part through. This can be done right in the middle of the embroidery, it just takes a bit of fiddling.
First, punch a hole through with your X-Acto, and then use a scissors to trim away the raw threads at the edge of the hole, until you can push the clock piece though properly.
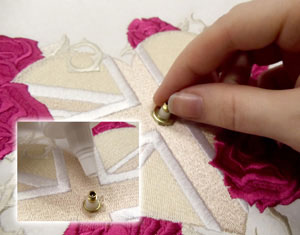
For most clock kits, the piece that pushes through will have a threaded piece that you can screw your bolt onto to keep the two pieces in place. Before putting the final bolt on to hold it, add a dab of glue around the thread edges to keep those loose threads you cut through from fraying further.
Screw the top bolt on, securing your clock part in place.
This may vary a bit from kit to kit, so be sure to read any instructions that come with your clock kit.
Before we add the rest of the clock parts, let's add our pretty clock numbers. This aspect is purely decorative, you can add numbers in any way you like.
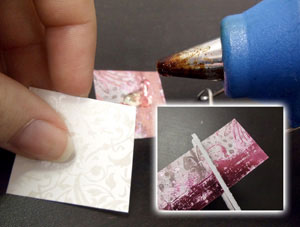
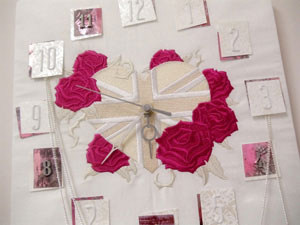
I cut a dozen little squares from my different scrapbook papers, as a place for my numbers to hang out on.

I layered these together in little sets and laid them out on my clock, trying to get the best arrangement and a neat collage effect.
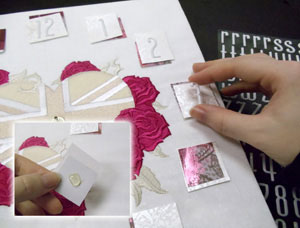
When you’re happy with your little number chips, grab your hot glue and glue them in place.
Next, grab your chosen numbers. I’m going to use a combination of some fun puffy stickers I found, awesomely called “thickers,” which induced a whole afternoon of me talking like Looney Tunes' Sylvester (Sufferin’ succotash, I’ve got thickers!).
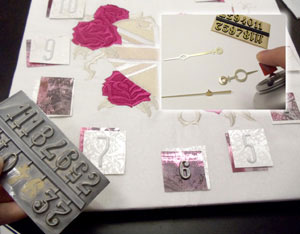
Since I randomly alternated my little squares' top pattern, I decided that on my pink squares, I would use some of the numbers that came with my clock. These originally all came in gold, so to make everything match, I used silver spray paint on the clock hands and the letters.
Make sure not to spray any gear parts with paint, less you gum up the clockworks and your clock stops working.
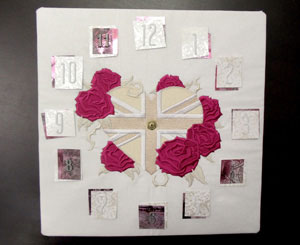
Here’s my punky little clock, ready for its finishing touches!
Follow your kit's instructions on how to assemble the final clock parts.
Ironically, my kit didn’t even come with instructions (which led to some exclamations a little more colorful than "sufferin’ succotash," let me tell you). Let's hope you got a nicer kit than I did. In general, the order should be: hour hand, minute hand, then second hand.

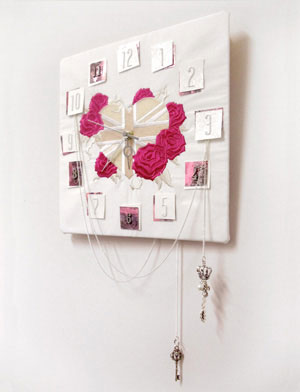
Finally, if you want to be extra schmancy (one step above fancy, for those in the know) you can add a little chain and charm for a little bling.
This can be attached in any way you like, but in one of those “guess how I know this” pieces of advice, if you put your charms off center and hang your clock on just its center clock piece, your clock will totally hang sideways. This is remedied by adding two hangers at the back so it can’t spin.
Yup, I have these blonde moments for you people, so you don’t triumphantly hang your pretty finished clock up for the first time in front of coworkers and then listen to them complement you on your awesomely sideways clock, through a fit of giggles. Maybe your friends are nicer than mine...
Anywho, once you’ve attached your charms, pop in a battery, set the time, and you’ve got yourself a darn fine clock to dress up your wall with panache.
Yup, we didn’t have to figure out how to hoop a clock (thankfully) but that doesn’t stop you from making an embroidered one! Now you can turn any of your favorite designs into something a lot more fun to stare at when you’re waiting for the seconds to tick by.


