Do you enjoy wrapping presents? I'm a firm believer that the best gifts are about the contents AND how they're wrapped. That's why putting a handmade touch on the outside of your presents is a great way to amp up the excitement of opening gifts. Jazz up your gifts and holiday wrapping with embroidered ribbon! This tutorial will show you how it's done.
Supplies
To craft your embroidered ribbon, you will need:
- Your favorite embroidery design (we recommend light-stitching borders)
- 3 inch wide fabric ribbon (or wider)
- Medium weight cutaway stabilizer
- Temporary spray adhesive
- Thread for your embroidery
- Scissors or pinking shears
- Ruler
- Air erase marker
- Printed templates of your design(s) for placement
Designs Used
When choosing an embroidery design for this project, it's important to consider a couple things:
- Open, light-stitching designs will work best on lightweight fabric like ribbon.
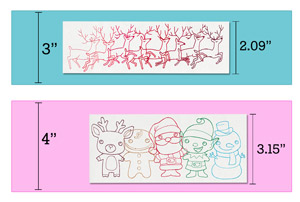
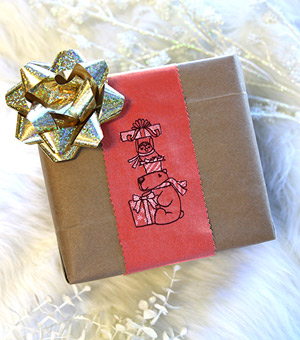
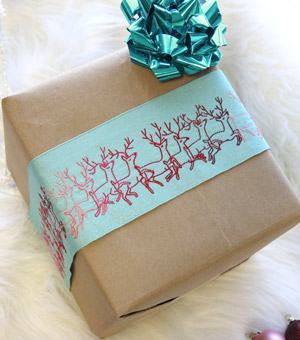
- Choose designs with a width smaller than your ribbon width. For this example I used a 3 inch wide ribbon, so I chose the smallest Reindeer Rainbow design because the height is only 2.09 inches. Likewise, this Christmas Friends Border is 3.15 inches tall, so it fits nicely on a 4 inch ribbon.
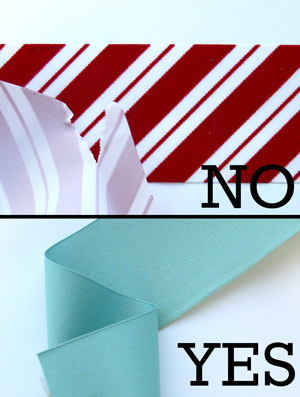
When choosing your ribbon, pay attention to the materials. Plastic blended ribbons, such as ones that contain acrylic, are easy to perforate with your needle, and may end up ripping. Fabric-like polyester ribbon will hold embroidery better.
First things first: In order to repeat a design evenly along the length of the ribbon, you will need to align your hoop with the center point of the ribbon.
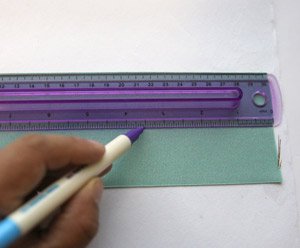
To do this, find the middle point of your ribbon with a ruler. Using your air erase fabric pen, mark points at the center of the ribbon intermittently, then use a straight edge to connect each point.
You will also need a printed template of your design to line up the repeating pattern. Here's more on how to print templates.
For best results, you will need a piece of stabilizer long enough to extend past the length of your ribbon for hooping. It also helps to use a long enough piece to go the length of your ribbon. Using your temporary spray adhesive, spray the back of the ribbon and press it firmly onto your medium weight cutaway stabilizer.
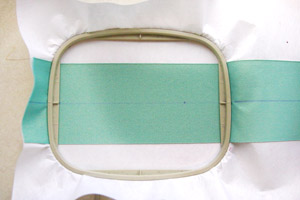
Line up the vertical crosshairs of your hoop with the straight line you've marked down the center of your ribbon.
Because ribbon tends to be smaller than the width of the hoop, make sure to hoop the stabilizer taut with the ribbon.
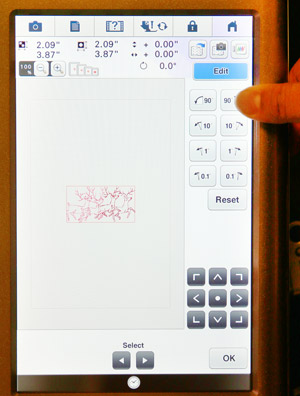
Pay attention to the position of the embroidery design on your machine before you start stitching -- you may need to rotate it to fit the direction of your ribbon.
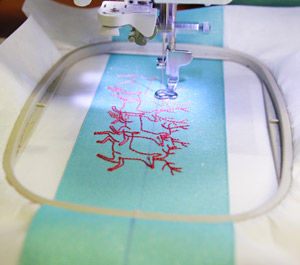
Now, it’s time to start stitching!
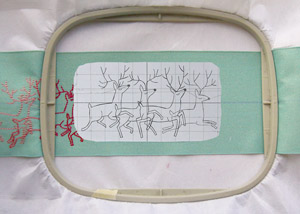
When your first design is done stitching, you may want to continue repeating the pattern down the ribbon. Use your printed template, lined up with the crosshairs of your hoop, to re-hoop the ribbon and stabilizer. This will ensure your design will land straight and line up!
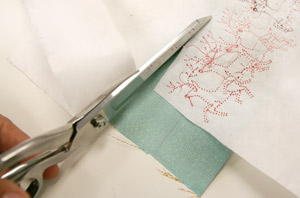
When finished with your embroidery, remove your design from the hoop. It may be easiest to hide the stabilizer if you cut it the same width as the ribbon itself.
Note: You can also press your ribbon with an iron to give it a finished look -- make sure to use a pressing cloth in between the iron and ribbon to avoid burn marks.
You can create your own ribbon from your favorite fabrics too! Just print a template of the design you'd like to use, mark a border around your design with your air erase pen that is between 0.25 and 0.5 inches, then draw a straight line that matches the length of your "ribbon."
Hoop and embroider your design on your fabric strip, then use pinking shears to cut out your "ribbon" and create a finished edge (and to prevent your ribbon from fraying).
Wrap your presents and share the cheer! You've created a unique and exciting way to show off the best gift of all -- your love!


