What better way to keep the sun off your face and make a fashion statement than with an embroidered floppy sun hat? This inexpensive accessory can be found in your local Target, Michael's, Lowe's, or department store and is super easy to customize to your style -- with just a little bit of colorful embroidery!
Supplies
To craft your embroidered straw hat, you will need:
- Your favorite embroidery design(s), I chose the 4 x 4" version of the Painted Poppies
- A floppy felt, straw, or synthetic straw hat
- Printed templates of the design files, for placement (here's how to print templates)
- Medium weight tear-away stabilizer
- Water soluble stabilizer (straw hats only)
- Air erase marking pen
- Temporary spray adhesive
- Scissors
- Ruler
Designs Used
Let's start with those printed templates...
Use embroidery software to print a template of your design. If you do not have software, Wilcom has a free program you can download, here. If you need a reminder on printing templates, read this.
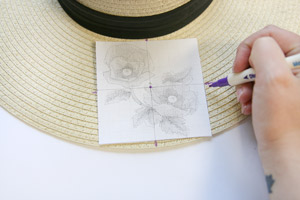
Cut around your template, then use your air erase pen to mark the horizontal and vertical lines on your hat. You can also poke through the middle of the template and mark the center point for more accuracy.
NOTE: Some floppy hats have a flexible core or wiring around the brim, which your embroidery needle will not be able to penetrate. If this is what you have, make sure to place your design away from this area.
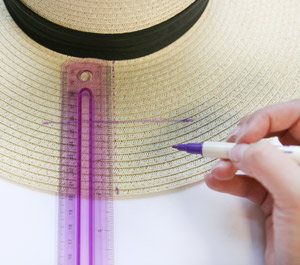
Next, use a ruler to extend your horizontal and vertical lines out. This is the best way to ensure your embroidery lands exactly where you want it to go.
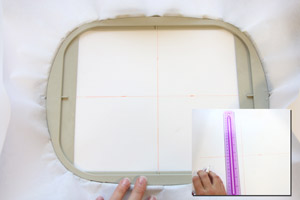
Grab the largest hoop you have and cut a piece of tear-away stabilizer slightly larger than your hoop size.
Use your ruler and a pen to make two perpendicular lines on the stabilizer. Hoop up the stabilizer, aligning your vertical and horizontal lines on the axis points of your hoop. Make sure your stabilizer is hooped nice and taut.
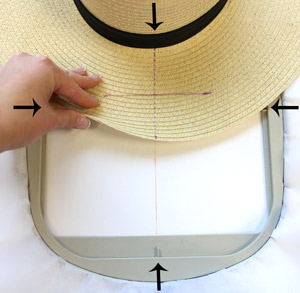
Now for the fun part! We almost never recommend floating your fabric or project; this is an exception.
Spray your tear-away stabilizer with temporary spray adhesive, then line up the lines of your hat with those on the stabilizer. Press the hat brim firmly down on the stabilizer.
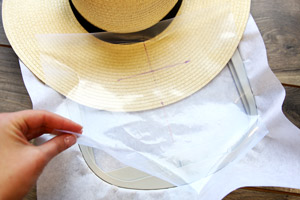
To ensure the stitches of my painterly design don't sink into the straw, I am using a heavy-duty water soluble stabilizer (Sulky Ultra Solvy) on the top of my hat brim.
If you are using a felt floppy hat, you don't need to use water soluble stabilizer on top.
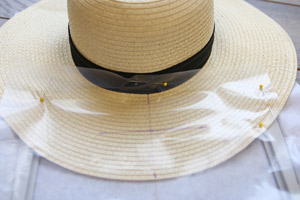
Because it isn't possible to hoop the hat or the top layer of water-soluble stabilizer, I used pins to hold the top stabilizer in place on the hat.
Attach your hoop securely to your embroidery machine, and press down the top of the hat to ensure it doesn't get caught while you are embroidering your design.
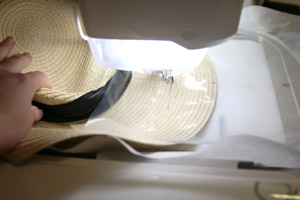
Now you're ready to embroider!
Start stitching! I would recommend slowing down your machine for this particular project. You should be able do this through your machine's menu.

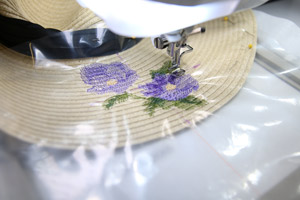
Because straw material is a little different, we don't recommend soaking off the water stabilizer, so once your design is done stitching, tear off as much of the top stabilizer as you can.
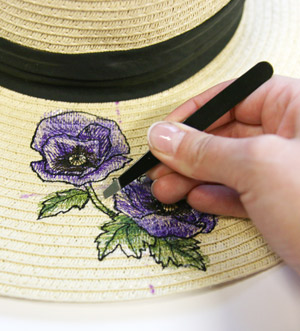
Use a tweezers to pull of smaller pieces that you are having trouble getting to, then use a wet sponge or towel to get the rest off.
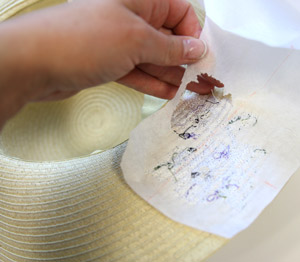
You can also tear away the back stabilizer.
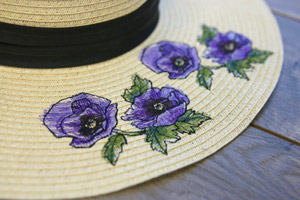
And there you have it! Embroider alternating designs, overlap flowers, or go all the way around the brim with embroidery!
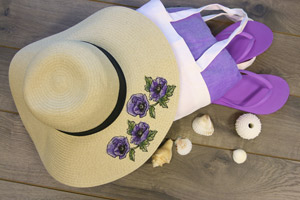
Grab your beach gear and head out in style!

Embroidering a floppy hat is the perfect way to keep shaded and make a fashion statement this summer. Whether you're into pretty flower accents, Cthulhus, or dragons, make a splash with your embroidery!
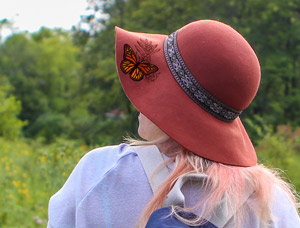
The same method works for most floppy hats, including felt ones -- so let your imagination run wild!


