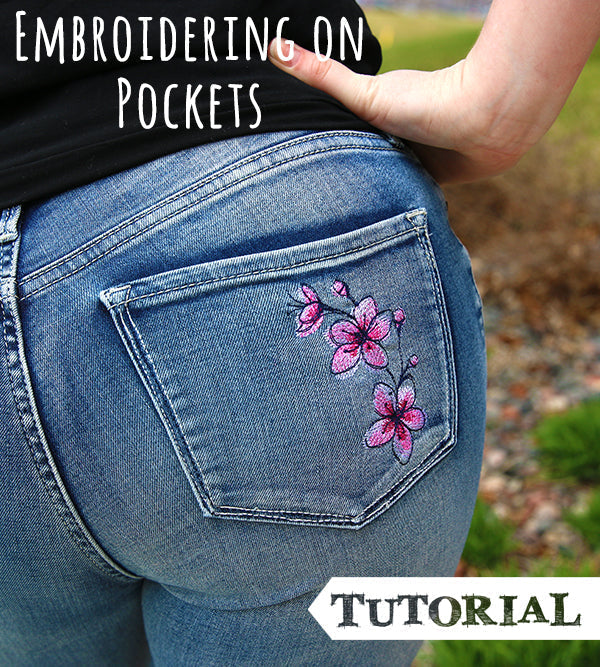
Ahhhh jeans ... they go with everything and are always in style. Most of us have our favorites, and now that embroidered fashion is trending, you can restyle your most loved pairs into updated fashionable favorites!
Embroidering on denim jeans is a fairly simple process once you know a few tricks. Back pockets are the easiest places to add a little embelishment, and this tutorial will show you how it's done. Get up close to the action by checking out the accompanying Embroidering on Pockets video to see how it's done.
Supplies & Materials:
Supplies
To craft your embroidered denim pocket, you will need:
- Your favorite embroidery design (we used this Cherry Blossom design)
- Medium weight cutaway stabilizer
- Temporary spray adhesive
- Printed templates of your design
- Scissors
- Seam ripper
- Pins
- Air-erase fabric marker or tailor's chalk
The designs used in this tutorial include: OR more materials & supplies
Gather Materials:
Start by selecting a design! When embroidering on a ready-made pocket, your design has to be smaller than the pocket you intend to stitch on. 4" x 4" designs tend to work best for adult pockets, such as the Passport Flower designs , the Bohemian Gold - Lotus Medallion , and Nauticus - Anchor .
Smaller designs like these will work on kid's apparel.
Make sure to measure the area you intend to embroider and compare it to the dimensions of the design before committing to anything.

Grab your seam ripper and get to work! Leaving the top two stitches at the very top of the pocket, seam rip down and around, then flip up your pocket at the hinge you've just created.

Use a generous amount of temporary spray adhesive on the back side of the denim pocket to adhere your medium weight cutaway stabilizer.
Next, use a printed template of your design to map out exactly where you'd like your embroidery to go. ( Here's more on how to print templates.)
Use an air erase fabric pen to mark the center and crosshair points of the design template onto the pocket. You will need these marking to help line up with the crosshairs of your embroidery hoop.

Start Embroidering:
Flip the legs and waist of your jeans out and away from you on a flat workspace so you can hoop just the denim pocket. Using a smaller hoop, capture as much of the pocket as possible, taut into your hoop.
Make sure the crosshairs on your hoop match with the crosshairs you have marked from the design template. If you are finding it difficult to hoop one direction, you can move the center point on your embroidery machine to match up with your marked center point of the design.

Next, stitch the design! Make sure the weight of your jeans is on a flat surface and not falling off your work space -- believe it or not, the weight of the denim alone is enough to throw off the embroidery arm, and make your design all wonky.

Once your embroidery is finished, remove it from the hoop and carefully trim the excess stabilizer away from the embroidery (so it's smaller than your pocket).

Next, pin all the way around the edges of your pocket and stitch along the original seam to complete the pocket.

A fresh look for any time of the year, this simple update is an easy way to dress up your favorite pair of denim! Whether you stitch on one pocket, mirror on both, or pick complimentary designs, there's no wrong way to do it!

Check out the Embroidering on Pockets video for a closer look at the techniques discussed here!