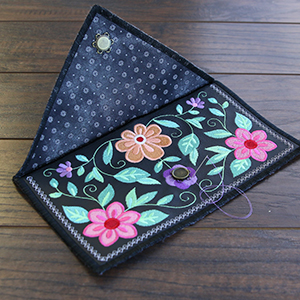
Add colorful flair to any outfit with this unique in-the-hoop project! Stitch a stylish clutch purse that will make the perfect accent to a wide variety of outfits. Decorative embroidery elevates this classic accessory. We'll show you step-by-step how to make your own!
Supplies
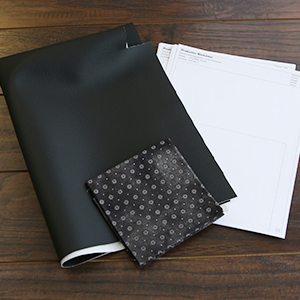
To create your clutch you'll need:
- In-the-hoop clutch embroidery design -- we're stitching the Bohemian Blooms Leather Clutch
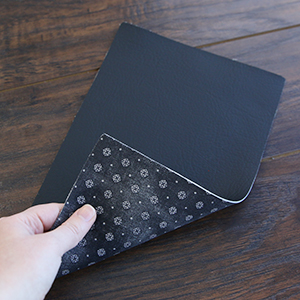
- 1/3 yard of thin and soft vinyl, leather, or ultrasuede (for the outside)
- 1/4 yard of quilter's cotton (for the lining)
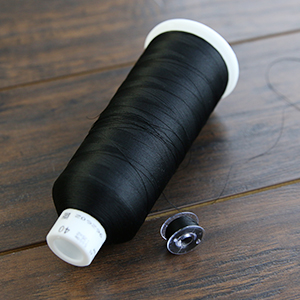
- Embroidery thread
- Sew on snap or magnet closure
- Tear-away stabilizer
- Temporary spray adhesive (such as Gunold KK100)
- Masking tape
- Scissors
Designs Used
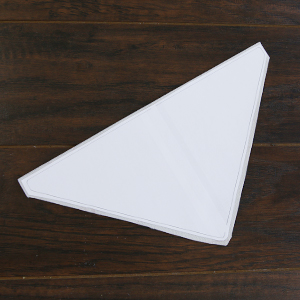
In-the-hoop clutch purse designs have multiple files. Two are full embroidery files. The others are dieline files marked with the letters DL. Dielines are used to cut the fabric to the right shape and size.
Open the dieline files using embroidery software, and print them. If you do not have embroidery software, Wilcom TrueSizer is a free program to use.
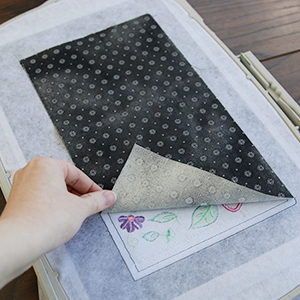
Take the printed dieline for the front "a" fabric piece, spray the back side of the paper with temporary adhesive, and smooth it onto the wrong side of the vinyl or leather. Placing it on the wrong side of the fabric will prevent the sticky residue from building up on the right side of the vinyl or leather.
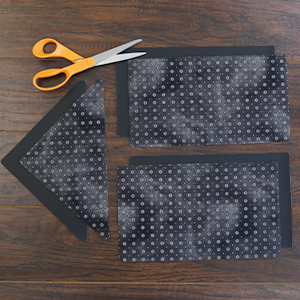
Cut around the shape, and repeat to cut out all the other dieline pieces. Make sure to print each of the dielines twice, and cut one outside fabric piece and one lining fabric for all the dieline shapes.
All designs will have 3 or more dieline files.
Once all the fabric pieces are cut to the correct shapes, it's time to embroider the design.
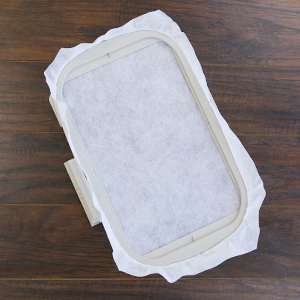
Hoop a piece of tear-away stabilizer. Madeira E-Zee 1.5 oz or Floriani Tearaway Medium are good choices. Those brands are more fibrous, less like paper, and will tear more cleanly.
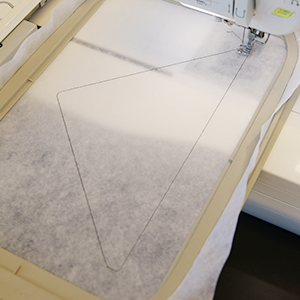
Attach the hoop onto the machine, and load the first embroidery file labeled with an "a" (not the dieline files).
Use a 75/11 sharp sewing needle instead of an embroidery needle. The sharp sewing needle has a finer point, and it will make smaller perforations in the stabilizer.
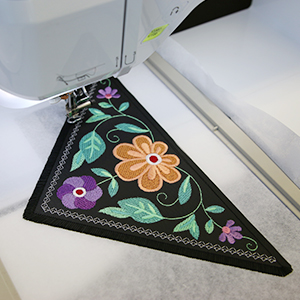
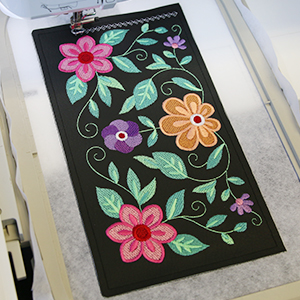
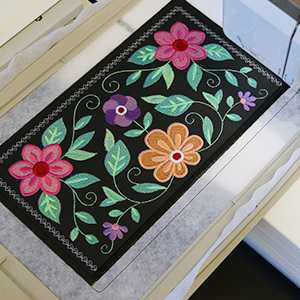
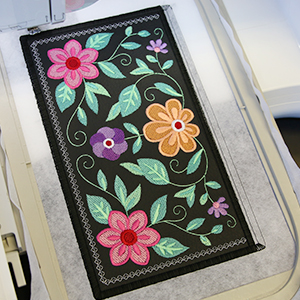
Embroider the design. The first thing to embroider will be a dieline (or outline stitch). This marks the area on the stabilizer where the fabric piece will be placed.
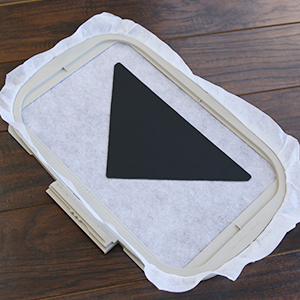
After the dieline has sewn, remove the hoop from the machine, but do not unhoop the stabilizer.
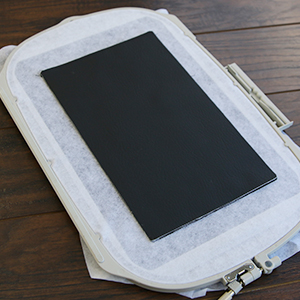
Spray the wrong side of the "a" front fabric piece with temporary adhesive. Smooth the fabric piece onto the stabilizer inside of the sewn dieline.

Then place the hoop back onto the machine, and embroider the tackdown for the front fabric piece. The tackdown will hold the fabric piece in place for the remainder of the design.
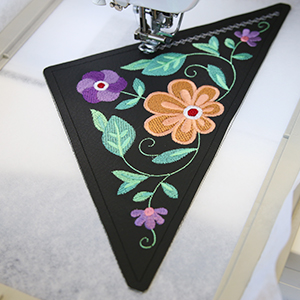
Once the front fabric piece is stitched in place, embroider all the inner details. Make sure to stop before sewing the "lining tackdown" step.
Before sewing the "lining tackdown" step, remove the hoop from the machine, and turn it over so the back side of the embroidery is facing up.
Then spray the wrong side of the lining "a" piece with temporary adhesive and smooth it into place on the back side of the embroidery.
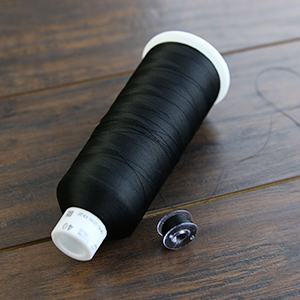
As all the embroidery from here on out will be seen from both sides, wind a bobbin to match the thread color used in the rest of the design.
Place the bobbin into the machine, and follow the color change sheet to embroider the rest of the "a" file design.
The final things to sew will be the "lining tackdown" and then the "finishing seam", which will bind the fabric in place and sew two of the final borders onto the flap.
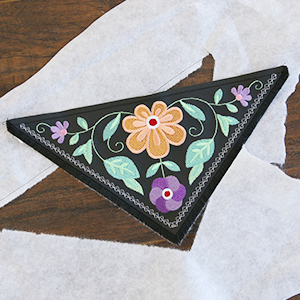
Once the embroidery for the flap (file "a") is finished, carefully tear the excess stabilizer away from the outside edges of the design.
Some in-the-hoop clutch designs have an additional strap piece included as its own file. These designs will have three embroidery files (an "a", "b", and "c" file) rather than just two (only an "a" & "b" file). If your chosen design includes a strap, load the strap file (it will be a file "b") onto your machine, and hoop another piece of tearaway stabilizer. Then repeat the steps above (which show embroidering the flap) to embroider the strap piece. Once the embroidery is finished, tear away the excess stabilizer from around the strap. If your design does not have a strap, move onto the next step.

After the other embroidery files have finished sewing, hoop another piece of tearaway stabilizer. Load the final embroidery file (labeled with a "b" or "c") onto the machine. Begin to embroidery the design. The dieline for the front piece will sew out first.
Spray the wrong side of the front vinyl or leather piece, and smooth it into place (the front piece is the smaller rectangle shape).
Then follow the color change sheet to embroider the "front piece tackdown" and all of the inner details.
Before sewing the "front lining tackdown" step, remove the hoop from the machine, and turn it over so the back side of the embroidery is facing up.
Then spray the wrong side of the front lining piece (the smaller rectangle) with temporary adhesive and smooth it into place on the back side of the embroidery.
As all the embroidery from here on out will be seen from both sides, wind a bobbin to match the thread color used in the rest of the design, and use it for all remaining steps.
Place the bobbin into the machine, and follow the color change sheet to embroider the "front piece lining tackdown" as well as the "top pocket finishing seam".
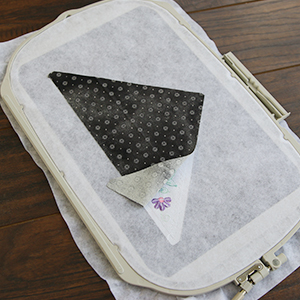
Then embroider the "back piece dieline" which will show the placement for the back piece and back lining of the clutch purse. Stop before sewing the "back piece tackdown".
Spray the wrong sides of the two back pieces (the outer fabric and the lining) with temporary adhesive. Match up the edges, and adhere them together back to back with the wrong sides of the fabrics touching.
Once the two back pieces are adhered together, spray the lining side with temporary adhesive just around the four edges.
Then smooth it into the "back piece dieline" on the back of the hoop over the front lining piece.
Place the hoop back onto the machine, and embroider the "back piece tackdown", which will hold the back piece in place on the back of the hoop. Then embroider the "finishing seam" step, which will sew a final border along the sides and bottom edge of the purse.
Stop before embroidering the "flap tackdown" step, and remove the hoop from the machine without unhooping the stabilizer.
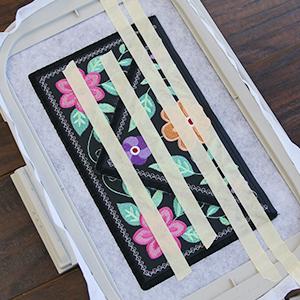
Line the top edge of the flap (file "a") up with the top edge of the sewn dieline (the edge without a border). Tape it securely in place, making sure none of the tape goes over the top edge, so it doesn't get sewn into the "top finishing seam".

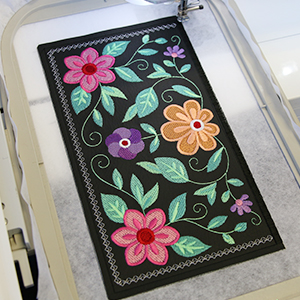
After the flap is securely in place, embroider the "flap tackdown" and the "top finishing seam". These steps will sew the final outer border, and bind the flap onto the front of the clutch purse.
If your chosen design has a strap piece, stop embroidering before the "strap tackdown" step. If your design does not have a strap, skip the next two steps.
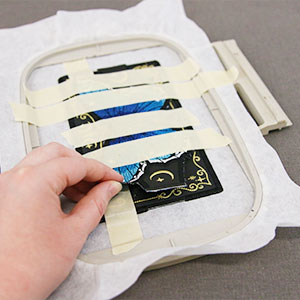
Spray the wrong side of the strap with temporary adhesive along the left and right outer edges where it will be sewn down. Avoid spraying the center, as this will make it sticky and difficult to use after you have finished embroidering.
To position the strap correctly, locate the two areas on the left and right edges of the hooped design where the final edge border has not sewn. Smooth the strap into place on top of the flap, so that the right and left sides perfectly cover the two edge areas without a finished boarder. Then tape the strap in place so it is very secure, but do not place any tape over the left and right edges where it will be embroidering. For best results, tape the strap down very well, so it does not get caught or pushed as the embroidery foot moves over it. Especially make sure to tape over any edges of the strap that the embroidery foot could get caught on while moving.
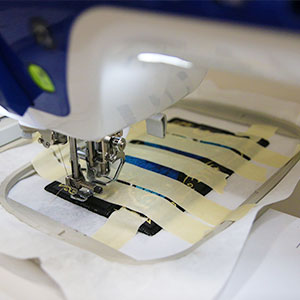
Then place the hoop back on the machine and embroider the rest of the design. It will sew both a tackdown and the final finishing border along the left and right edges of the strap. For best results, sit and watch as this portion of the design finishes embroidering, so you can stop the machine and adjust the strap piece as needed if it gets caught on the embroidery foot.

Once the embroidery is finished, carefully tear the excess stabilizer away from the outside edges of the design.
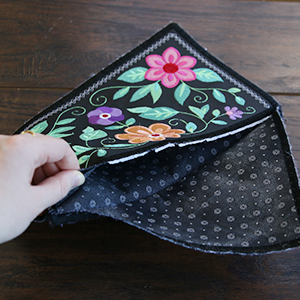
Then tear the purse open by removing the small strip of tearaway stabilizer left underneath the flap.
Add a snap, magnet, or other chosen closure to finish the clutch purse. Using one that is sewn or glued on works best, because it won't been seen on the front of the flap once it's attached.


