The mallow pumpkins are out again... that can only mean one thing... autumn is here! It’s time to celebrate my favorite season, and this year I’m doing it in a decidedly festive way... Bunting!
What is bunting, you might ask? Well, it used to be a type of lightweight fabric used to make flags and such, but nowadays it’s a term for any festive decorations made out of fabric. Usually bunting is hung like a banner, and it’s a great and cheap way to add some seasonal flair to your home!
Supplies
For my autumn bunting, I’m going to hang some festive fabric flags with “Autumn” spelled out in fun funky lettering, with some embroidery embellishments, of course. To make your bunting flags, you’ll want:
- a few different kinds of fun fabric
- some black and white felt
- pinking shears
- a long spool of ribbon
- your downloadable flag template, printed
- spray adhesive
- cutaway stabilizer
- scissors
Designs Used

To start, we’ll cut out our flags. To spell out “Autumn,” I’ll need 6 flags. I’ll add two more embroidered ones later, but we don’t want to cut those out yet.
First, take a piece of fabric and fold it over, so it’s in two layers. Cut the template flag across the top of the template, and line the top of the printout with the top edge of your fabric.
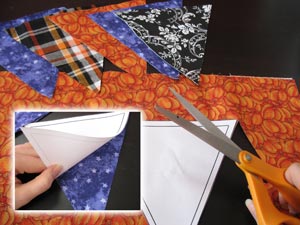
Cut out your flag following the outside line. The inside line is where your seam will be.
Keep the template, and use it to cut out all 6 of your flags. Make sure you’re cutting out two layers at a time when you cut out each flag. Now we have flags... but they need cute text!
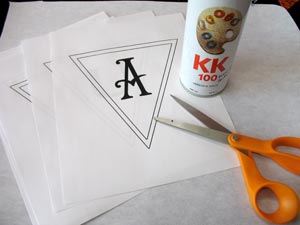
For my letters, I found a different font for each and printed them inside a template so I knew they would be the right size. Don’t be afraid to mix up some fun fonts and styles, but just be sure the font isn’t so complicated that you can’t cut it out of felt.
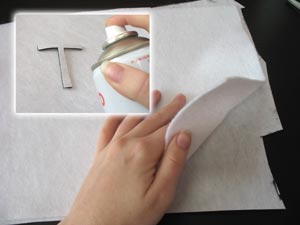
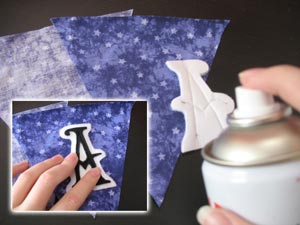
Print some letter templates, and grab your felt and a large piece of cutaway stabilizer (we’re using it for backing here) as well as some spray adhesive.
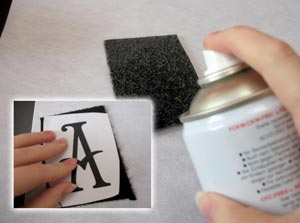
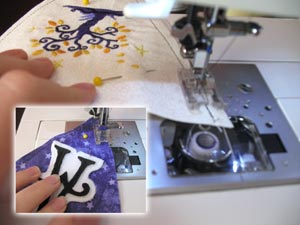
Cut out a letter, and then cut out a piece of black felt just larger than your letter. Generously spray the back of your felt with some spray adhesive, and stick it onto your stabilizer.
Coat the back of your printed letter template very lightly with adhesive, and place that on top of your felt.
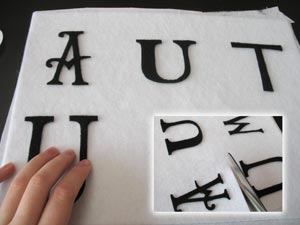
Carefully cut out your felt letter, following the printed template as closely as you can.
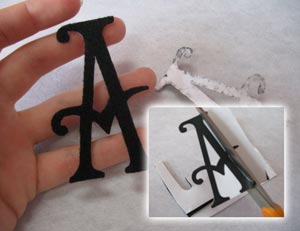
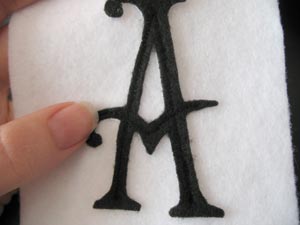
The “A” is going to be the most difficult letter, because of the negative space in the middle, but a small scissors or even an X-acto knife can do the trick pretty well. It all depends on what kind of font you choose. I chose an especially fiddly font, which I didn’t think about until I got to this step. Ah well...
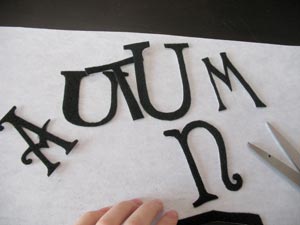
Repeat this process will all your letters, until you have all of “Autumn” cut out in neat pretty felt that has a sturdy backing. You can see I played with lots of fonts to create my letters.
Now, you can leave your letters like this if you like, but because a lot of my autumn-y fabrics are dark, I want to back my black letters with some white felt to help them “pop.”
Back a sheet of white felt with a piece of stabilizer using spray adhesive, then take your black felt letters and spray the back of them generously with adhesive.
Stick your letters evenly spaced on your white felt, leaving them plenty of room in between.
Once you have all six letters stuck on, cut each of them out carefully, leaving as much which space breathing room as you can.
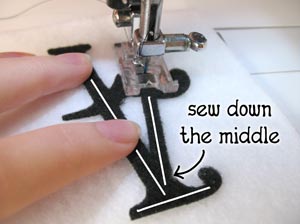
To applique delicate letters such as these, you don’t need to go around all the edges. Just sew a careful seam down the very middle of the letter, making sure you take your seam out to any pieces that stick out, like the cross on the “A”. Be sure, of course, to use thread that matches your felt.
Between a tack down seam and your adhesive, your letters should be nice and snug on the felt.
Here’s the finished letter with its delicate seam. Repeat this process for all your 6 letters.

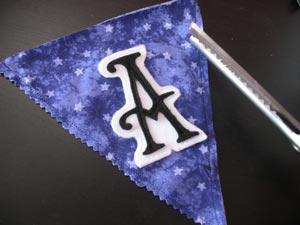
With your letter securely in place, take a pair of scissors and carefully trim around your letter, leaving about a 1/2 centimeter white edge, big enough to be able to follow with a seam again. Your outline doesn’t need to be as exact as your original letter, it can be a much simpler shape. Do this for all your letters.
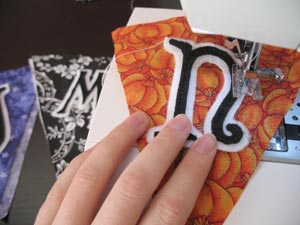
I placed my newly trimmed letters on the flags to see how they looked. I thought the white backing really made the letters pop nicely.
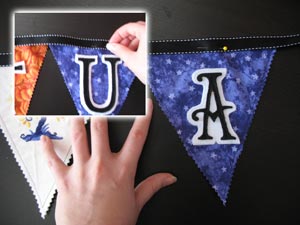
To secure the letters to the flags, spray the back of your felt letter with adhesive and place it carefully in the center of your flag. You only need one side of your flag right now, you can leave the back piece behind.
Make sure that when you place your letter, you leave enough room on the sides for the final seam.
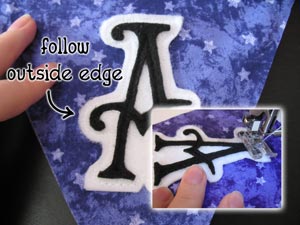
Change your thread to match your new white edging, and sew a seam following the outside edge of your letter, all the way around. You don’t have to worry about getting too close to the edge; a simple seam will be enough to keep the felt in place.
Sew the rest of your letters onto their flags, and then set them aside for now. It’s time to add some embroidered flags!
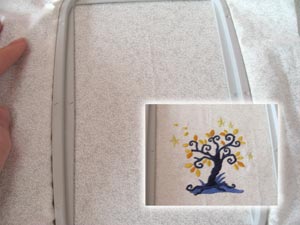
Take a piece of fabric large enough to hoop and large enough to turn into a flag, and hoop it up with a piece of cutaway stabilizer.
Find a festive fall embroidery design (the small size designs work best for fitting on flags) and stitch it out in matching colors. I picked our Autumn Treatise tree. If you want an embroidered flag on either end, repeat this process again, so you have two embroidered pieces.
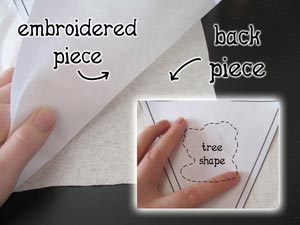
Layer your newly embroidered piece on top of a back piece of matching fabric, and then place the flag template on top, taking care to center the design inside the flag shape.
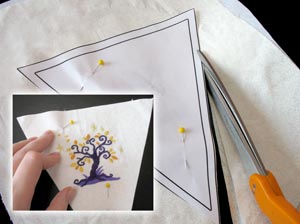
Cut out around your template, and then remove the top template and pin the two layers together again, ready for sewing. You’ll need to do this twice if you stitched up two embroidered flags.
Take all your flags (with the two sides pinned together) and sew a 1/4 inch seam around the edges.
To give your flag edges a nice finish and keep them from fraying, take your pinking shears and clip a zigzag edge along the sides of all your flags.
To finish your bunting for hanging, take a long piece of ribbon and pin the raw edge of your flags just underneath the edge.
If you want your bunting to look good from all sides, you can add another piece of ribbon on the back to cover the raw edges. Pin your flags in order. I started with a little embroidered tree flag, then spelled out “Autumn,” and finished with another little tree.
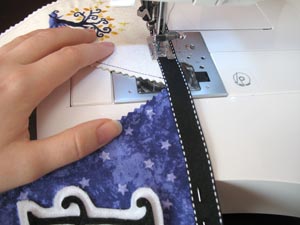
Sew a seam all the way across your ribbon, making sure you catch the edge of each flag as you sew over it.
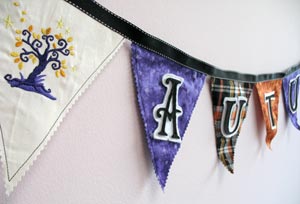
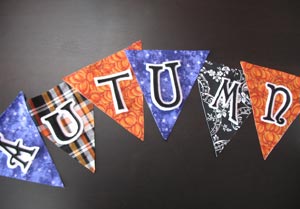
Your beautiful fall bunting is done! Hang your colorful celebration of autumn in your house to welcome in the new season. Old fashioned bunting gets a fun mix-up with funky colors and modern fonts, and the applique felt letters will be sure to attract attention.

Enjoy this season with some stylish home decor, and when the next season comes along, you know exactly how to celebrate it with style! Bunting is a fun, easy and cheap way to decorate your home for the seasons, all you need is some ribbon and all your leftover scraps of fabric! (And you know you have lots of leftover fabric.)
Happy fall, all!


