Faux fur brings extra fluff and fun to these adorable in-the-hoop plushies! Bigfoot, monster, and jackalope designs make a playful trio, complete with cute embroidered details. It's simple and so fun -- we'll show you how!
Supplies
To make your fluffy plushie, you'll need:
- Fluffy Bigfoot (Stuffed), Fluffy Monster (Stuffed), or Fluffy Jackalope (Stuffed) embroidery design -- we're stitching the jackalope
- Printed dieline templates for your fabric pieces (here's how to print dieline templates)
- Faux fur fabric for body
- Stiff craft felt for appendages
- Tearaway stabilizer
- Lightweight water-soluble stabilizer for topping, such as Sulky Solvy
- Temporary spray adhesive
- Polyfill stuffing
- Masking tape
- Scissors
- Hand-sewing needle and thread
Designs Used
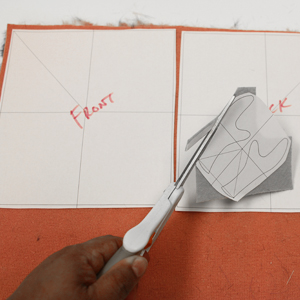
When you download each of these embroidery designs, you'll find four files: the embroidery file, plus three dieline files. The dieline file that ends in DL gives you the shapes for the appendages.
For these designs, the dielines for the body fabric (which end in DLFRONT and DLBACK) are actually rectangles -- you'll lay those down during stitching, then trim around the body shape after the design is done. Don't worry -- your plushies will be anything but square!
Print your dieline templates using embroidery software, then use them to cut out your fabric pieces for the body and appendages.
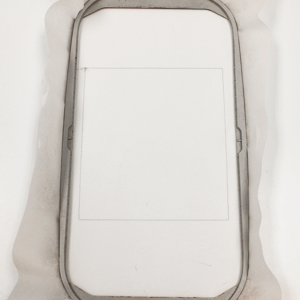
Hoop a piece of tearaway stabilizer, making sure it's taut within the hoop. Attach the hoop to your embroidery machine.
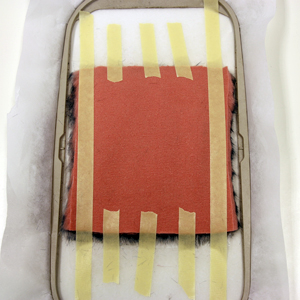
Load the full embroidery design (not the dieline files) into your embroidery machine. The first thing that will stitch is a dieline for fabric placement. Lightly spray the back of the faux fur piece for the front of the body with temporary spray adhesive, and place it face up inside the dieline.
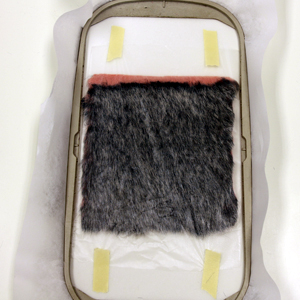
Next, cut a piece of lightweight water-soluble stabilizer slightly larger than your faux fur piece, but small enough to fit within your hoop. Lay it over the top of the faux fur fabric, and secure the edges with masking tape.
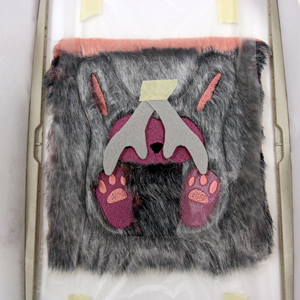
Next a tackdown will stitch (in the shape of the body), followed by the face and body details. After all these details have sewn, remove the hoop from the machine. Lay the felt appendages on top, facing toward the center of the body, so that the edge extends past the tackdown stitch. Tape them in place.
Next, lay the faux fur piece for the back of the body face down over the first fabric piece. Secure it in place with masking tape. Reattach the hoop to the embroidery machine.
The final step will stitch around the body shape, sewing the two faux fur layers together and catching the felt appendages in the seam. A small gap will be left so that you can turn and stuff your plushie later.
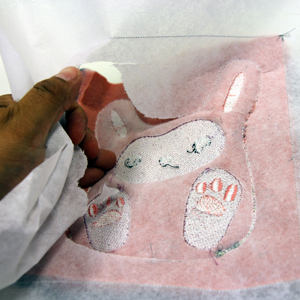
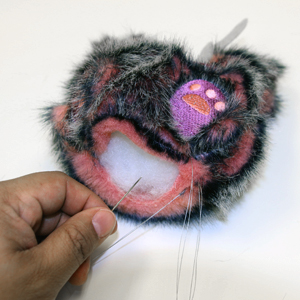
After the design is finished, unhoop the design, and carefully remove the masking tape and excess stabilizer.
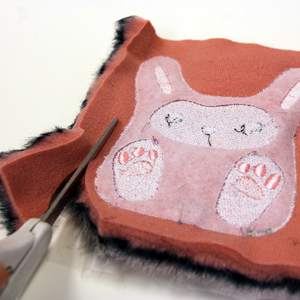
Cut around the body shape, leaving about a quarter inch seam allowance.
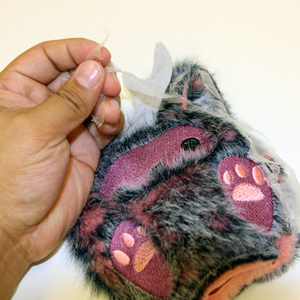
Turn your plushie right side out. It may help to use the eraser end of a pencil to push out the ears, being careful not to break the seams. Tear away the excess water-soluble topping.
Stuff your plushie with polyfill stuffing, then hand-stitch the opening closed.
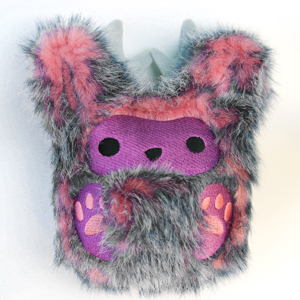
Your fluffy plushie is complete! Happy snuggling!


