Christmas time is here and there’s no better time to dandy things up. That may include yourself, your decor, your tree, even your ornaments! That’s right, there’s no reason your little handmade ornaments can’t get all dapper for the holidays. A cute scarf and a little top hat look just darling on a Christmas birdie... don’t believe me? Well, I’ll show you just how dapper he can look with this tutorial!
Supplies
To make your little dapper birdie, you’ll need:
- Fabric for the birdie, back and front
- Fabric for his appliqué wing
- Soft felt for his scarf
- Stiff felt fabric for his top hat
- Some ribbon to help him hang on the tree
- Templates (we’ll cover that in a moment)
- Cutaway stabilizer
- Tear-away stabilizer
- Spray fixative
- A button (for his cute little eye)
Designs Used
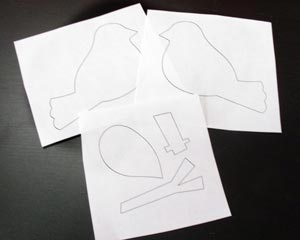
To make your birdie, you’ll need to print a template of the parts. There are several ways to get your templates, which come with the embroidery design: If you have embroidery software, you can print out the dieline files. If you don’t, you can hoop up a piece of paper and “stitch” the dielines, then cut out along the perforations to get your template.
You’ll need two birdie templates (one for the front, one for the back), and the template shapes for the wing, scarf, and little top hat.
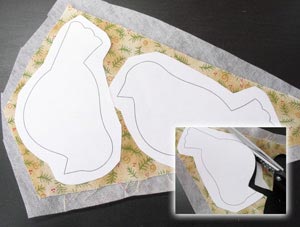
Take the fabric you’re going to use for your birdie, and cut a piece of matching cutaway stabilizer for it. Spray the stabilizer and smooth your fabric on top of it. This will give our cutouts some stability. If you want a less-stiff birdie when you’re done, use thinner stabilizer.
Lightly spray the back of your templates, stick them on to your fabric, and cut out your little birdie shapes.
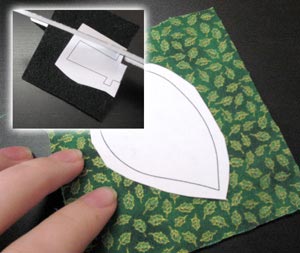
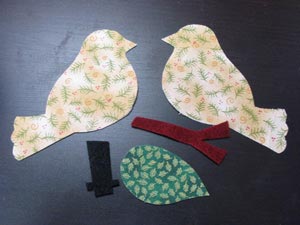
Continue cutting out your pieces. The wing can have stabilizer backing like your birdies if you like, but the felt doesn’t need it.
Remember, cut your top hat out of stiff felt, so it’s able to stand up on its own, and isn’t all floppy. Also, you’ll notice on the top hat template, there’s a little “tab” shape underneath the hat. Don’t cut this off! We need this little part to make sure the hat gets sewn on to his head. You can cut the little scarf out of any kind of felt you like.
Now we have all our pieces cut out and ready to be made into a birdie!
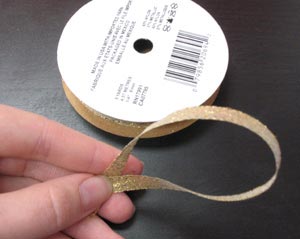
Before we get to sewing, we need a few more pieces. First, cut a loop of ribbon long enough to loop for hanging. Also, you’ll need to wind a bobbin in the same color thread as you’re going to stitch your dieline. If you’re following our color sheet, it’ll probably be red. Wind it and set it aside for later.
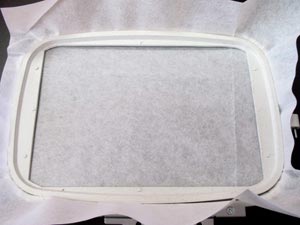
Now, hoop up a piece of tear-away stabilizer, and follow along as we make our birdie!
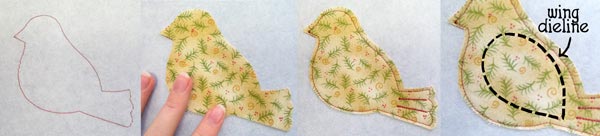
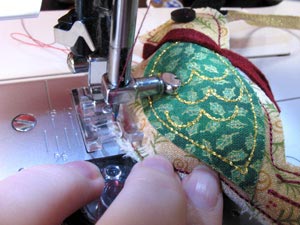
First a dieline will stitch. Take your front birdie piece, spray the back with adhesive, and place it carefully inside the dieline. When you set your machine to sewing again, it’ll sew a tack down and the tail detail. After that, the wing dieline will stitch. I marked it out here because it stitched nearly invisibly in the gold thread I used.
Take your wing piece, spray the back with fixative, and place it carefully inside the dieline. The tack down will stitch, followed by the wing detail and then the little x for the eye. Once your machine has stitched the x, it’s time to stop it, take the hoop off the machine ( DON’T un-hoop it!) and flip it over.
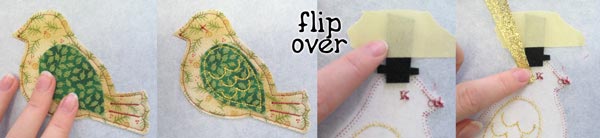
First, take your little felt top hat. Place the top hat so the brim is just at the top of his head, but the tab overlaps to the inside. This way, the tab will be caught with the finishing seam, keeping the hat in place but hiding the tab inside. Tape the hat in place. Next, take your loop of ribbon, spray a little fixative on the end, and place the raw ends just inside the birdie. You’ll probably also want to tape down the top of the ribbon so it doesn’t get a chance to move around.
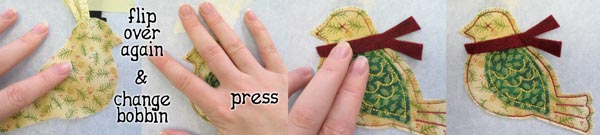
Finally, take your back birdie piece, spray just the edges of the fabric, and place it on top of everything, carefully lining it up inside the seam shape. Before you forget, change your bobbin out to the matching dieline color you wound before (in this case, red). Flip your hoop over again, and press it from the front (so we don’t risk tearing the stabilizer) pressing everything flat and firm. Finally, lightly spray the back of your little scarf piece, place it jauntily around his neck, and put your hoop back under the machine. The final dieline will stitch, sewing over your scarf edges, and securing his hat and loop. The dieline will leave a little gap at his tummy for stuffing.
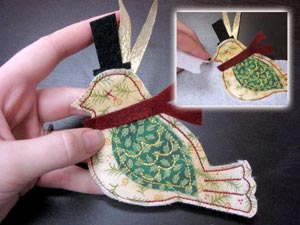
Un-hoop your birdie and carefully tear him free of the stabilizer.
Phew! Your birdie is all done stitching. Now he just needs a few embellishments and a little fattening up to make him shine!
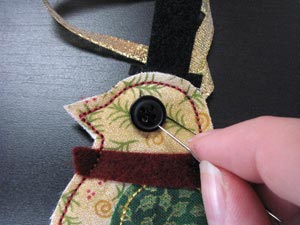
Grab your little button and stitch or glue it on to your birdie where the little x is marked. To help stitch through only one layer, I stuck the end of a pencil up through the birdie to pull the two layers apart, and then stitched it in place.
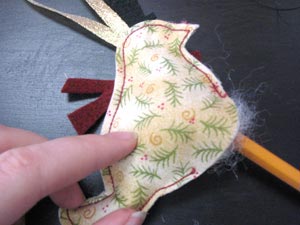
Now stuff your birdie through the little opening in his tummy. A pencil end helps to push little bits of stuffing in hard to reach places, like his head and his tail. Stuff him up till he’s good and plump.
Finally, pinch that opening shut, and making sure you have a matching bobbin and thread, sew the opening closed. I’d suggest stitching from the top so you can match the seam that’s already been sewn.
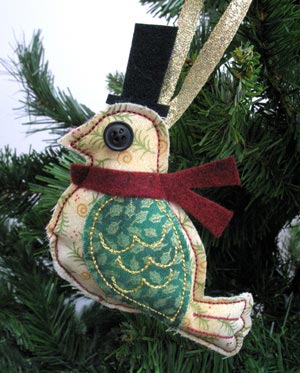
Ta da! What a dapper little gent. Your Christmas birdie is dressed to impress in his holiday finest. He's got a vintage whimsical charm with all the luxuries and speed of modern stitching.
If you want to get really creative, why not cut out all different shapes of smart hats and different kinds of scarves, change out buttons and fabrics, and whip up an adorable army of festive birdie ornaments, each one a little bit different from the rest. They make fabuous gifts, or just great decorations for your fabulous crafty tree. Enjoy dandy-ing up your holiday celebrations!


