It’s no secret that I love things with wings. We’ve done winged projects before, like this one, and in it I stated my once-upon-a-time desire to be a fairy. OK, maybe not so once-upon-a-time. Basically I think I just want the wings. Who wouldn’t love a pair of delicate wings floating on their back?
Well, I may not be able to achieve my lifelong dream of fairy princess, but we can certainly look like one! Transform an ordinary tee into a romantic scoop back with some floating wing embroidery, and add a little magic to your wardrobe.
Supplies
To make your new floating wing tee, you’ll need:
- Regular T-shirt (not too stretchy!)
- Awesome light-stitching wing designs (I'm using the 2.44" x 3.85" size
- Printed templates of the wing designs, for placement (here's how to get them)
- Organza (if you really want to go for a “floating effect” pick something close to your skin color)
- Fabric for edging, or in my case, I found some bias tape that matched my tee.
- Heavy duty water soluble stabilizer. We’re using Sulky Ultra Solvy.
- White fabric pencil
- Scissors and lots of pins!
Designs Used
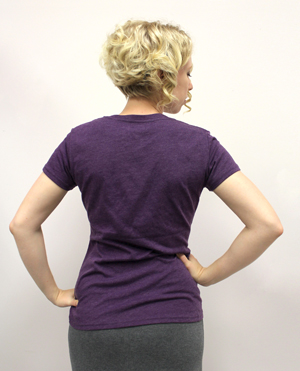
So, here’s how my tee started out. It’s just fine to have a fitted tee, but make sure your tee isn't too stretchy around your body, or it will likely bunch up when we try to add the organza panel. This tee is perfect, fitted, but not too stretchy.
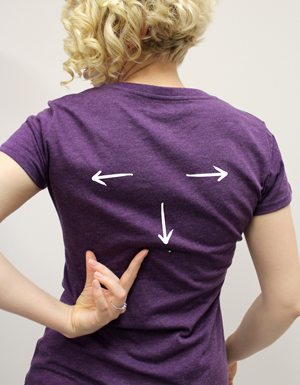
The first thing you’re going to want to figure out is how low to make your back scoop. I recommend you wear one of your favorite bras, and something that’s not a racerback. You’re going to want to mark on your tee where your bra clasp is, as well as the two straps. No point in making a low scoop tee if it shows off a little too much! This way we can customize it to just how we want it.
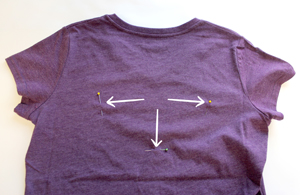
When you have these areas marked, you’ll know how large you can make your scoop while still making sure everything that needs to remain hidden does so.
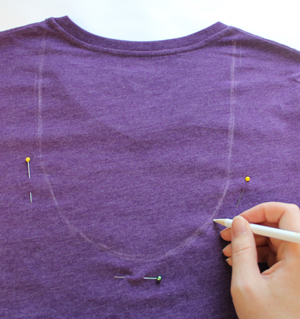
Using these pin guides, draw a long scoop starting at the outside of the collar, and staying about an inch in from your pins. This will make sure that even with seam allowance, your straps stay hidden. Use a fabric pencil to mark your lines.
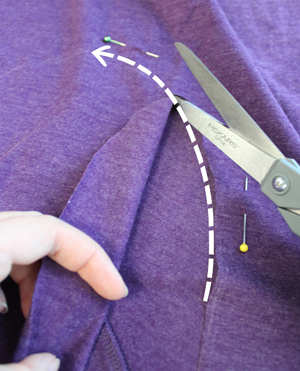
Once it’s marked, start your cut at the collar and cut our your back scoop, making sure not to get too close to the pins.
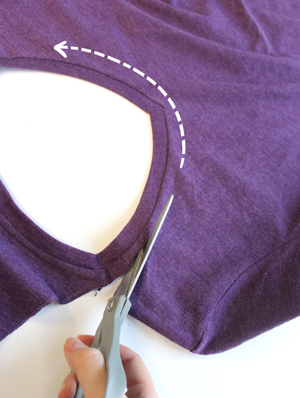
When you get around to the front, you can just cut off the collar right outside the seam. This tee was already a V-neck, so I didn’t want to get too much lower. If you have a regular crew neck tee, you can scoop it down a little from the collar
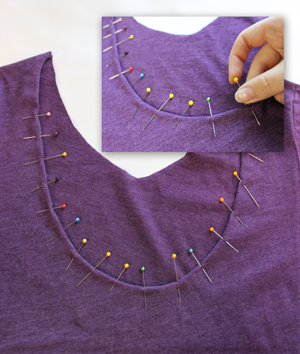
Yup, with T-shirt material, the best way to make sure your curve doesn’t bunch up is to use lots of pins along the edge. Fold the raw edge under and pin it in place to give yourself an idea of what your back scoop will be like. You can skip the front for now.
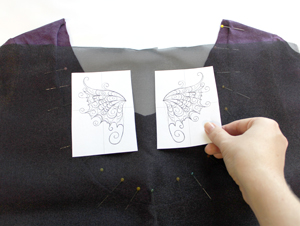
Lay your organza on top of your tee, roughly where it will be when it’s done.
Using your printed templates, plan out where you want your wings to go. You’ll want them to sit right about at your shoulder blades, with a little bit of space in between. You should be able to see your tee through the organza, so make sure your wings are positioned so they will sit nicely in the organza scoop.
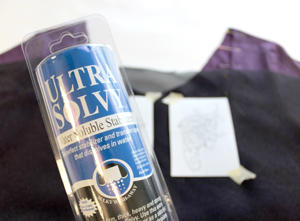
Tape your templates in place so you know just where to stitch. Next, grab your water soluble stabilizer!
I like Sulky Ultra Solvy, or thicker water-soluble stabilizers, because it makes sure our stitches will have a good base to stitch on, even on organza. Organza is surprisingly sturdy, but stitching on it is still mostly recommended for light designs like these wings.
Hoop up your organza with the water-soluble stabilizer underneath, and stitch out each of your wings.
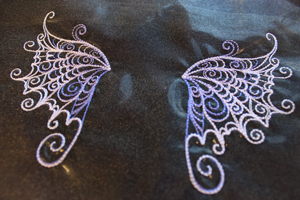
Here are my wings all finished, with the stabilizer still underneath. Lets get rid of that stabilizer.
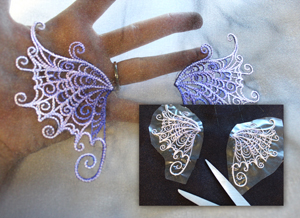
Cut as much excess stabilizer away from your wings as you can, so you’ll have less to dissolve. Trim it very carefully! It doesn’t take much to slip up and snip right through the organza. Not that I would know. I never do things like that. Nope.
Soak your stabilizer according to your package directions. This thicker stuff might take a little longer to dissolve than thinner stabilizers, so make sure all the gunk is gone before you dry it off.
There! Gorgeous ombre wings floating delicately on organza. Now we just need them on our tee.
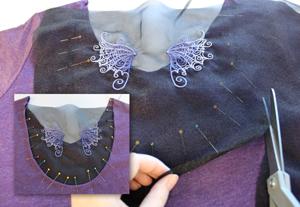
Start by laying your wings on top of your tee roughly where you’d like them to sit in the scoop, and cut them into the scoop shape, leaving lots of extra room on the outside for maneuvering.
To test your placement, slide your organza piece inside your shirt, and center your wings. If everything looks good, we now need to sort out the raw edge of our organza.
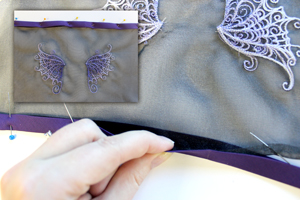
There are lots of ways you could finish off this raw edge, from doing a double fold and a seam, to using a piece of fabric as trim. I happened to have some purple bias tape that actually worked quite well. The slightly stiffer tape was great for keeping the organza held firm and in shape.
Fold the raw edge of your organza down (towards the inside of the tee) and then fold your trim over it, pinning it in place. Make sure your pins catch both the organza and the trim.
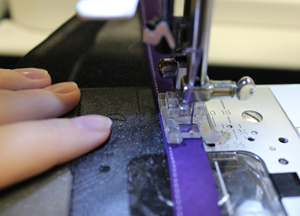
Sew a seam along the top edge to keep your trim in place. I did a double seam... just because, I guess.
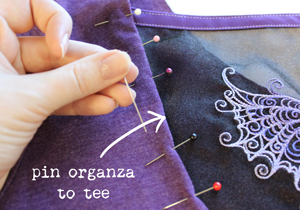
Once the top edge of your organza has been finished off, slide it back inside your tee and this time very carefully center your wings on the back. I didn’t take my organza piece all the way to the top of the shoulders; I had it down a couple inches, so the wings would sit at my shoulder blades.
Once your wings are in place, re-pin the edges to pin the two layers together, both the folded edge of the tee and the organza. For an extra finished edge on the tee, fold the edge under twice.
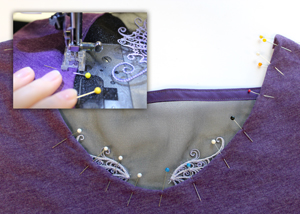
Once you have the back piece pinned in place and the wings look centered, work your way around to the front, pinning and folding it like you did at the back.
When everything is ready, sew a seam around your collar, taking care not to stretch your tee too much as you go.
When you’re done, turn your tee inside out and trim off all the excess edges of the organza piece.
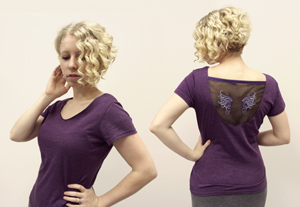
And your wings are done! What was once and ordinary tee has now become a romantic scoop back tee with delicate floating wings. Even the front now has a more flattering, feminine neckline.
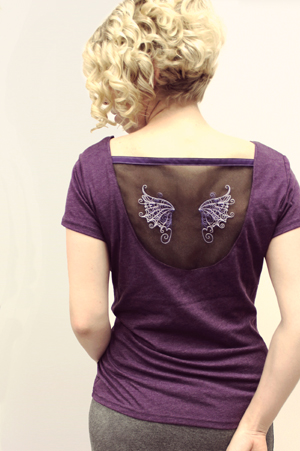
Your measurements ensure that the tee doesn’t scoop too low, revealing instead a flattering drape with your fairy wings on show. If you really want a more “floating” effect, you can try it with super sheer or skin tone organza, so the wings seem to be right on your back.
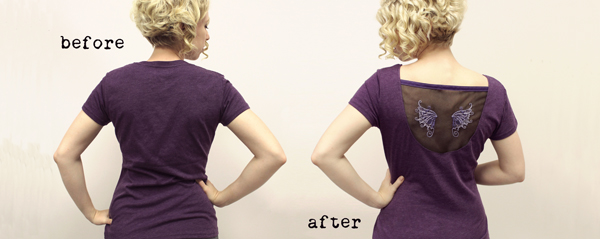
Your boring tee is transformed! From a plain wardrobe statement to a romantic and flattering tee, with just a few snips and some delicate embroidery.
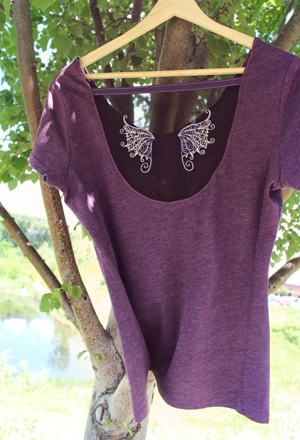
It’s the perfect summer update for all your tired T-shirts, and a great way to still find your inner fairy princess, even if she only comes out in embroidery now and then. After all, in the end, all I wanted were the wings, and now I have them!


